On going projects
SCROLL DOWN TO SEE THEM ALL
On going projects
SCROLL DOWN TO SEE THEM ALL
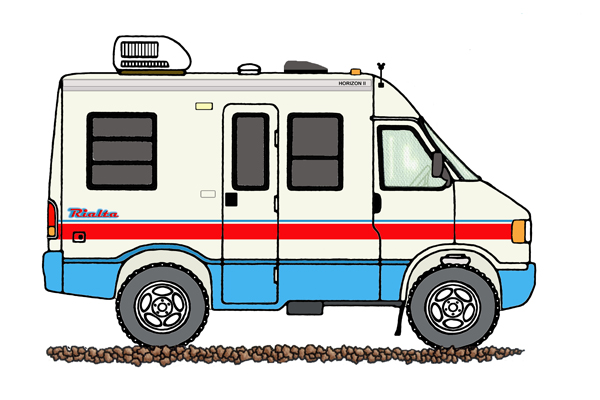
It seams like I always working on something on the Rialta. So for those "On Going Things" I thought I would discuss them here.
When I tackle something really big I may still do a write up on it with more details .
360 degree photos from inside the 1995 Rialta. Click HERE to see more.
Friday 5-27-2016
I found a product that helps elevate "Black Streaks" on the side of the Rialta. It is a vinyl J molding that forms a gutter that catches the runoff from the roof and channels it away from the sides. It mounts using 3M double stick automotive tape that comes pre-attached to the trim. You just peal off the protective backing and apply the molding where you want it! It is available in White and Off-White, I got the Off-White. Now I only have 4 black streaks to deal with! I really was not that bothered with the streaks but I did want to stop the water from running into my screen room when I am using it. I found it at Amazon!
Sunday 5-22-2016
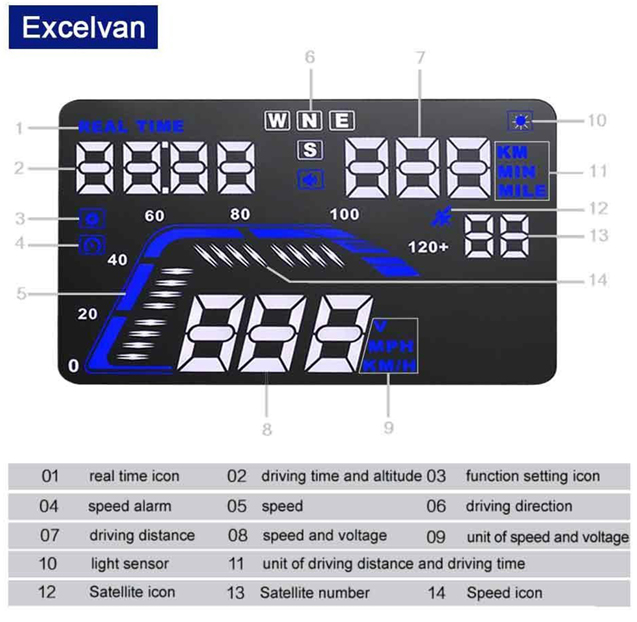
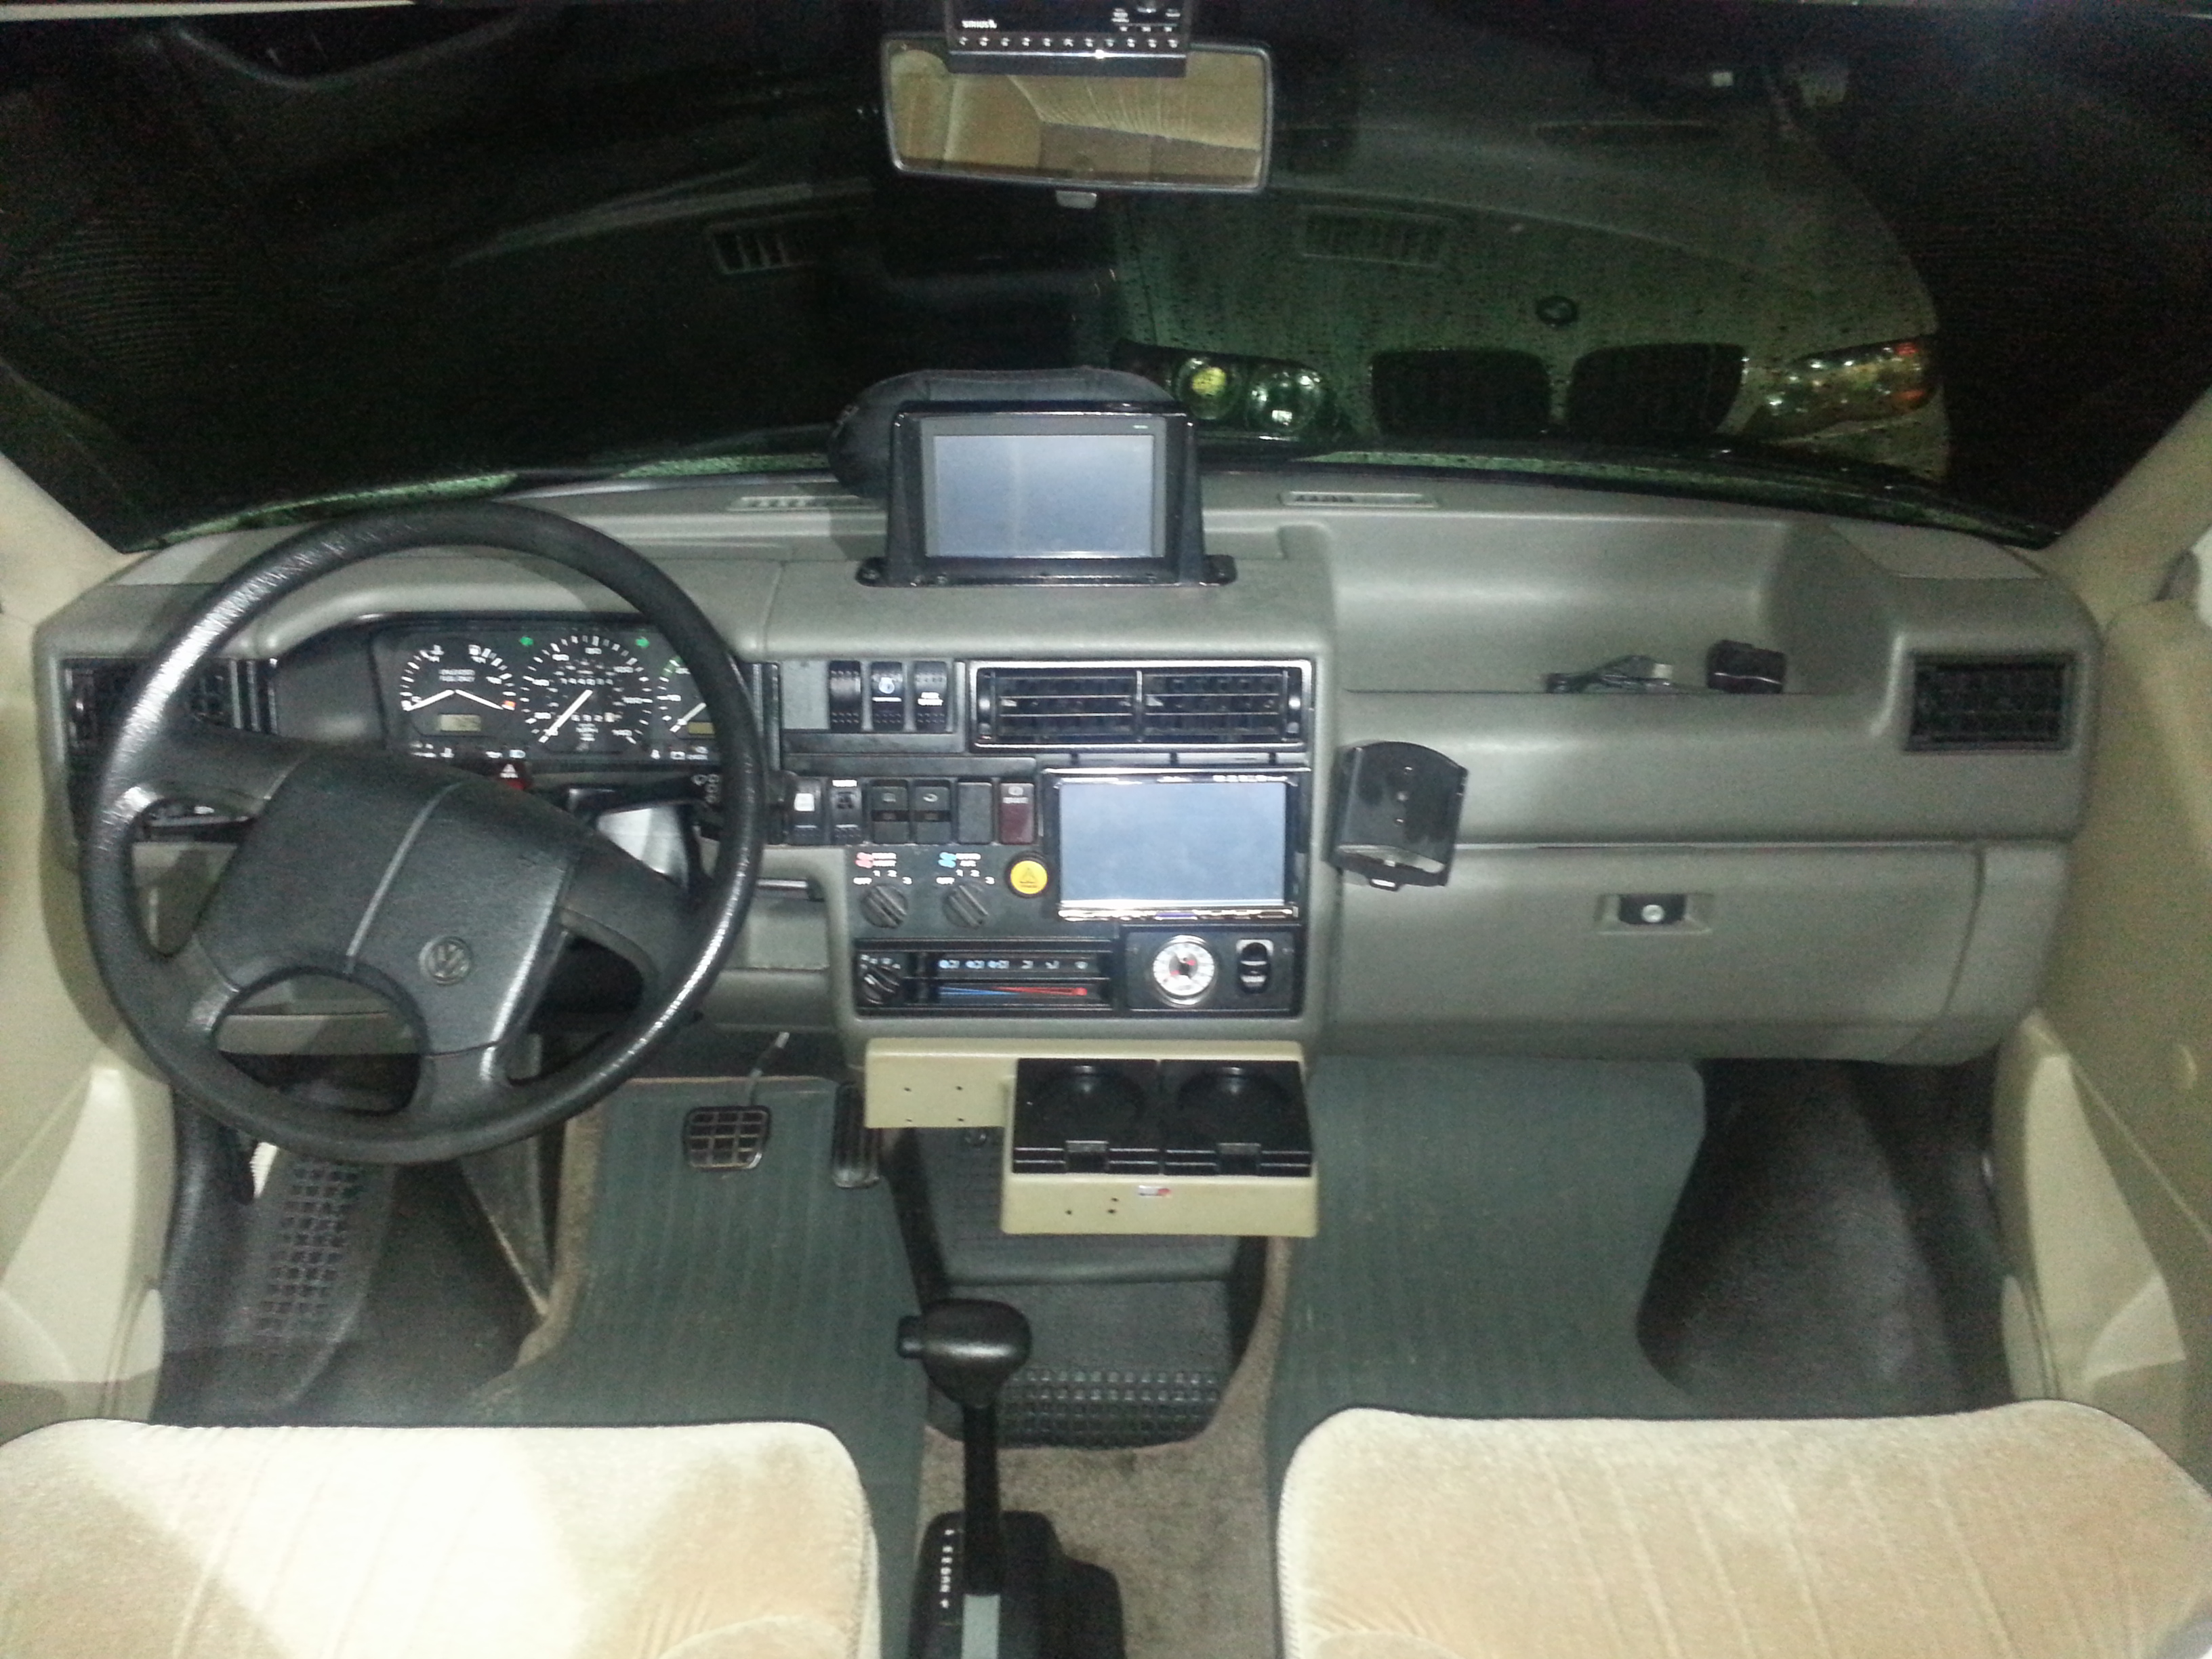
I have been looking for a heads up display for several years and I found one that does not require an ODB2 connection. The one I found has a built in GPS so it can show Speed, Time and Direction. I put it on a switch so I can completely turn it off (it shuts off the display if it does not detect movement for several min) but I wanted to be able to shut it completely off to save the Rialta's battery.
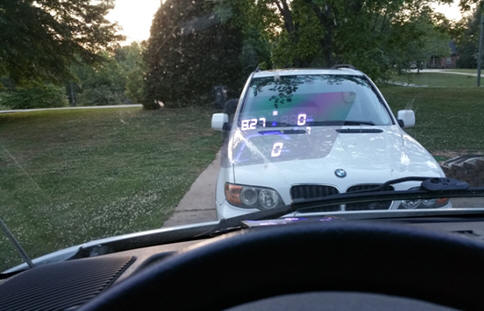
There are several different models of these available from Amazon or on ebay. They plug into a cigarette lighter 12v socket and include a mirrored decal that sticks to the windshield to eliminate and dual reflection caused by the double thick safety glass windshield. It also includes a non-skid pad that holds the unit in place on the dash.
Just another fun toy to play with while on the road in the Rialta!
WOW! I got alot of questions about the HUD so here is a video that explains the workings of it in detail. This is the GPS model not the ODB2 version. If you are interested in the ODB2 model there are videos covering it on YouTube.
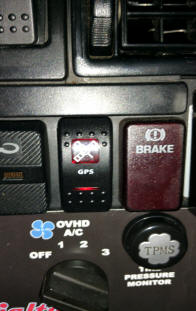
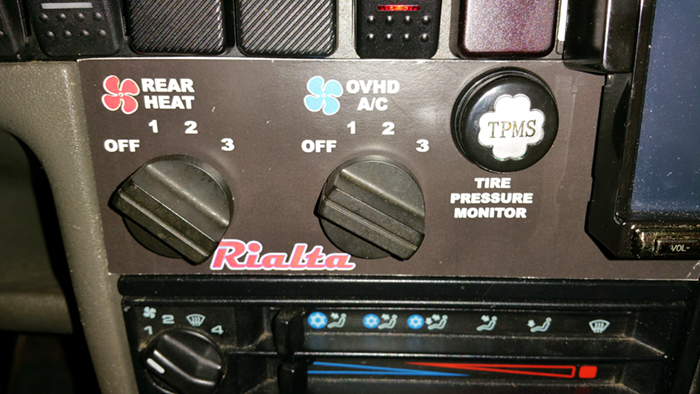
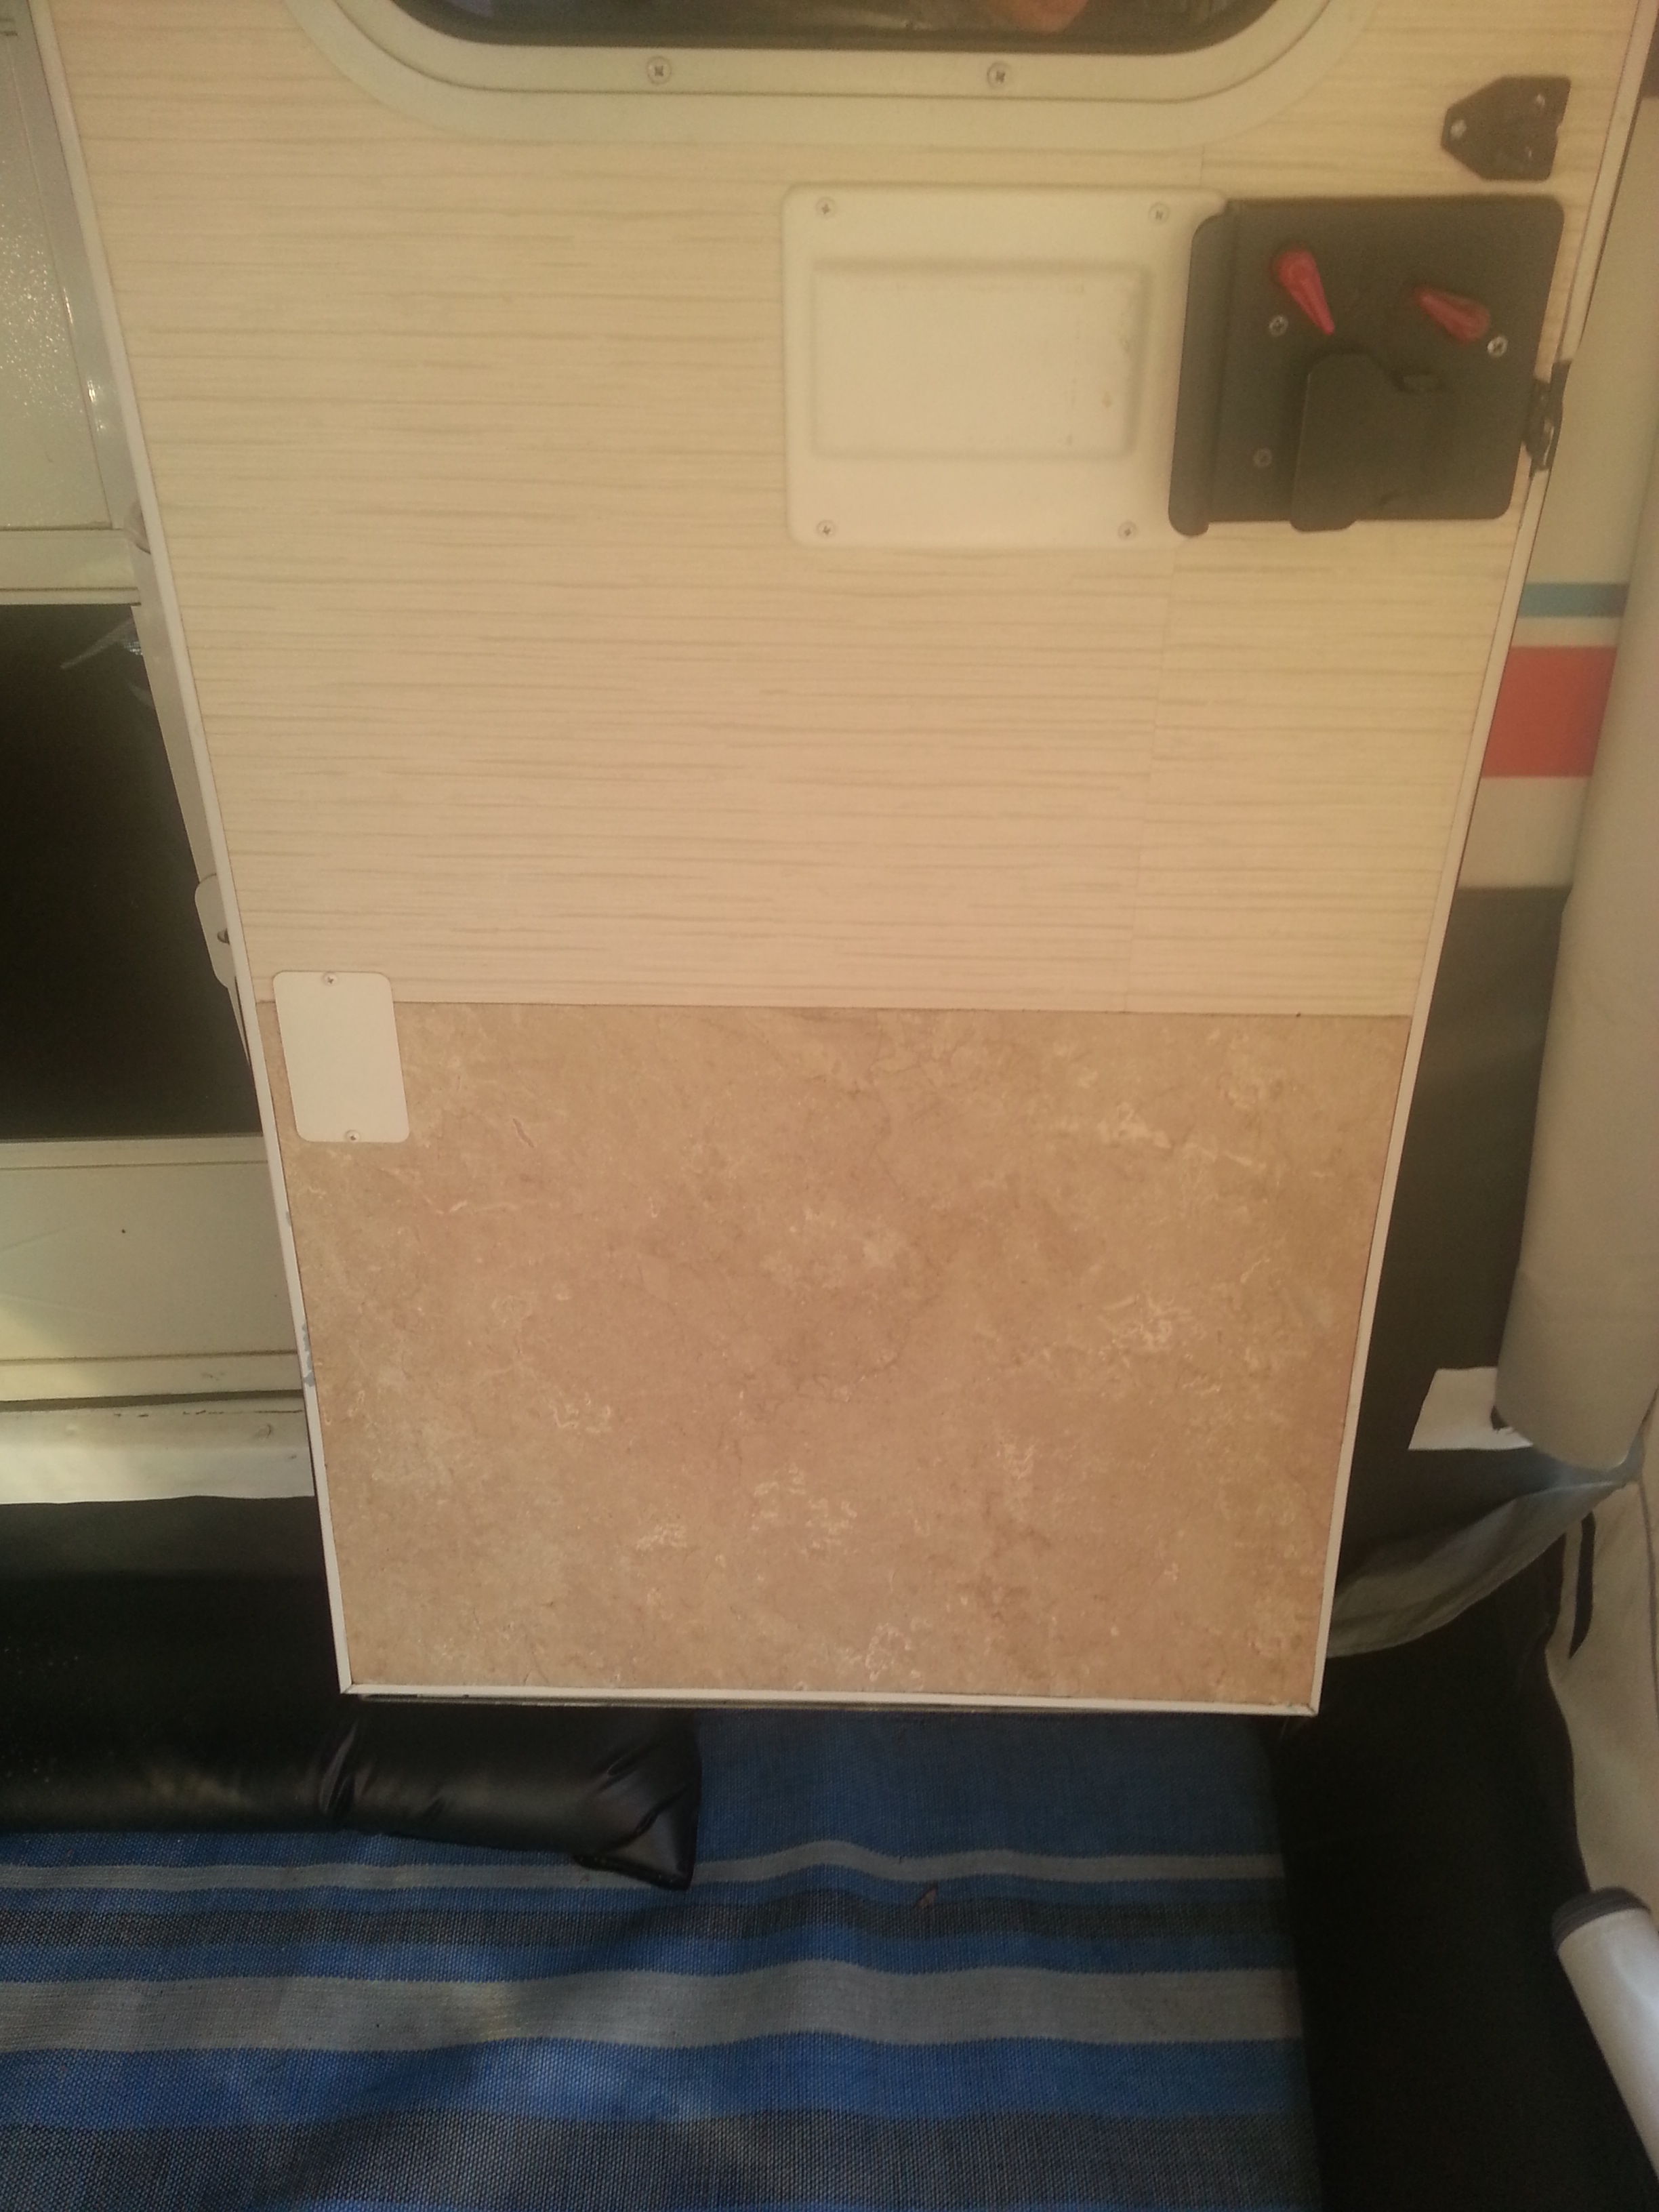
I also replaced the label on the rear Heat/AC switches. The old one was not made with heavy material and it had wrinkled over time. I added the TPMS label and the Rialta text logo that we use with our motorhome.
Sunday 5-8-2016
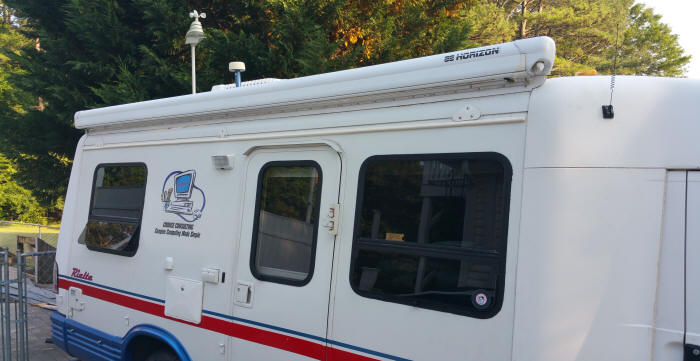
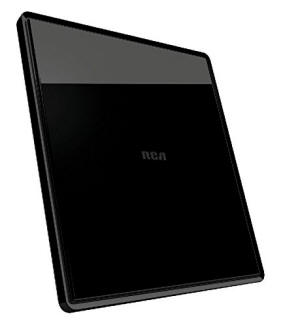
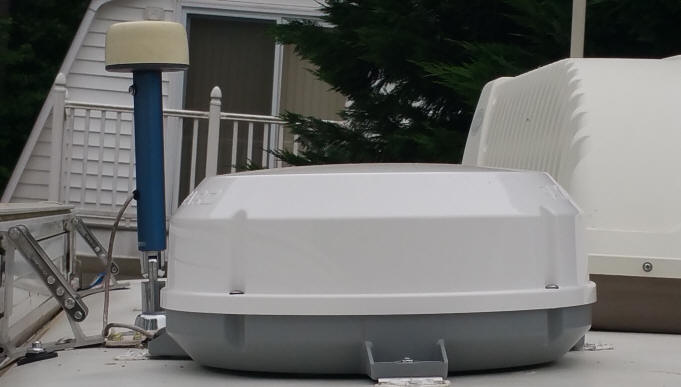
I can't believe it has been a year since I have done anything major to the Rialta. I traveled over 15,000 miles in it last year without doing anything to it other than basic maintenance! After returning from the PCB rally I decided it was time to dump the Direct Satellite TV, we just could not justify the 65 dollars a month that it cost for basic programing. Last summer I picked up an RCA flat HD antenna that I tested out with my 32 inch outside TV.
It worked great with the panel just sitting on the table beside the TV. So I decide to look into HD antennas that can be permanently mounted on the roof. I chose the Winegard RZ-8500 White Rayzar Automatic Amplified Antenna. It is a dome covered powered antenna that mounts on the roof.
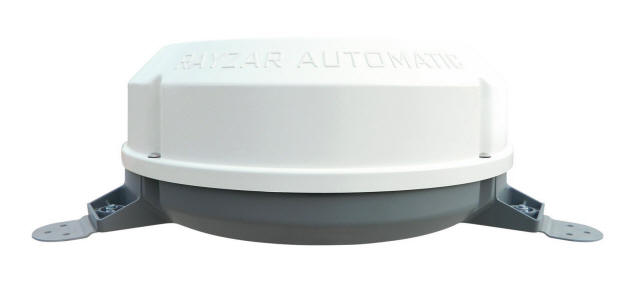
The antenna mounted in the location of the existing Sat Antenna. I filled all the holes and used the supplied cover plate to cover the hole left by the inside crank handle. You only need to run one cable to the antenna. It sends HD Digital TV signals and well as 12v power thru this cable. The antenna has a motor driven rotor that seeks out the locations of the incoming signals and remembers where they are located within a 360 degree area.
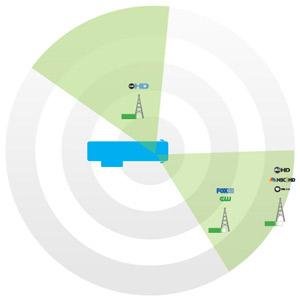
You can then use the control panel to jump to any of the found signals. The controller mounts inside and is connected to your incoming cable TV line, the line from the Antenna and a 12v power source. A cable also runs from the controller to your TV or in my case the new digital tuner.

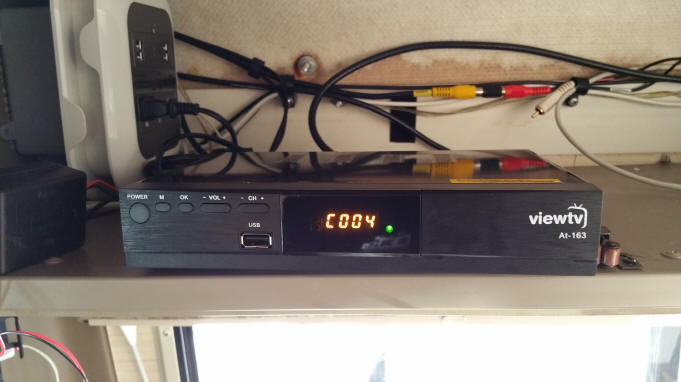
Since I have the Concertone Entertainment System (that does not have a digital TV tuner) I needed to get a digital to analog converter/tuner. I chose a Viewtv AT-163 Digital TV Converter Box. The converter box has HDMI/Coaxial and Composite outputs. It can also act as a DVR by using a USB Stick or Disk to record video to.


It comes with a remote and several cables to use to hook it up.
I installed a splitter on the line coming out of the antenna controller and ran one cable to the new converter and another to a connection in my outside radio box. This way I can connect the TV outside and use the tuner built into it to watch whatever and use the converter box to watch something else on the inside TV's. I mounted the controller in the front cabinet where I had the Sat Receiver. I have 110v power supplied from my inverter in that cabinet so connecting the converter was a snap.
I connected the audio output from the converter to the surround sound input of the Concertone. This will allow the audio from the converter to play thru the interior speakers.
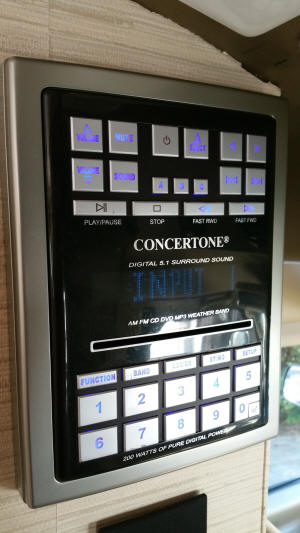
The Concertone Has a DVD player, AM/FM Radio, TV tuner (this will be set to channel 4 now to play the converted digital signal), Aux input and a Weather Radio. It also has 3 speaker selections so you can select which speakers to play. I have them set up as Front, Rear and Outside. With this arrangement you change the channels with the converter remote and the selected station displays on the front and rear drop down TV's.
The antenna has a very low profile and can't be seen above the awning on the side. The tall antenna on the left is my Wi-Fi booster antenna it can be folded down for travel.
The video below explains in detail how the Rayzar Automatic works.
Wednesday 5-13-2015
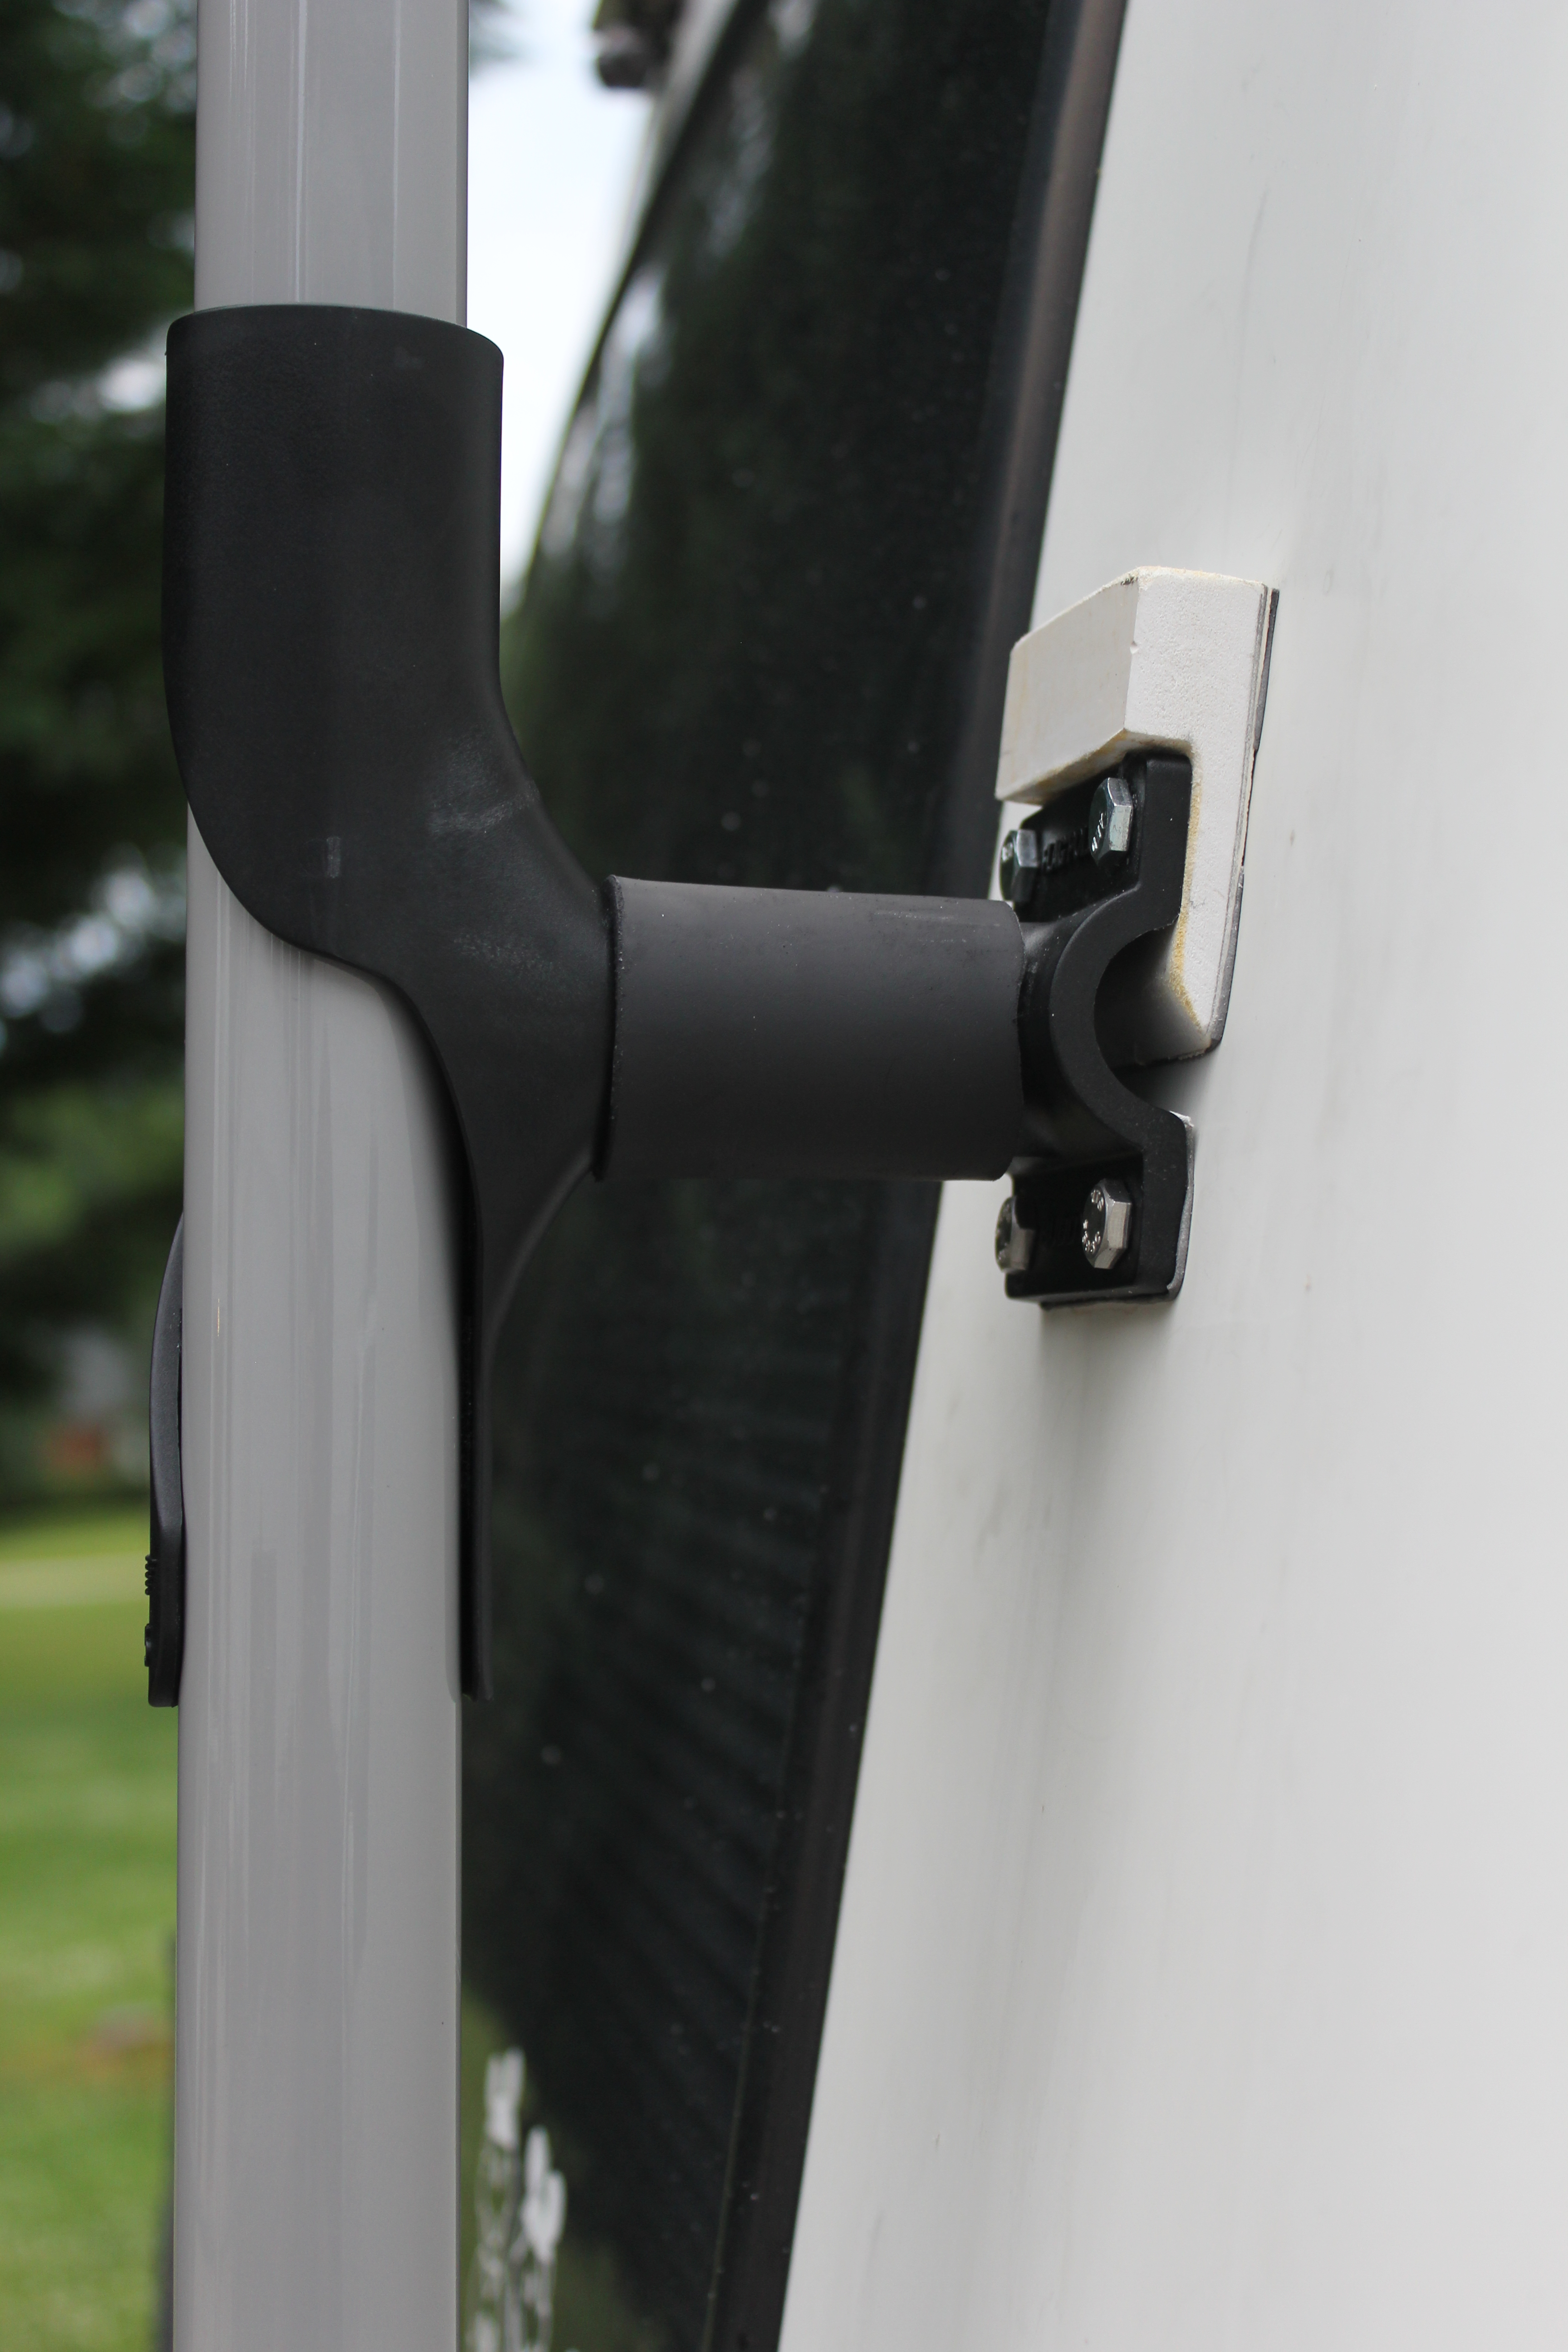
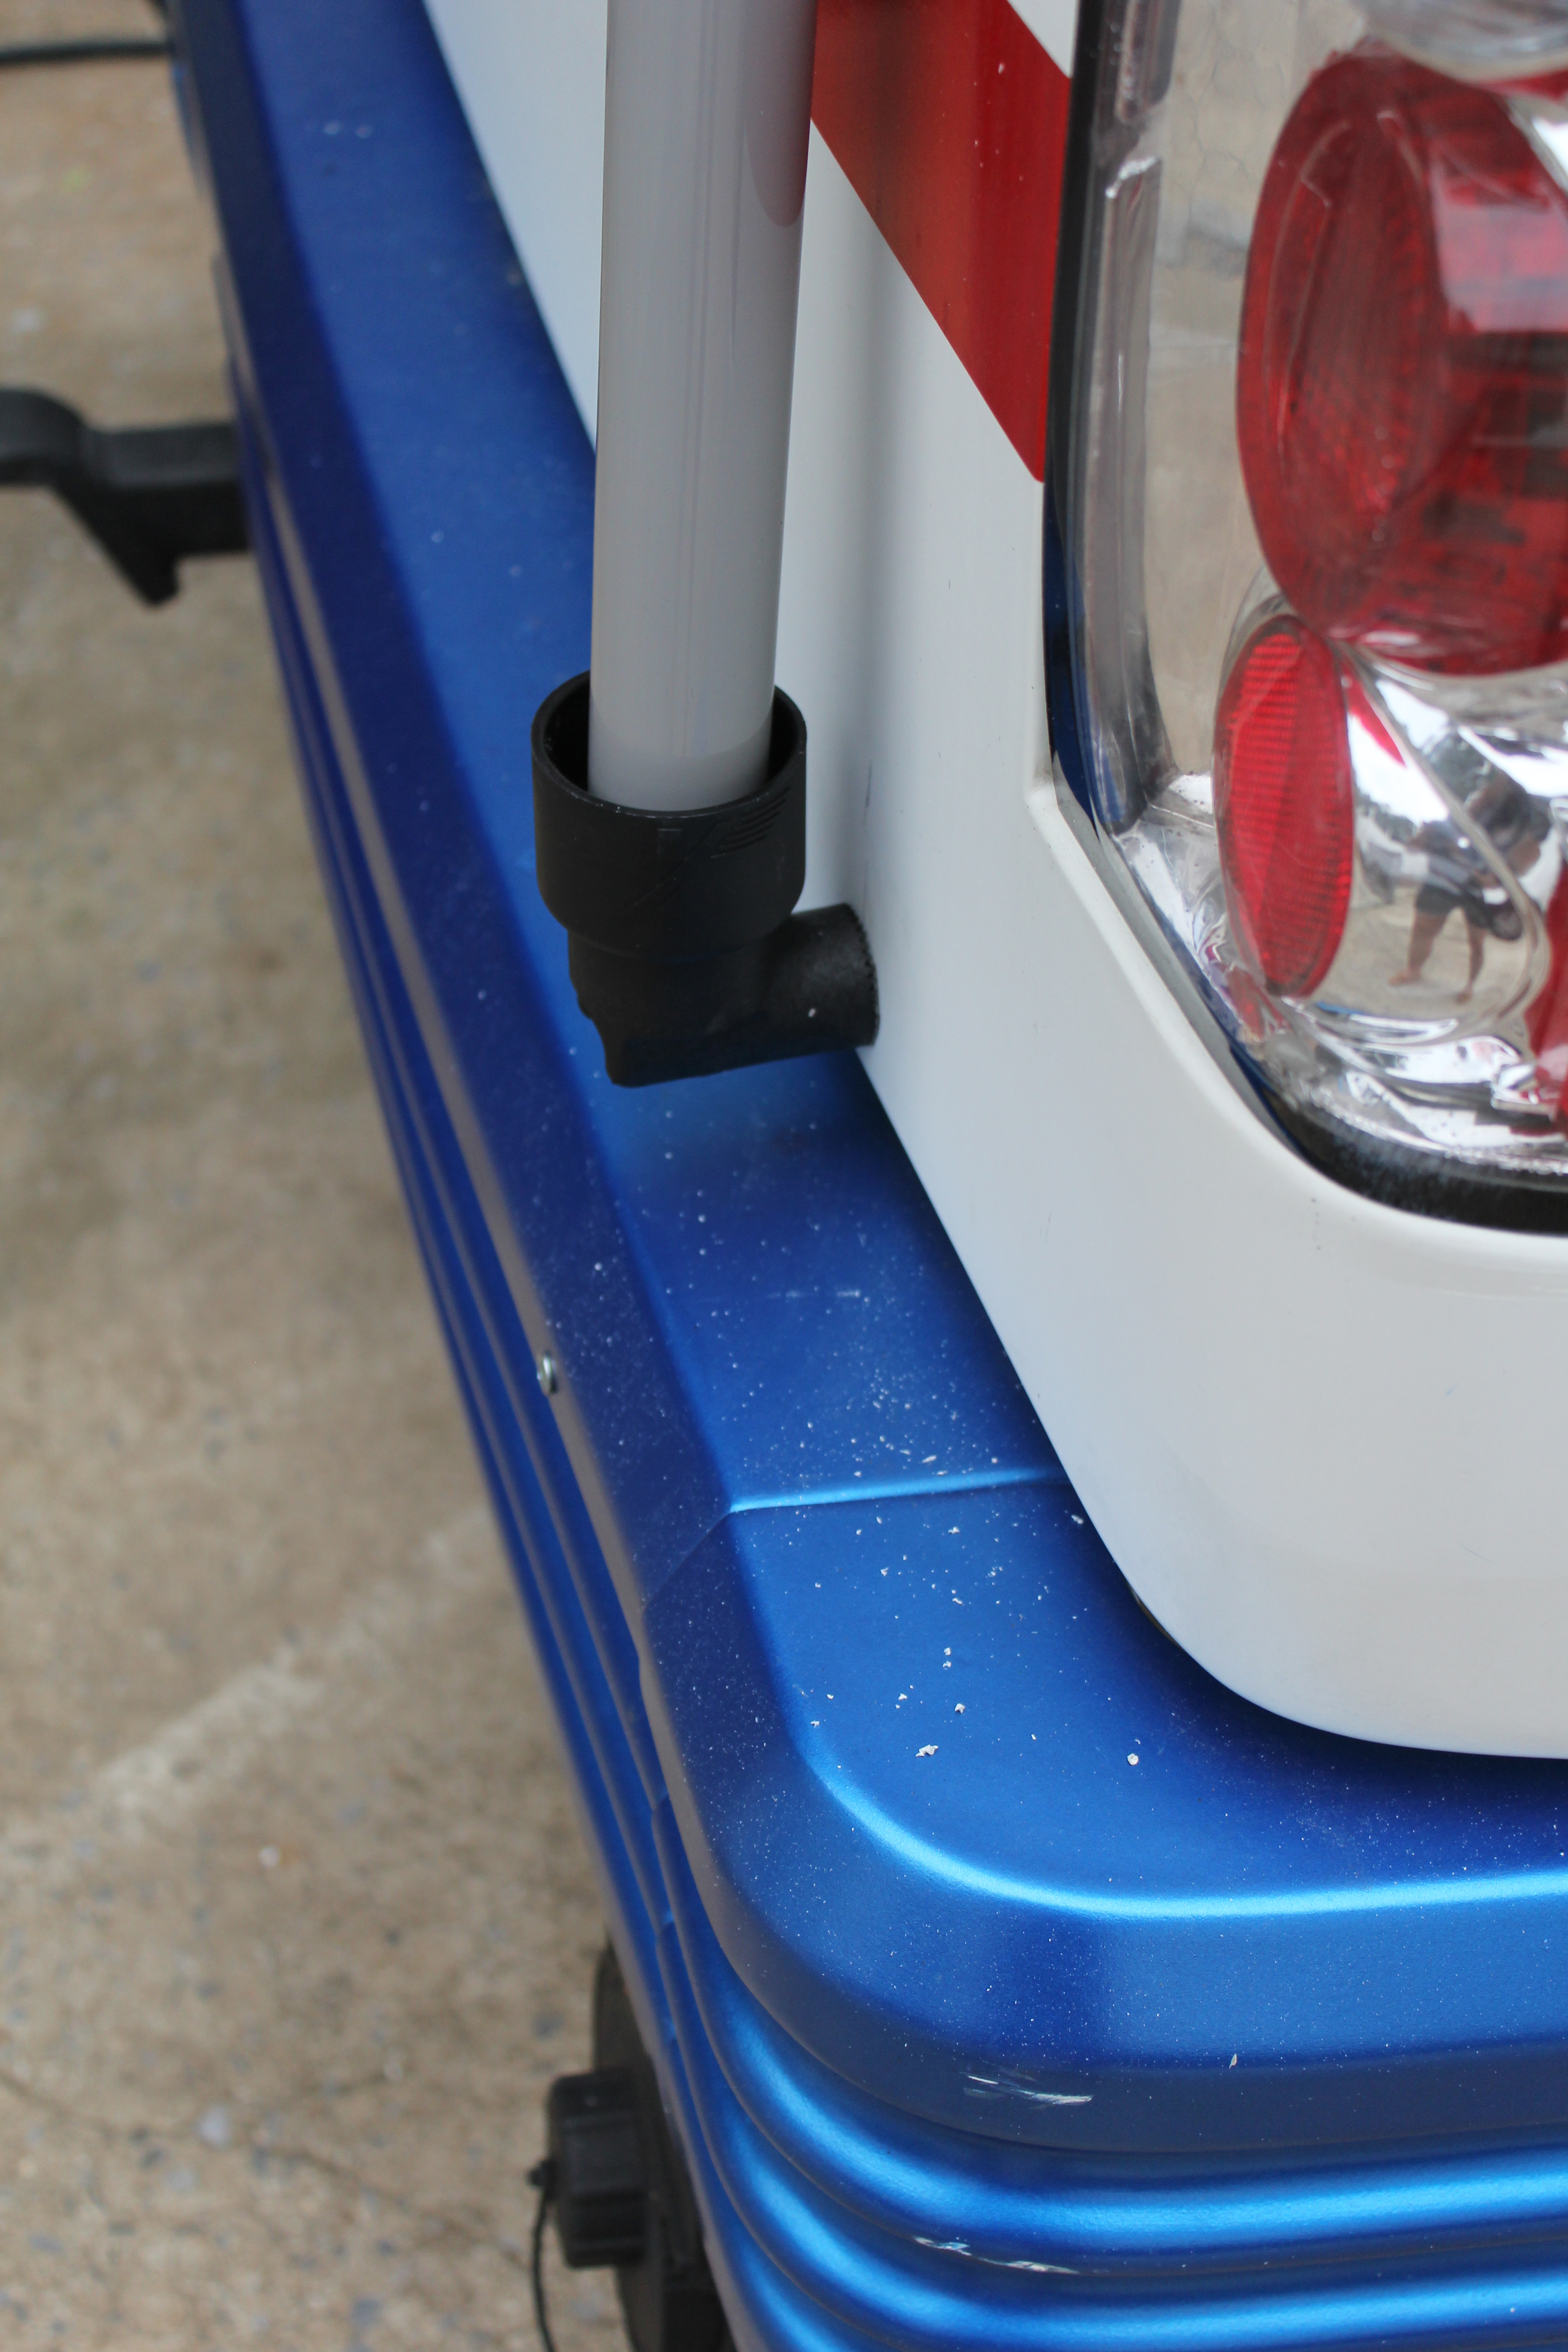
We have always had a flagpole on the back of the Rialta. I wanted to upgrade it to one of the telescoping ones that would fly 2 flags. I decided on a 16 foot Flagpole Buddy. The Pole is made of fiberglass and collapses to 4 feet. To raise it you just pull and twist the top 2 sections and then use pins in the bottom 2. The mount is designed to attach to a roof ladder on the back of the RV. I modified the brackets slightly to make them work on the slope of the back of the Rialta. I used a section of PVC pipe to extend the top bracked about 3 inches. The I thru bolted the top bracket to the back of the motorhome. I had to make a wedge to get the bracket to be stright to align with the bottom holder and allow the flagpole the stand vertical. The mount works great you just extend the pole insert it in the top bracket at an angle the straighten the pole and set it in the bottom holder.
The top bracket The bottom holder
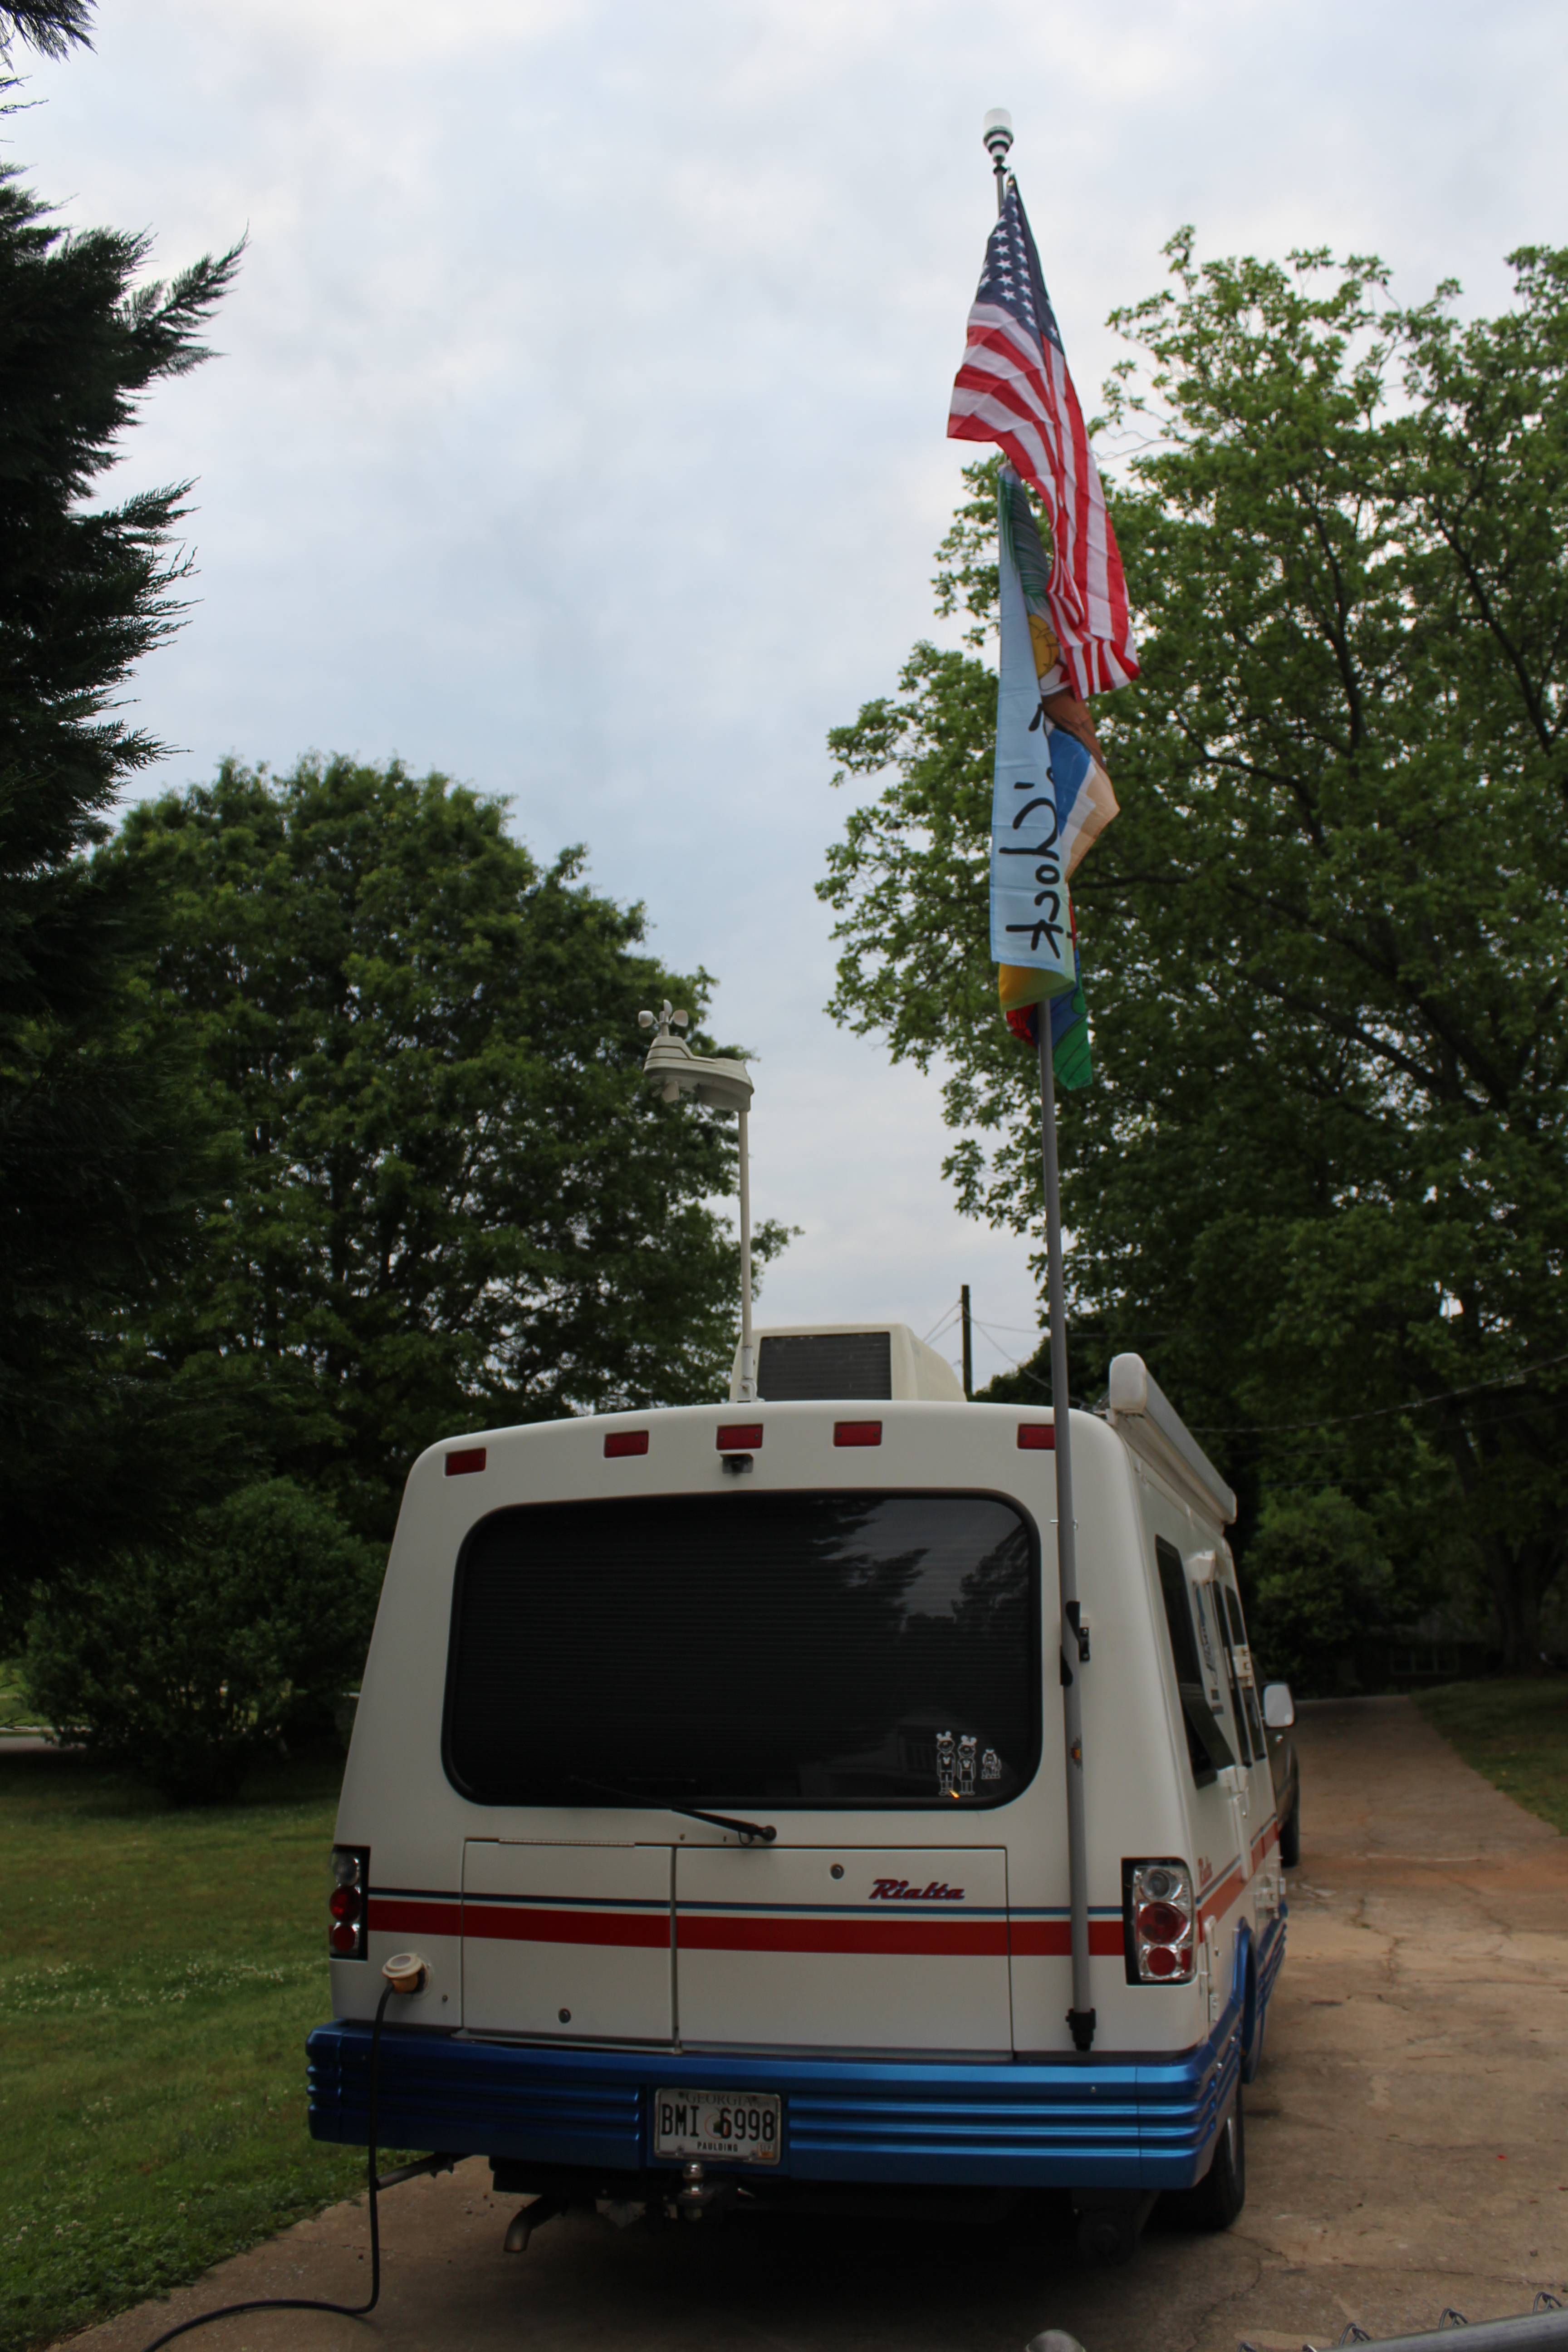
And just for fun I added a solar powered strobe beacon to the top that flashes Red, Blue and Green at night.
![]()
Saturday 5-9-2015
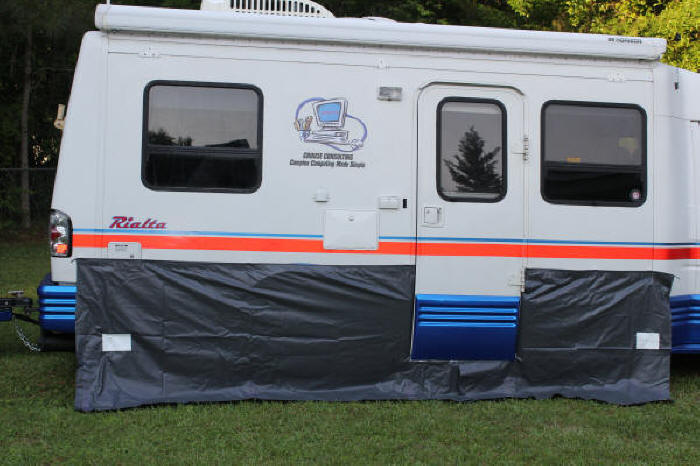
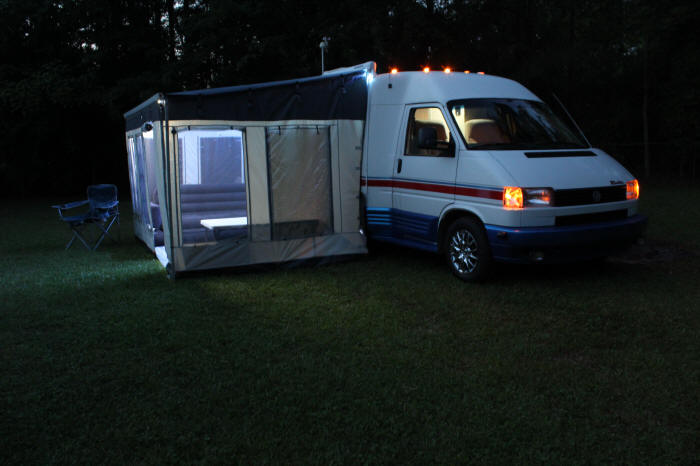
I did a photo shoot today for the company that I get my company logo stickers from. They requested some photos of the Rialta to use on there website so I pulled the R around to the back yard and took so nice pictures.
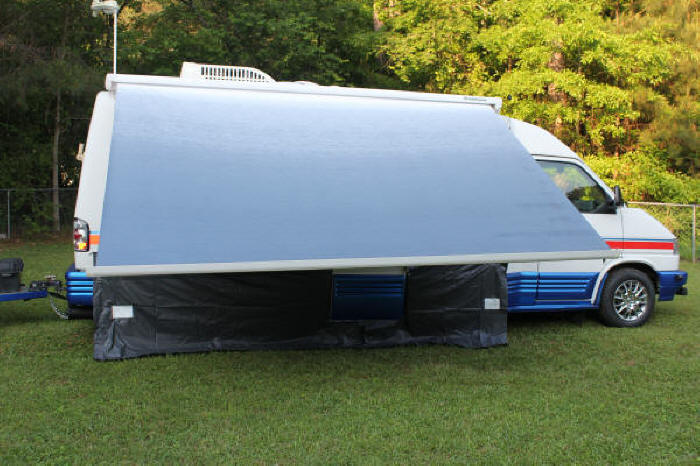
I also took some of setting up the Patio Room. 1st you install the skirt along the bottom of the Rialta. This keeps air and critters from coming under the motorhome and into the room.
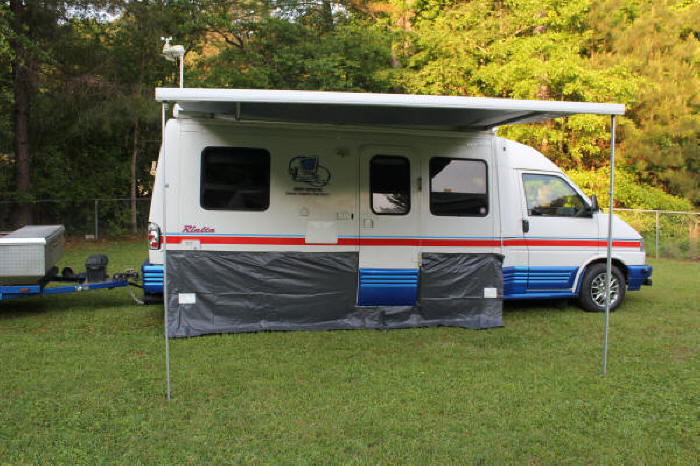
Next you crank out the awning.
Then set the legs.
Attach the end walls using the supplied rafters and clip them to the awning. I also spread out the patio mat and stake down the end walls turning the excess wall under the mat.
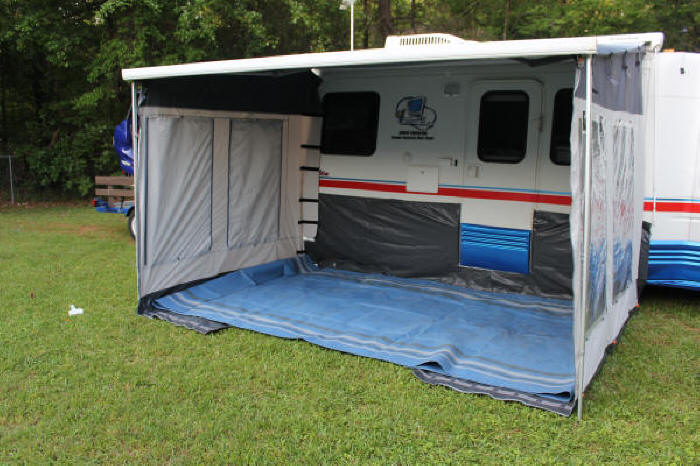
Then the front wall and door.
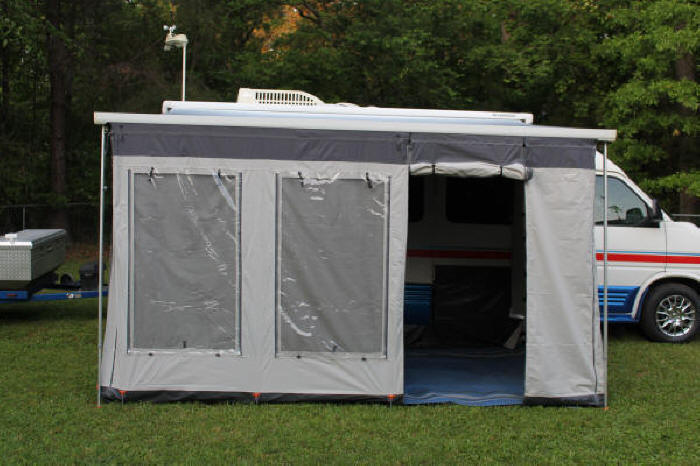
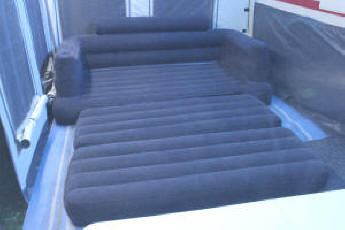
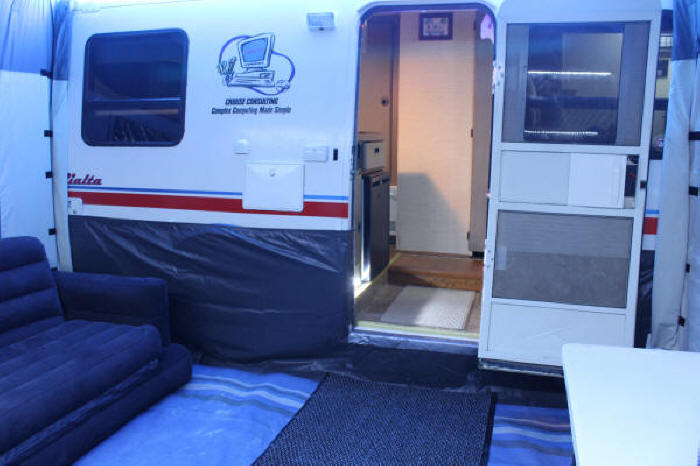
Now we move inside to install the padded straps that hold the side walls tight to the coach. Then we set up the furniture. Inflate the couch and setup the table or maybe a few folding chairs.
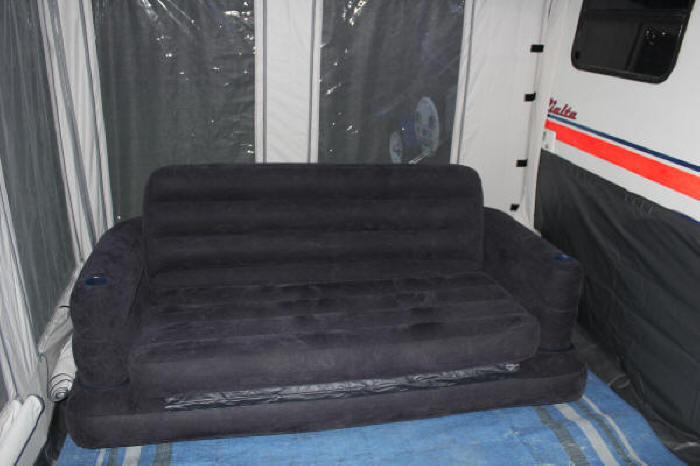
The couch is light weight, takes up very little space (when deflated) and folds out into a queen size bed! It is a great place to take a nap, very comfy!
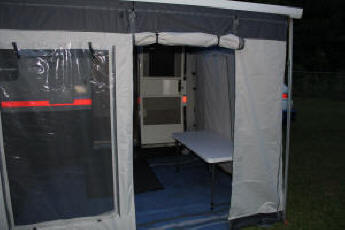
Makes a very cozy living area when it is all setup.
It is really nice at night when you can set out and not be carried away by the BUGS!
Thursday 4-9-2015
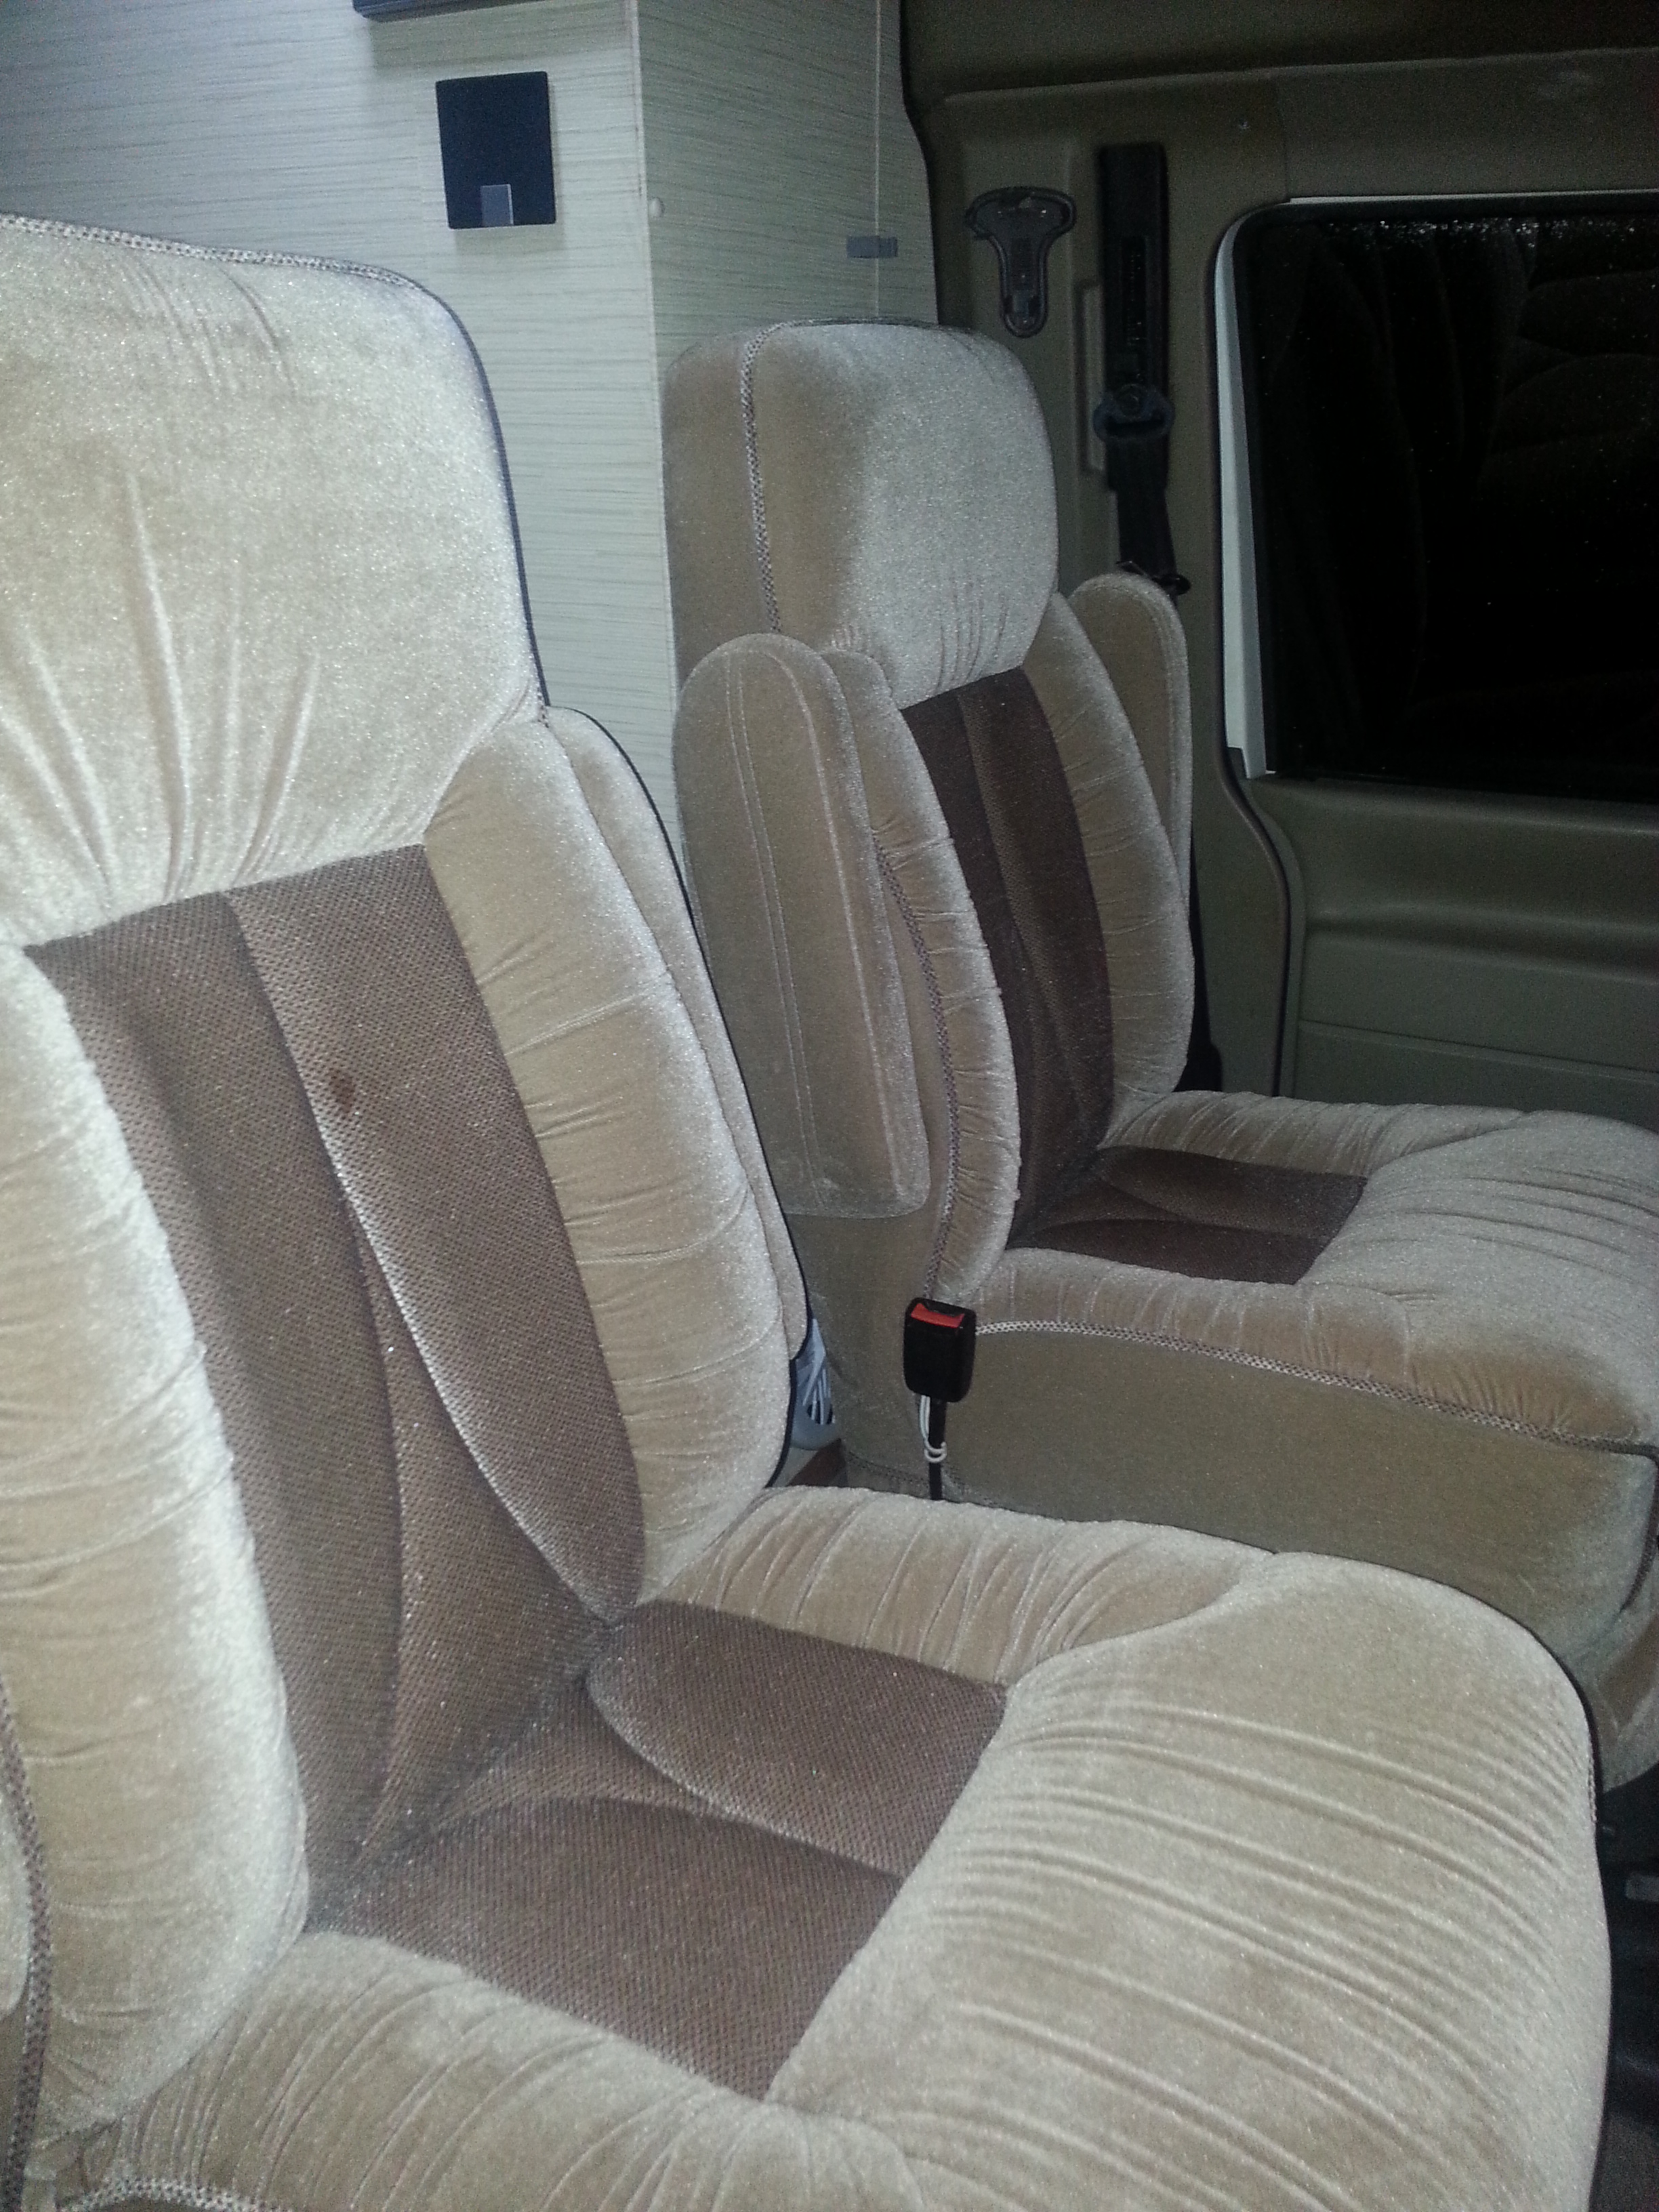
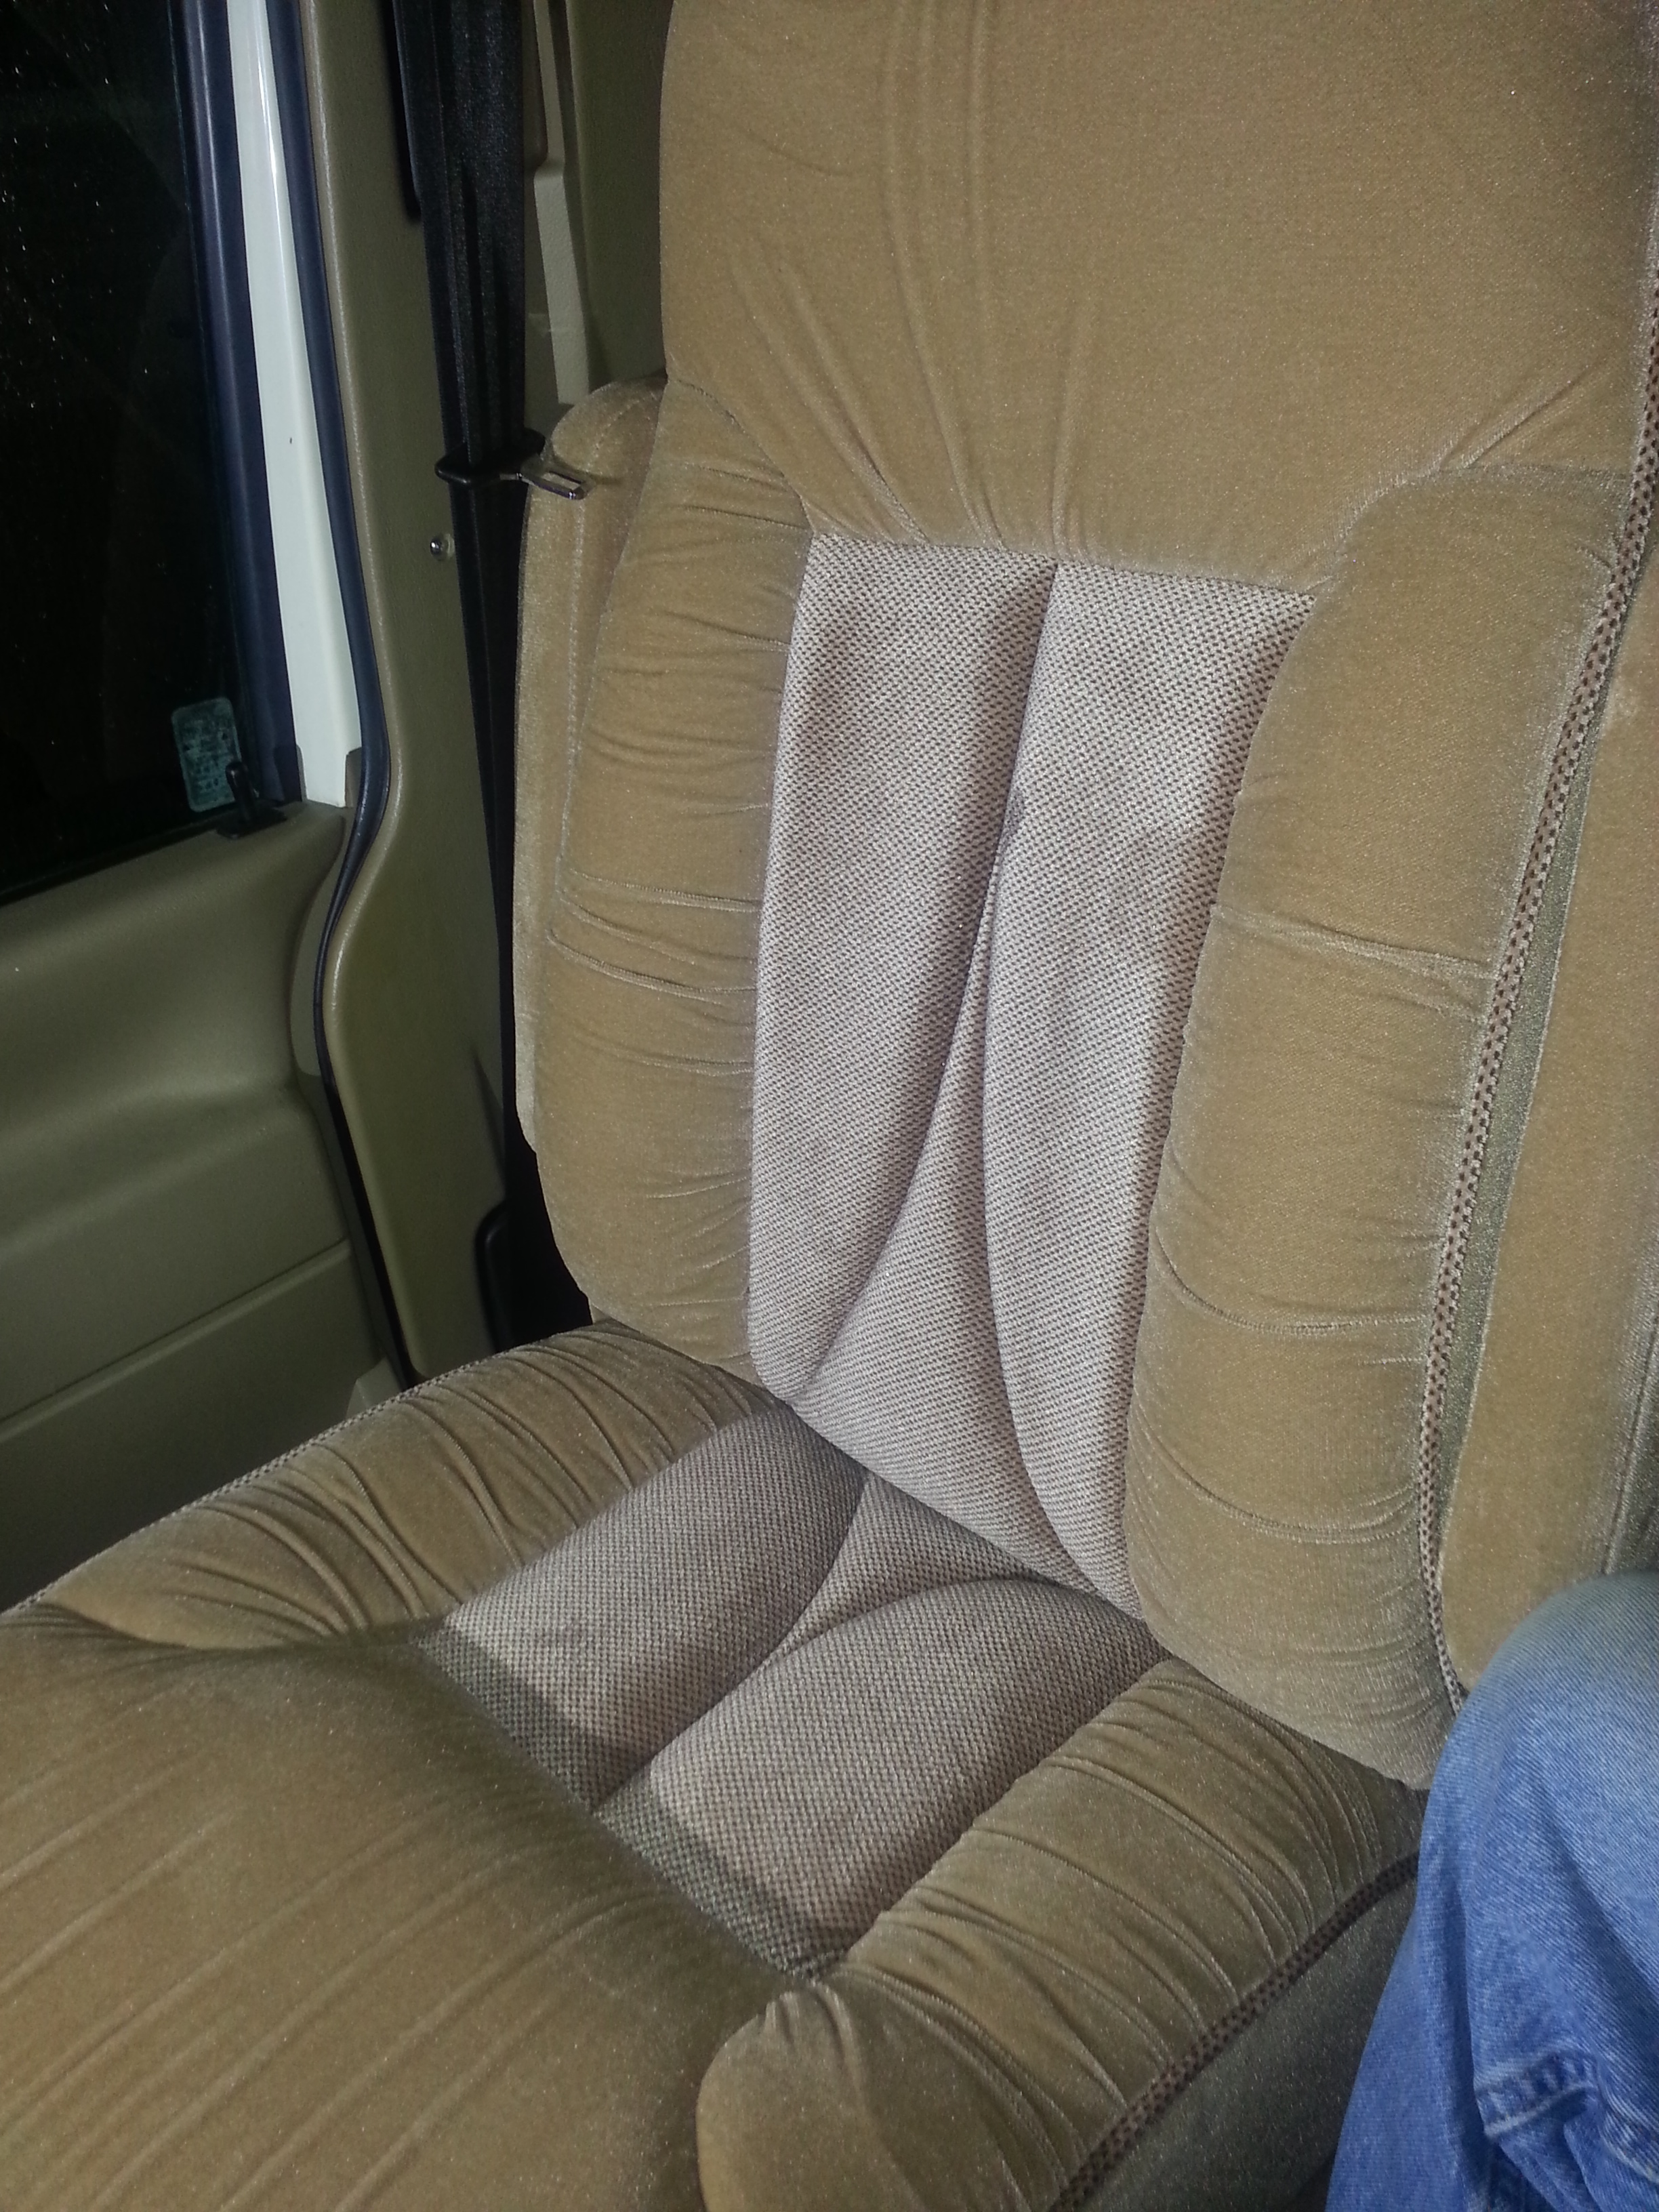
My new seats arrived today! I go them installed fairly easily. They went back in the same holes as the old ones. I did rework the swivel release using the shorter cable that was used for the slide release. The new seats came with a lever to work the slide locks. These are SOOOOO! much nicer than the originals much better foam and thicker bottoms. They raise you up just a little bit and give a much better seating position. I also got some extra fabric that is used in the seat inserts. I plan on using it to accent the rest of the coach later on. I got the seats from www.shop4seats.com they are made by Seat Craft, if took about 4 1/2 weeks to get them.
Now have all the work finished in the cab just a couple things to finish up in the rear and we will be set to go.
One think I did notice is that the air bags are not holding air. Think I am going to try the Green Slime trick to see if that will help. First I will check all the connections and see if one of them is the culprit. A little soppy water squirted on the connections should show any leaks.
Wednesday 4-1-2015
I have finished most of the interior modifications, just waiting on my new front seats. I also did some interior finish work that I have been putting off. When I built the new bathroom I got enough wallpaper to refinish all the walls but I never tackled the job. To wallpaper all the walls required removing a lot of the interior trim plus the cabinets. Since I had most of the rear interior removed to install the new water heater I decided to tackle the wallpaper and to make a permanent repair to the rear shelf. It had broken several years ago and I had made a temporary fix that needed attention. Another area that needed attention was the entry door. The power lock wiring needed repair and the paneling on the door was rotten near the bottom. I repaired the broken wire and wallpapered the panel. I put a piece of Formica at the bottom to cover the rotten panel.
The finished wall behind the closet.
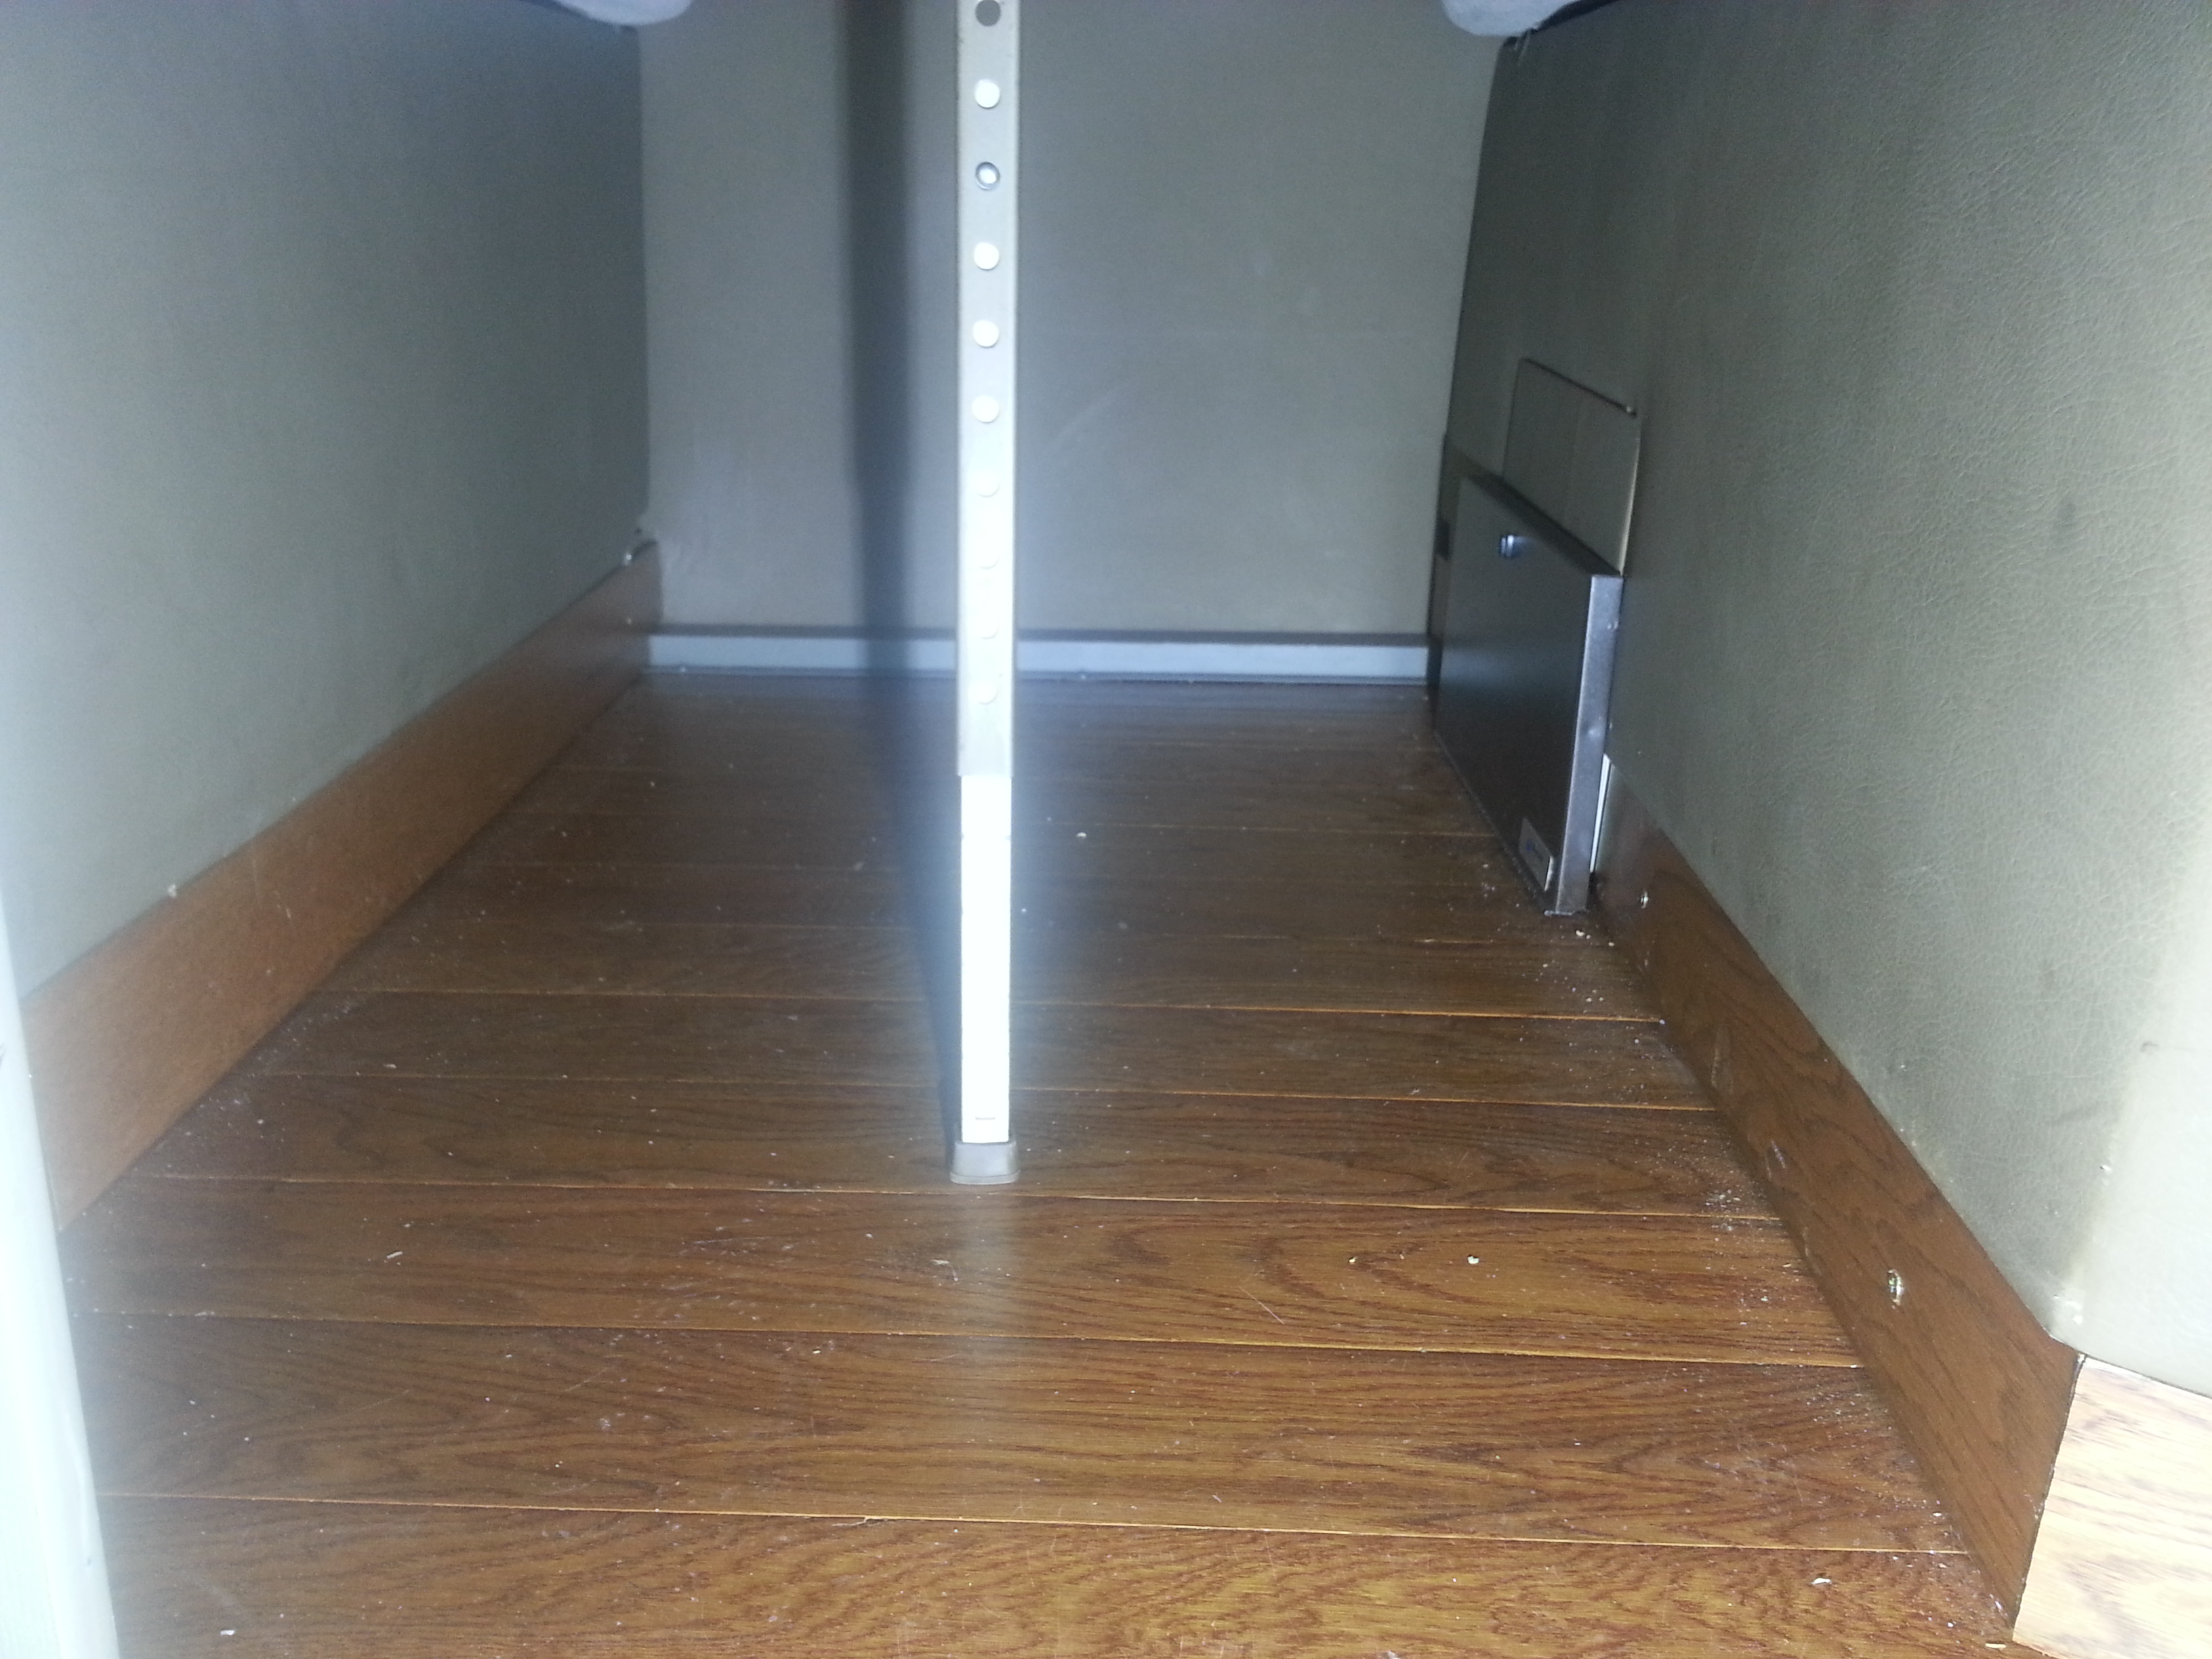
The finished kick panels under the rear seats. I had to raise the rear seats 3 inches to clear the new water heater so I added the wood flooring to fill in the gap. I have ordered a new table ITC table leg to replace the existing folding leg and wall mount.
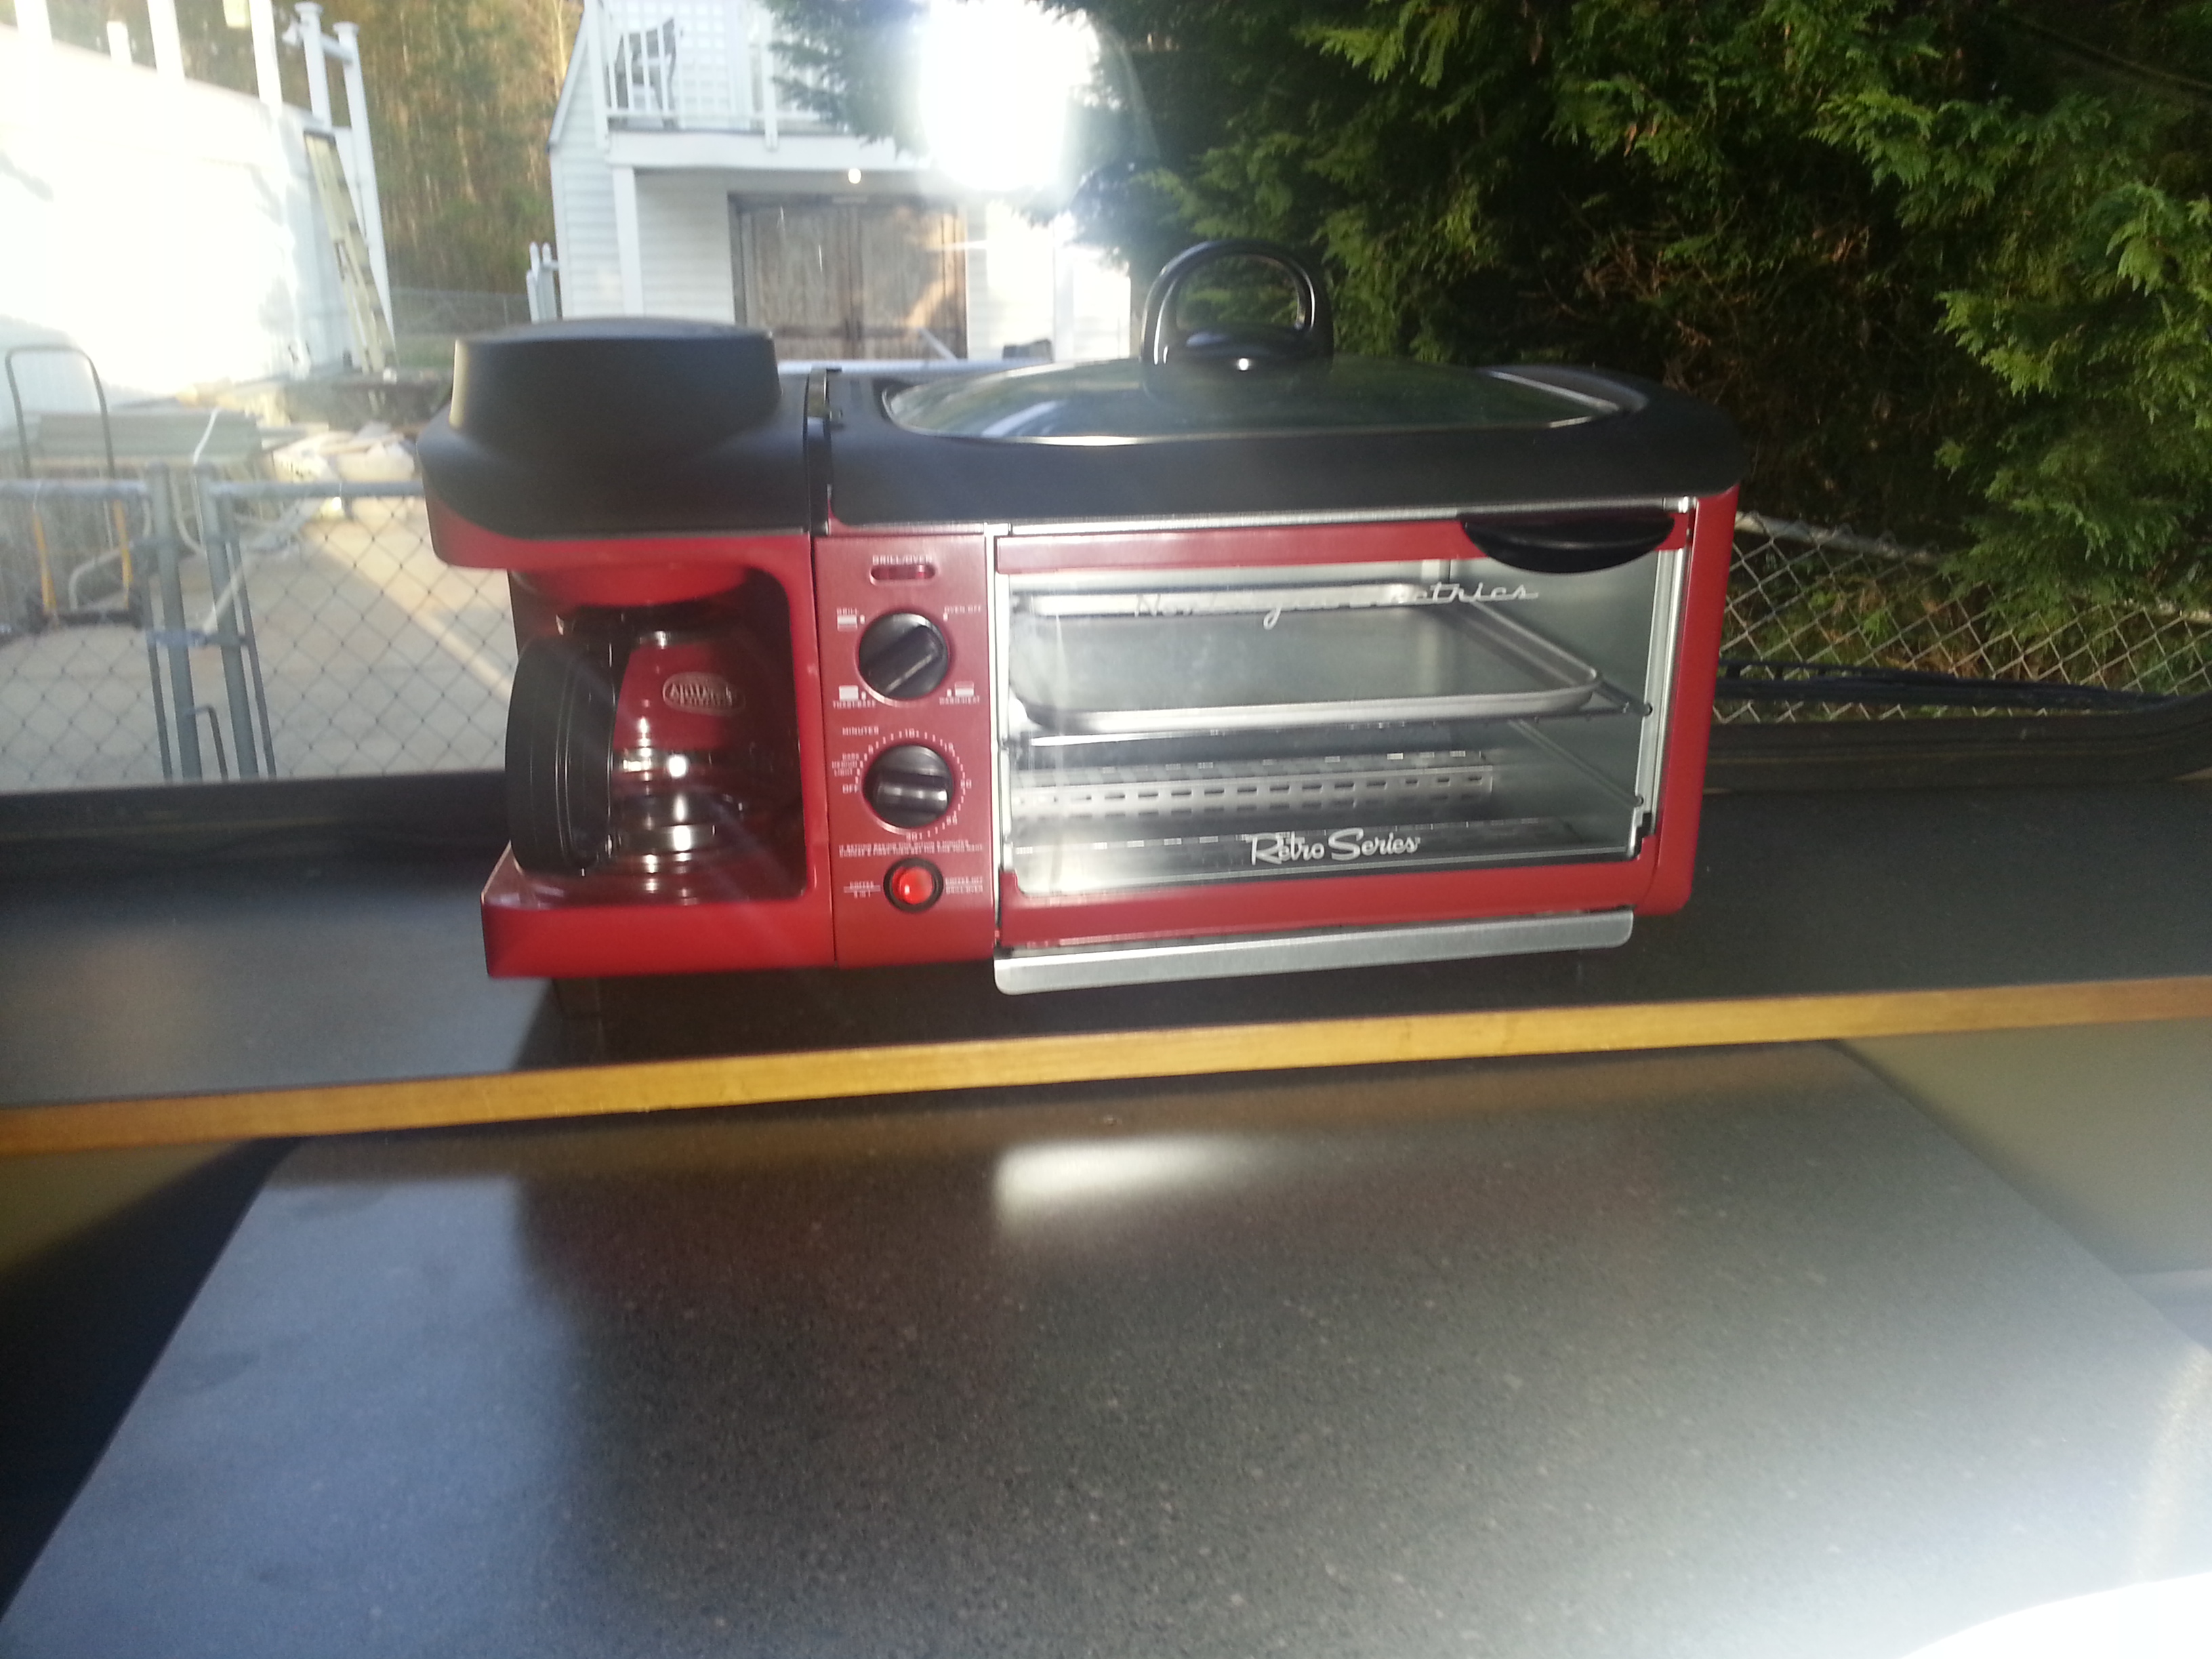
To complete the all electric theme we got a new toaster/coffee maker/griddle. This thing is great! we can fix 4 cups of coffee make toast and cook up some bacon all at the same time. The grill is under the glass lid and it can cook just about anything. I love making link sausage on it. With a non stick coating clean up is just a damp paper towel wipe down away. We use 2 single serve coffee bags and it makes a great cup of Joe. Just put the coffee bags in where you would put a filter and coffee, makes for easy cleanup.
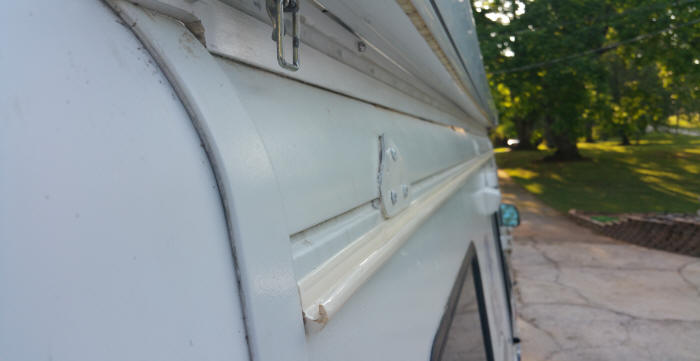
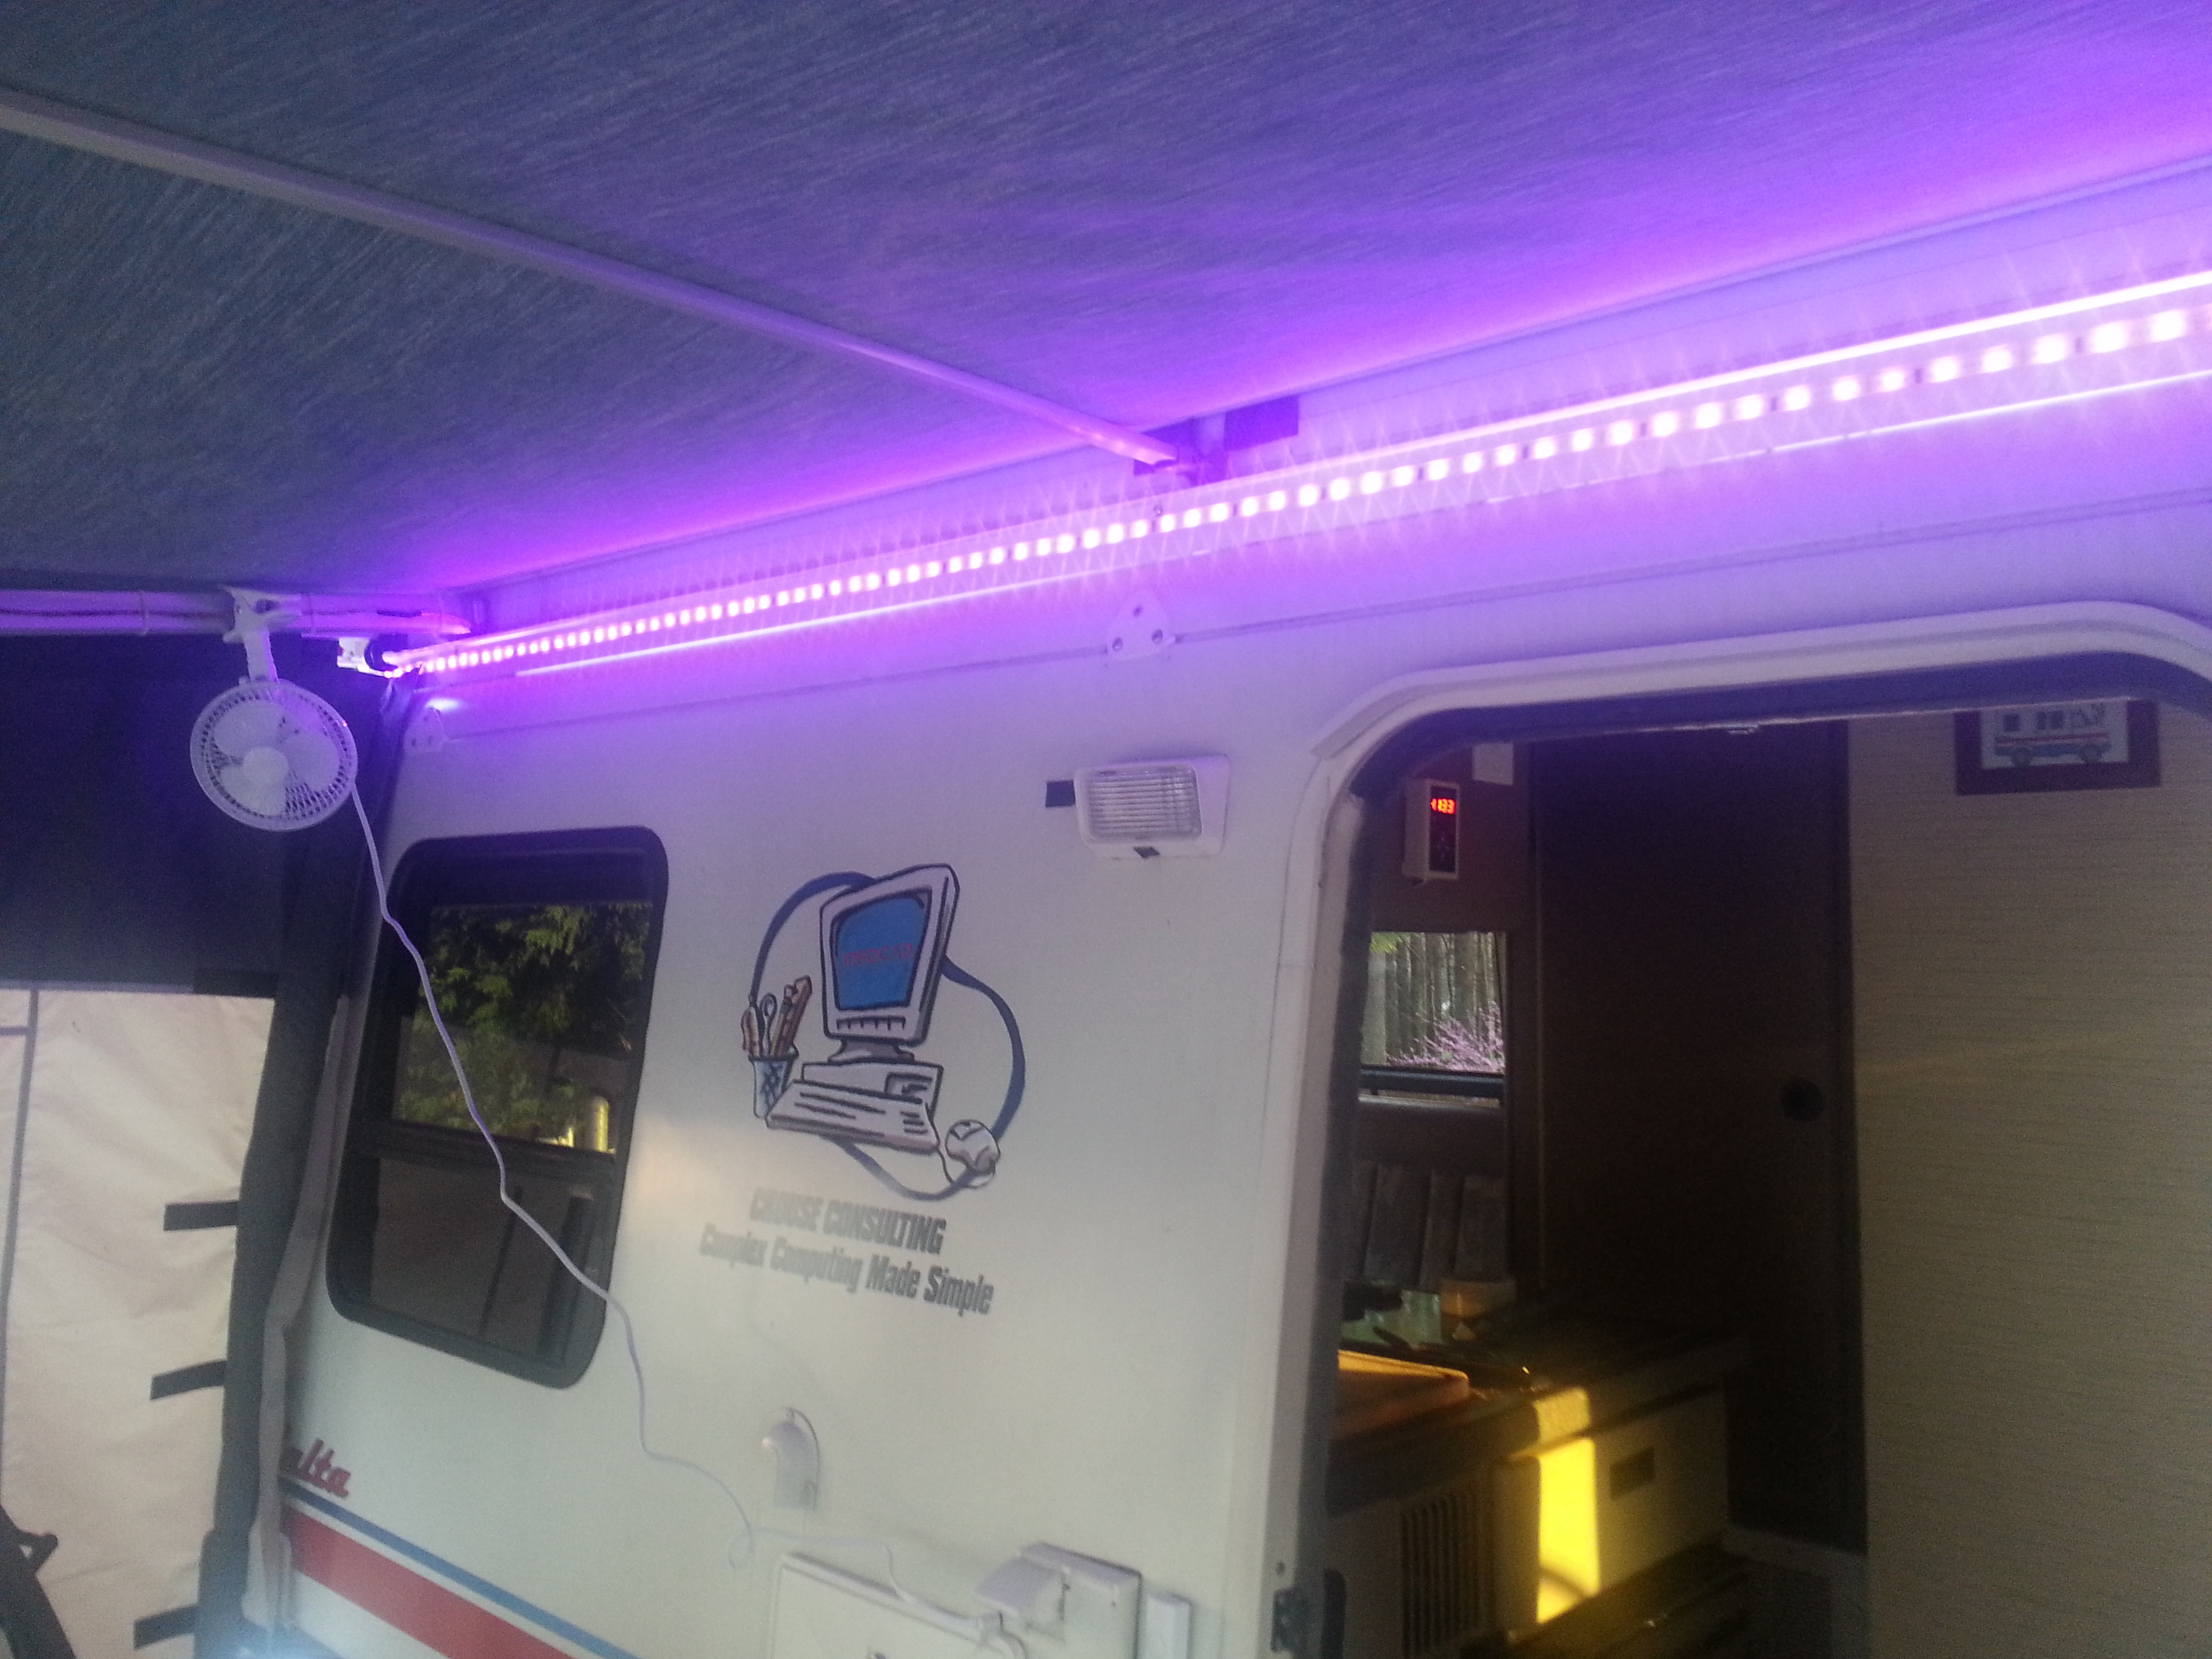
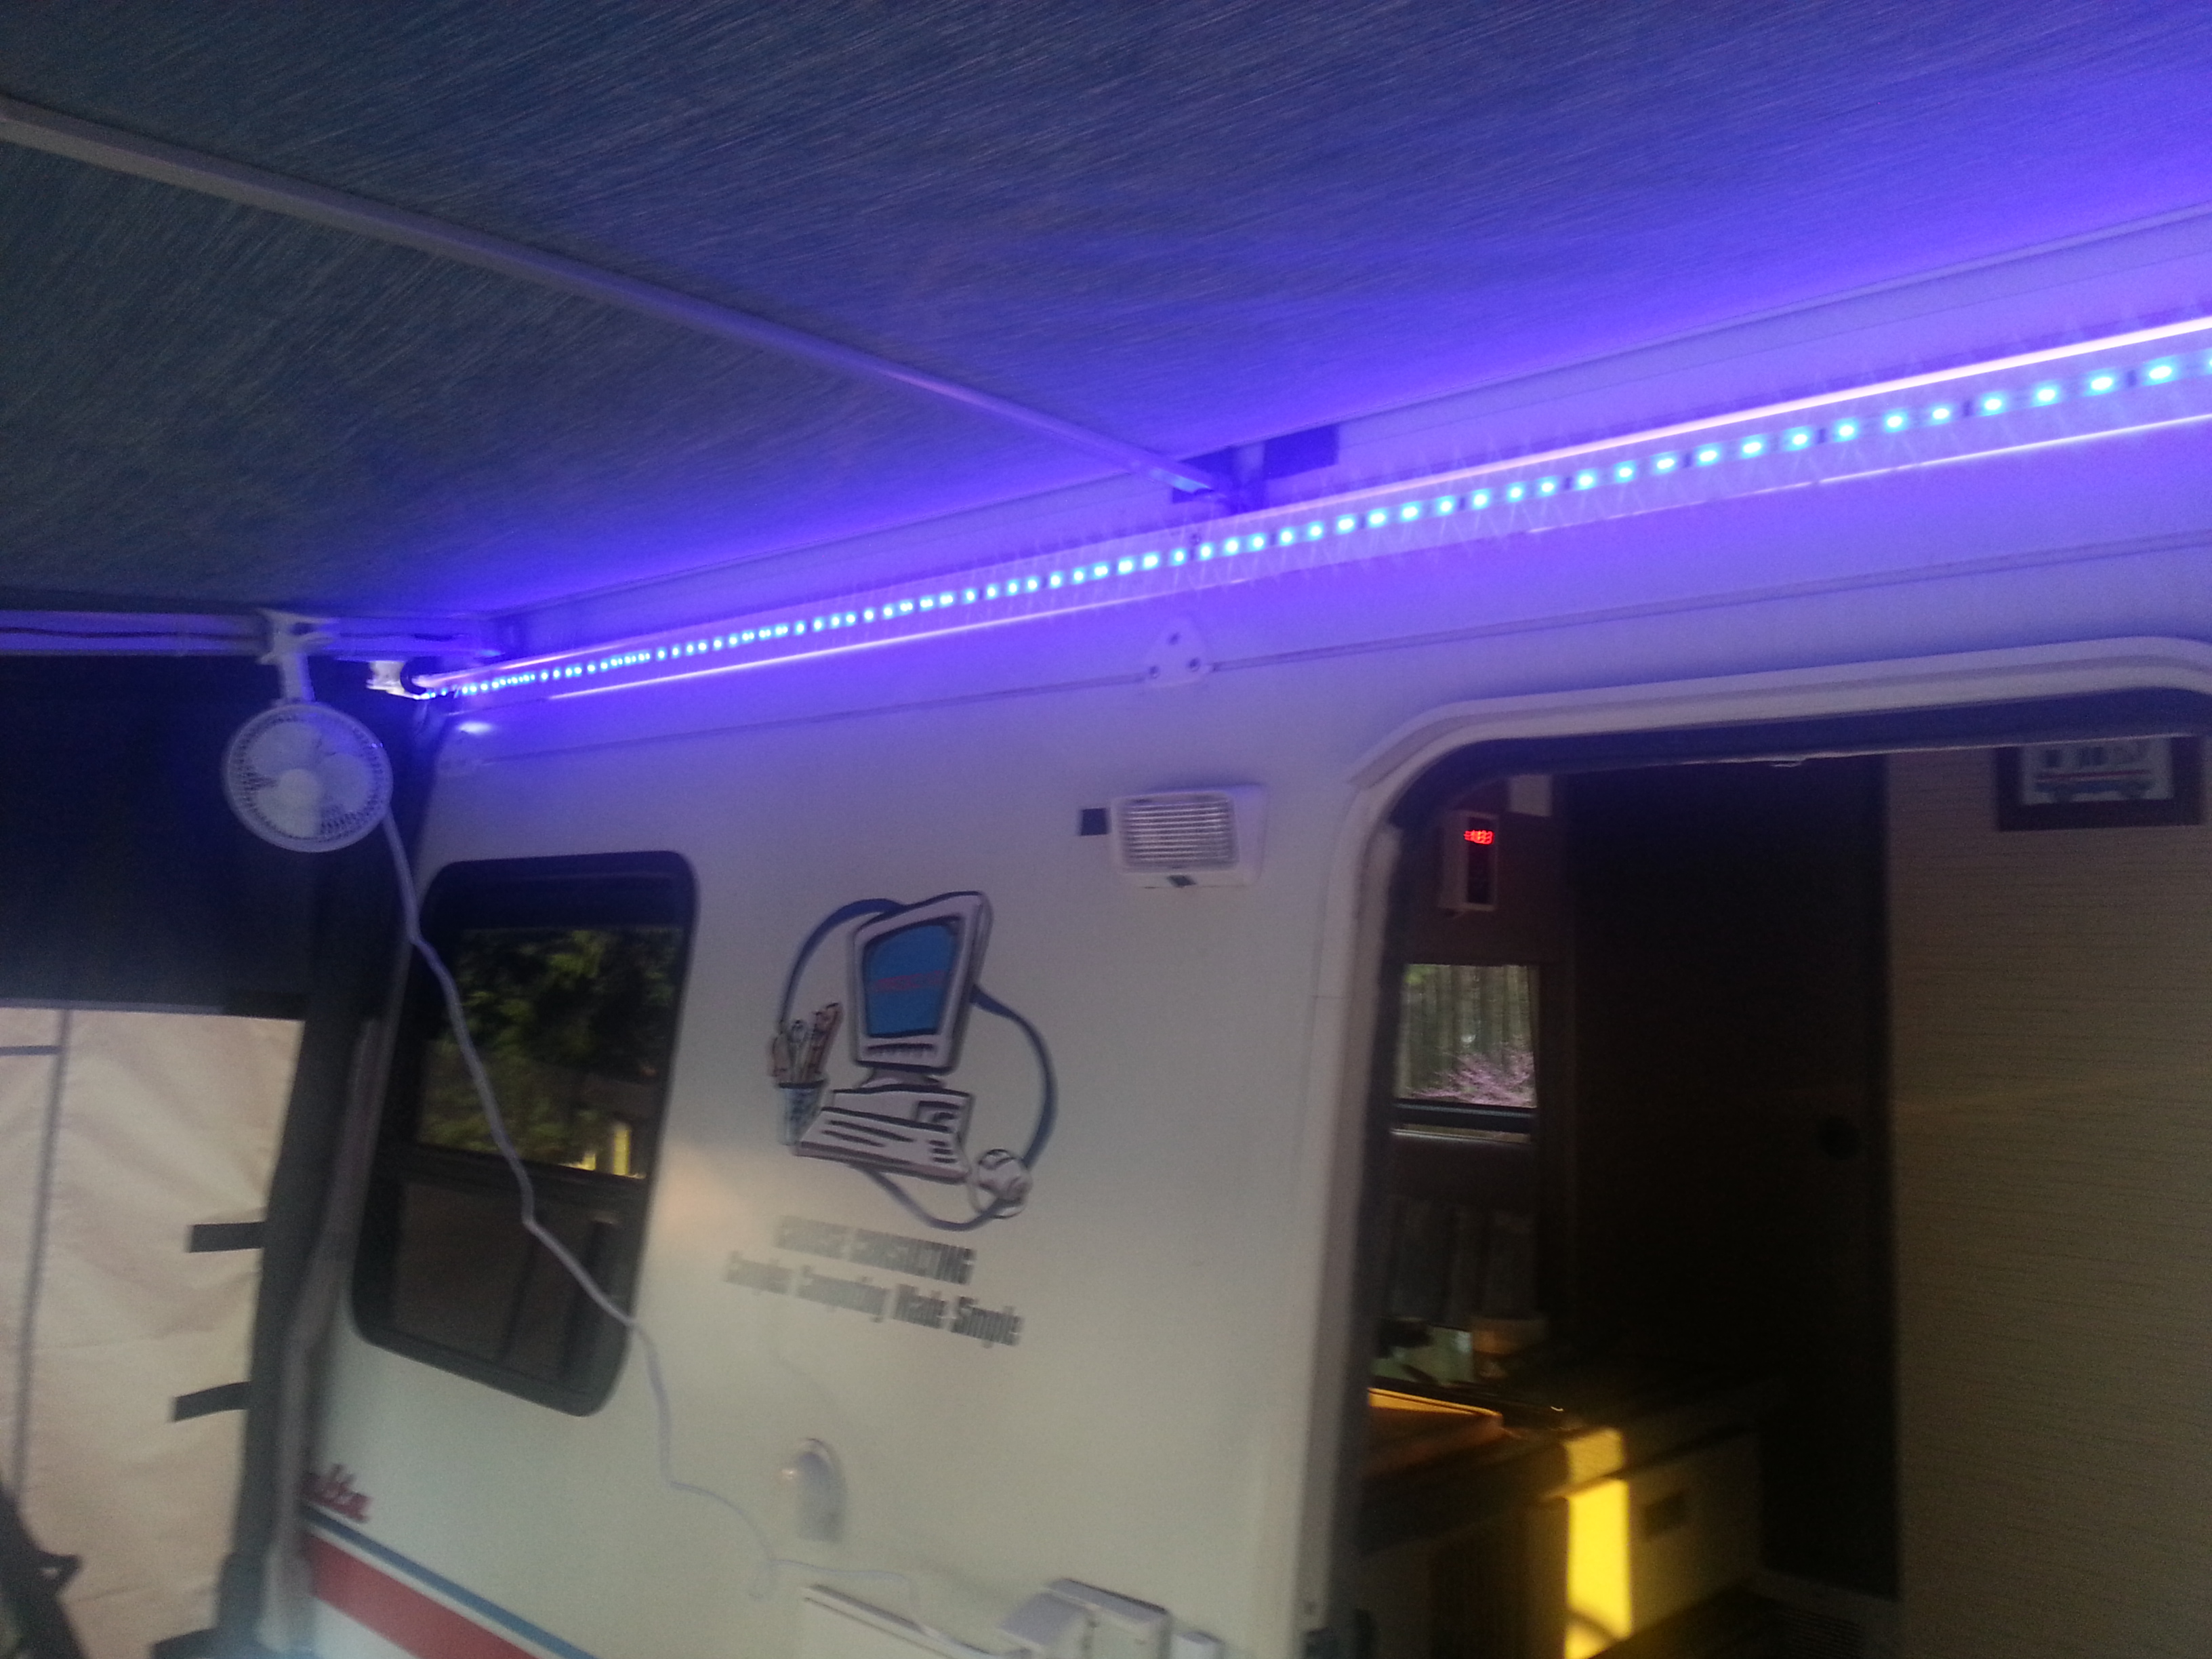
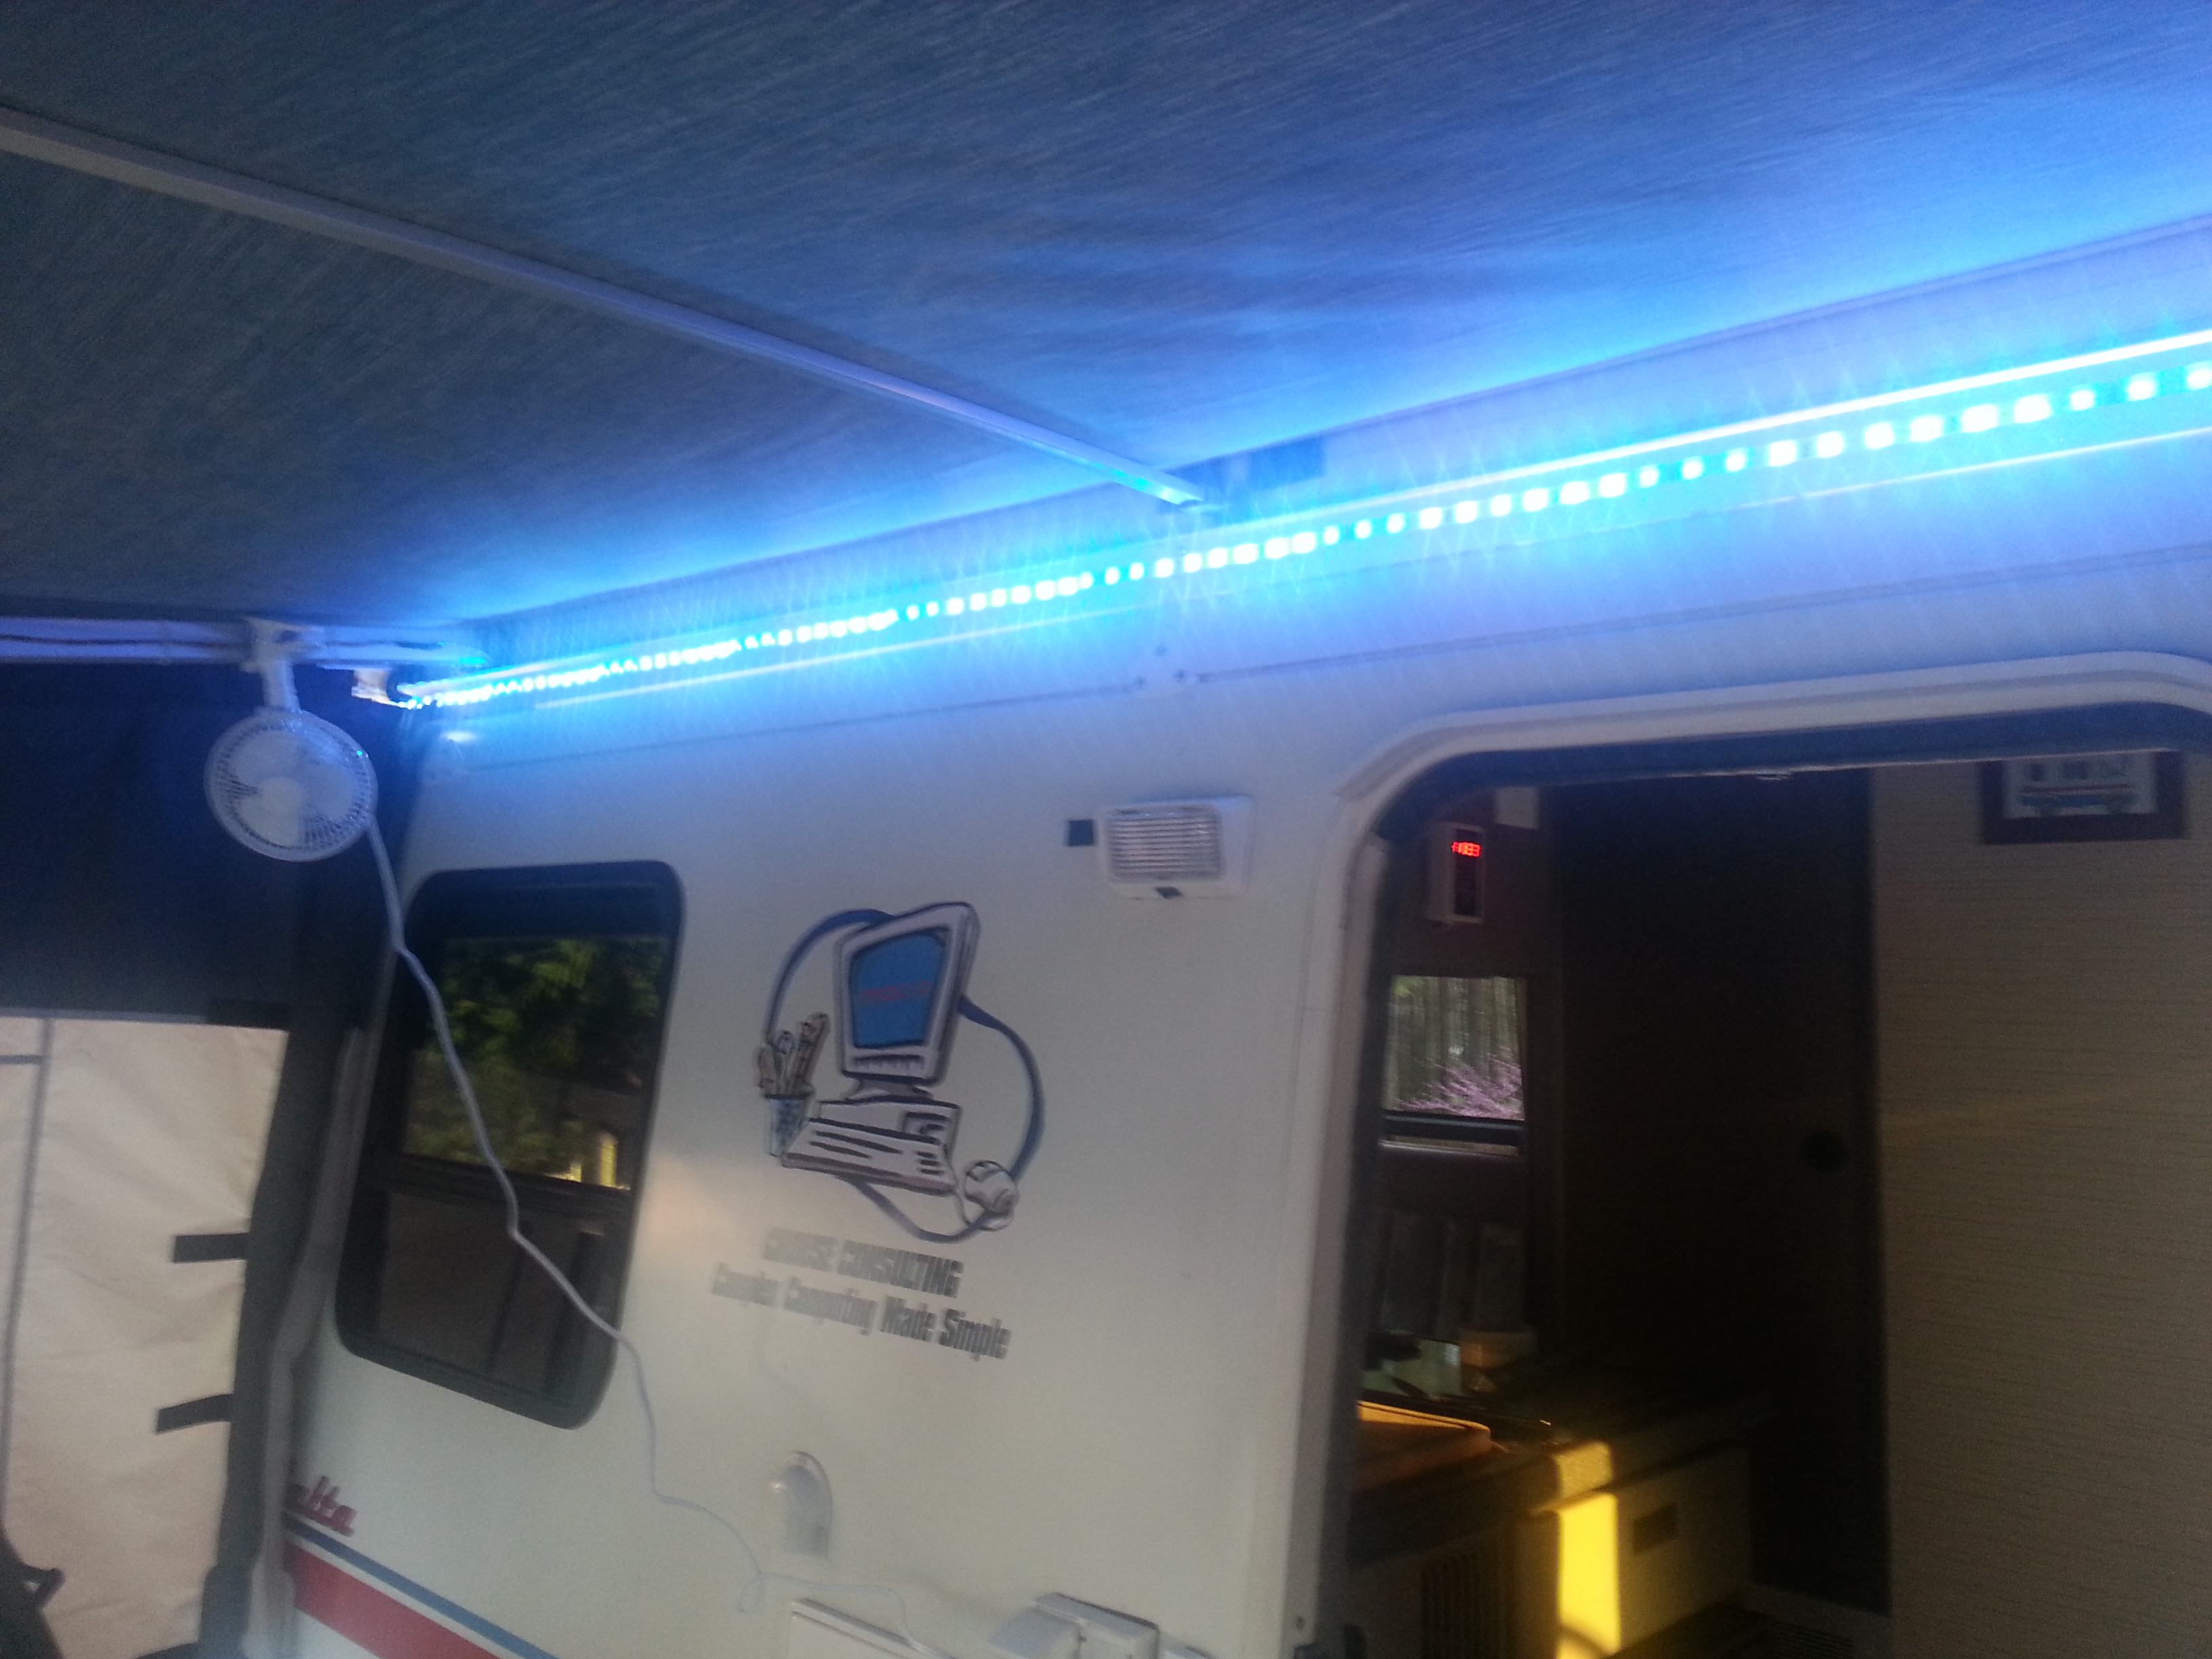
With the inside mostly finished I started on some outside updates. In order to get the new add-on-room to fit right I needed to raise the awning up about 4 inches. I did this by getting the roof mount kit from Fiamma and moved the awning to the roof instead of the sidewall. This also gives better clearance for the door and it lets you put some pitch on the awning so you can leave it up in the rain. Before the awing had to almost be flat for the door to clear the arms. Raising the awning left a 2 inch gap under the bottom. I filled this gap with a 12 foot piece of PVC plastic trim that I cut to fit tight between the roof and the awning. I routed a 1/2 inch wide by 1/8 inch deep groove into the plastic trim. In this groove I mounted some LED strip lights. I already have a strip of white LED lights under the front edge of the awning but these are a little different. They can change colors in 132 different patterns!
With a remote you can select any display setting and speed up or slow down the animation. It does solid colors as well as white. Just a bit of fun ... Disco Rialta!
.jpg)
Lights on the front of the awning bar. These really light up the area under and around the awning.
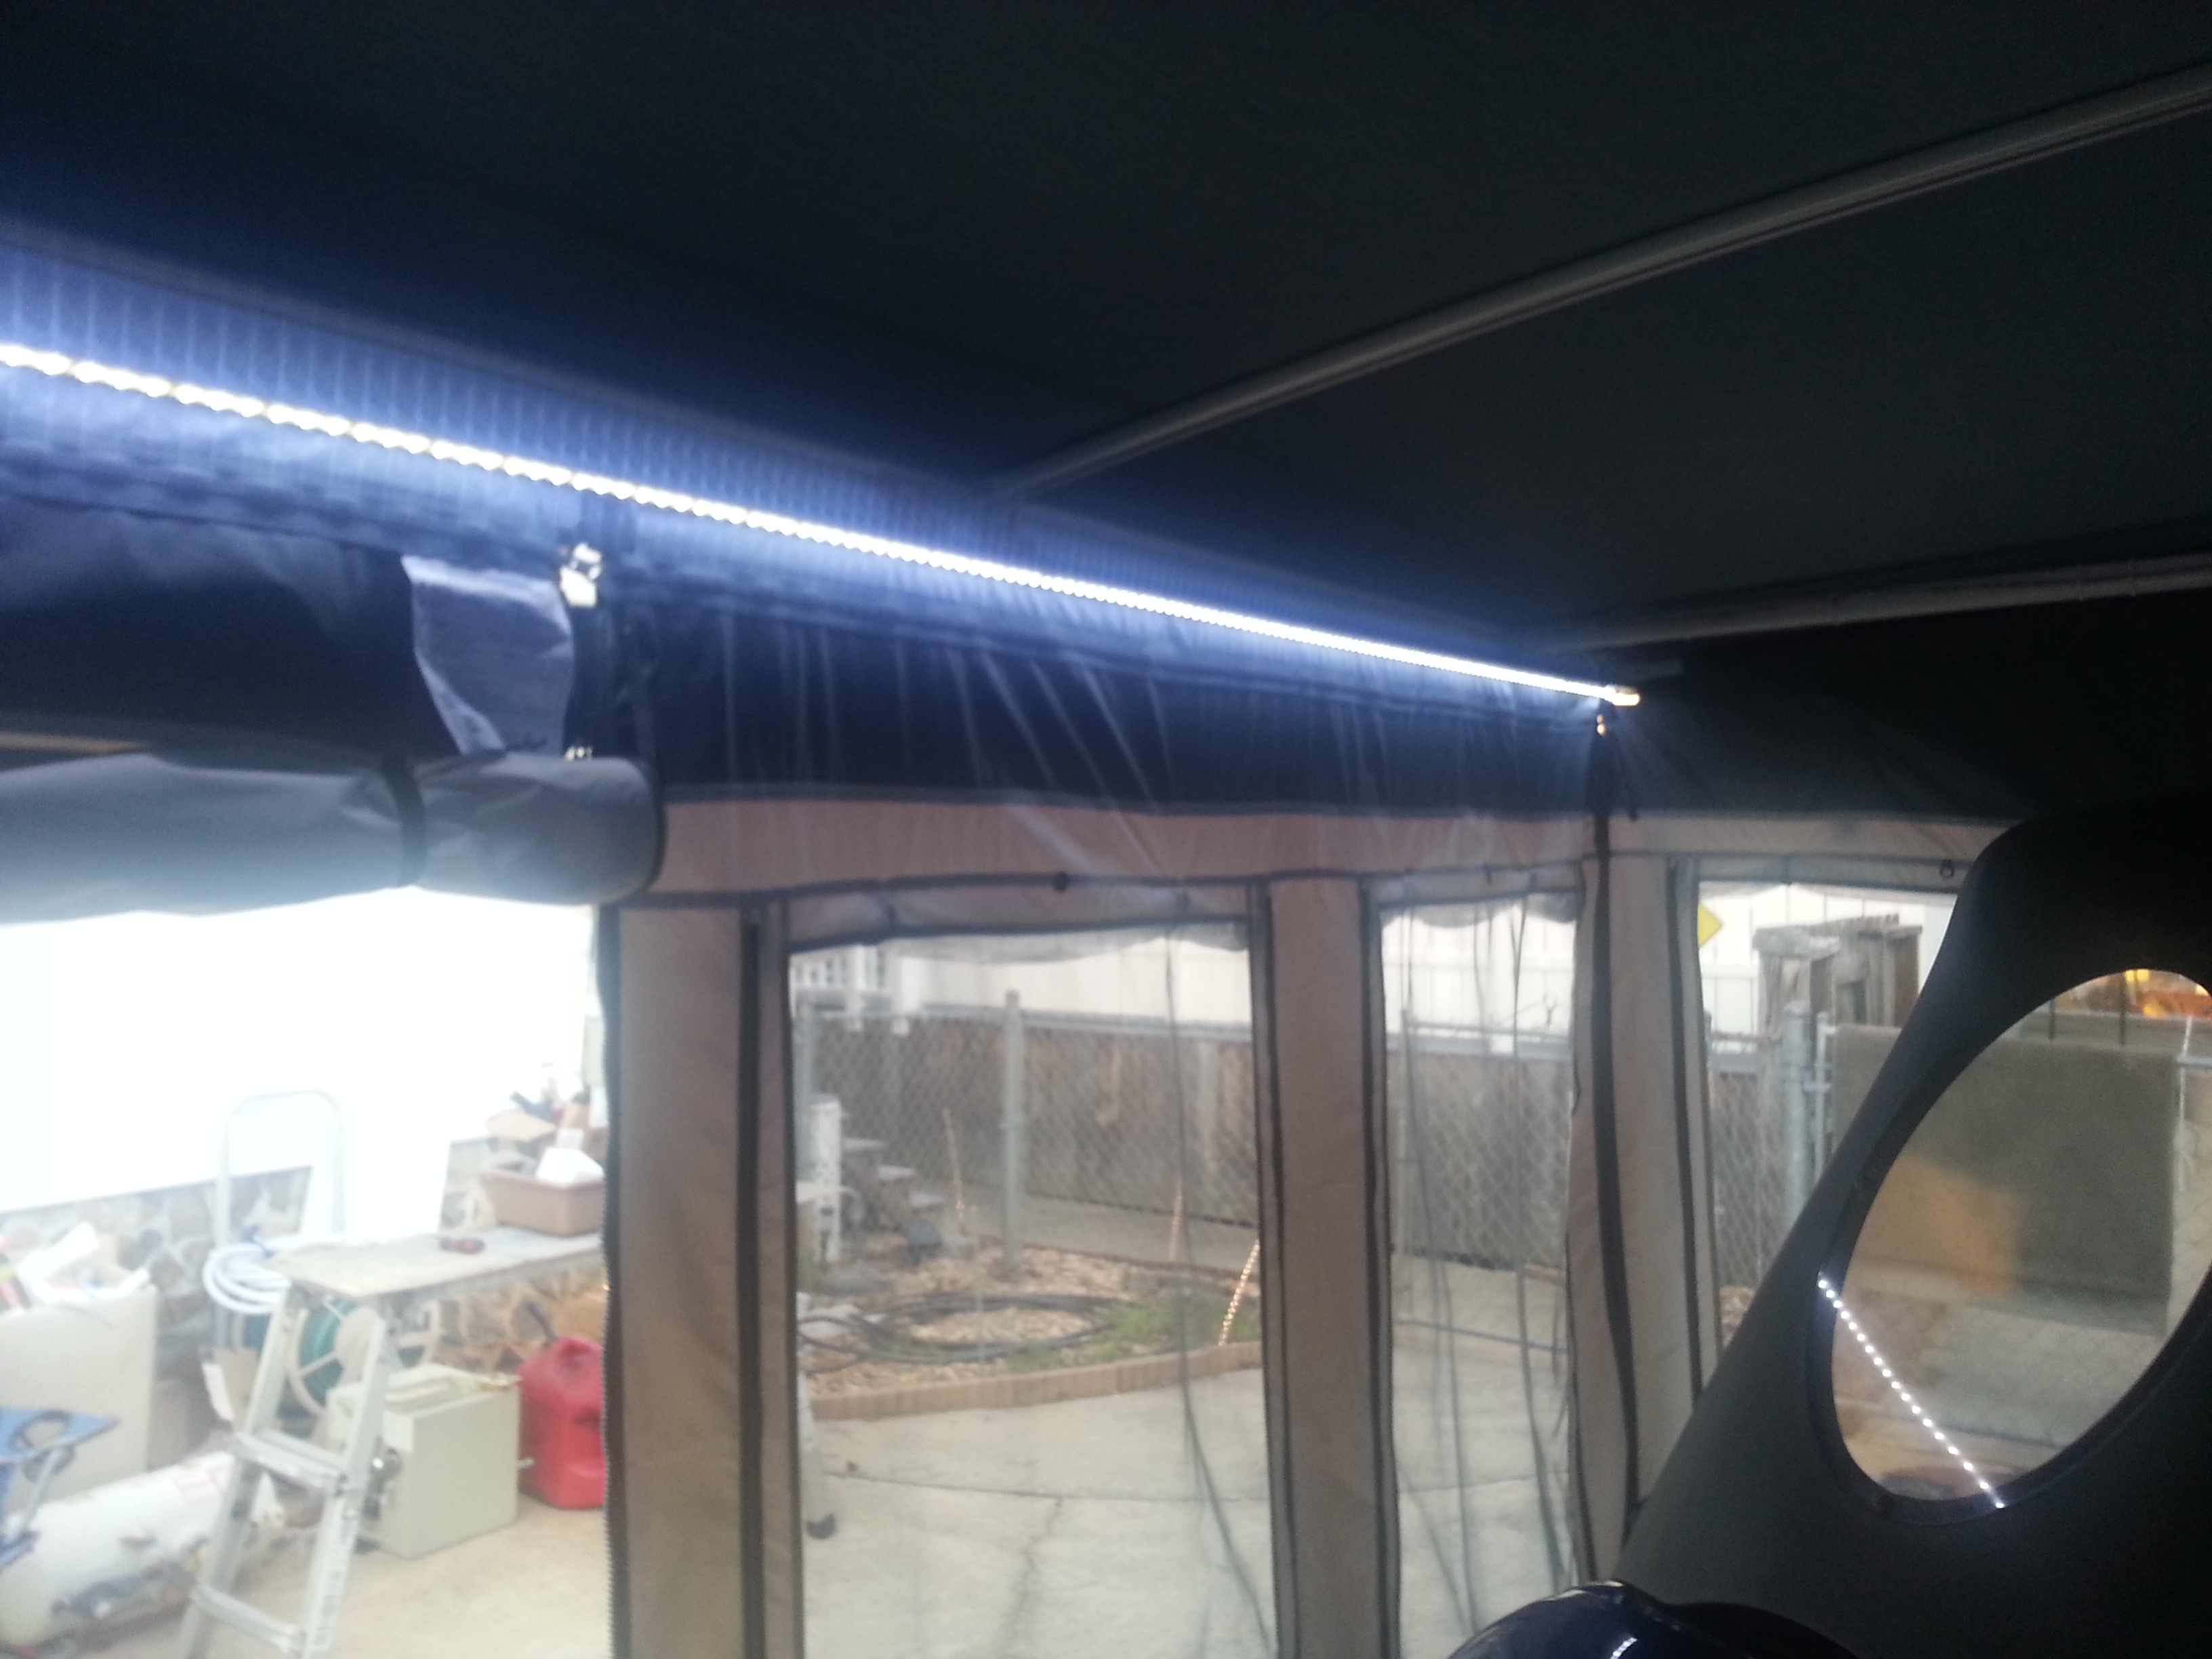
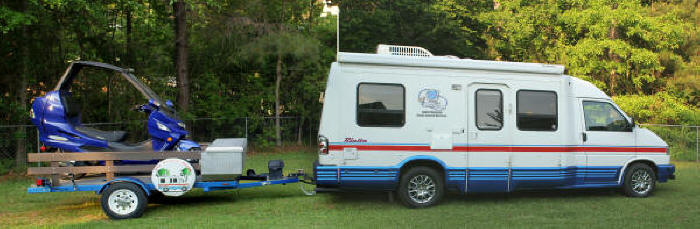
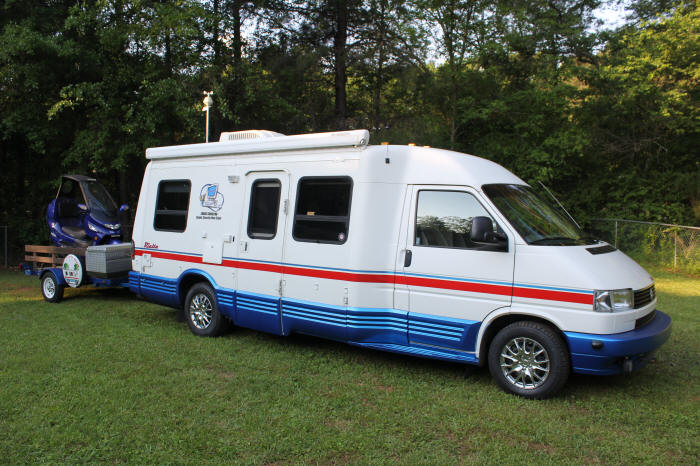
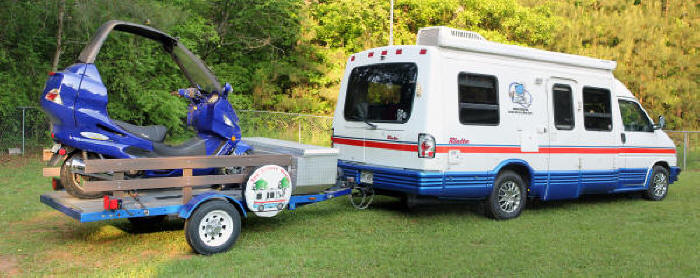
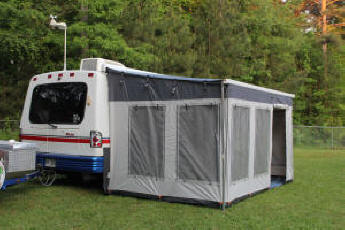
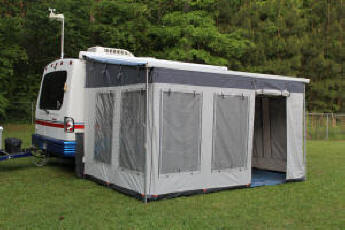
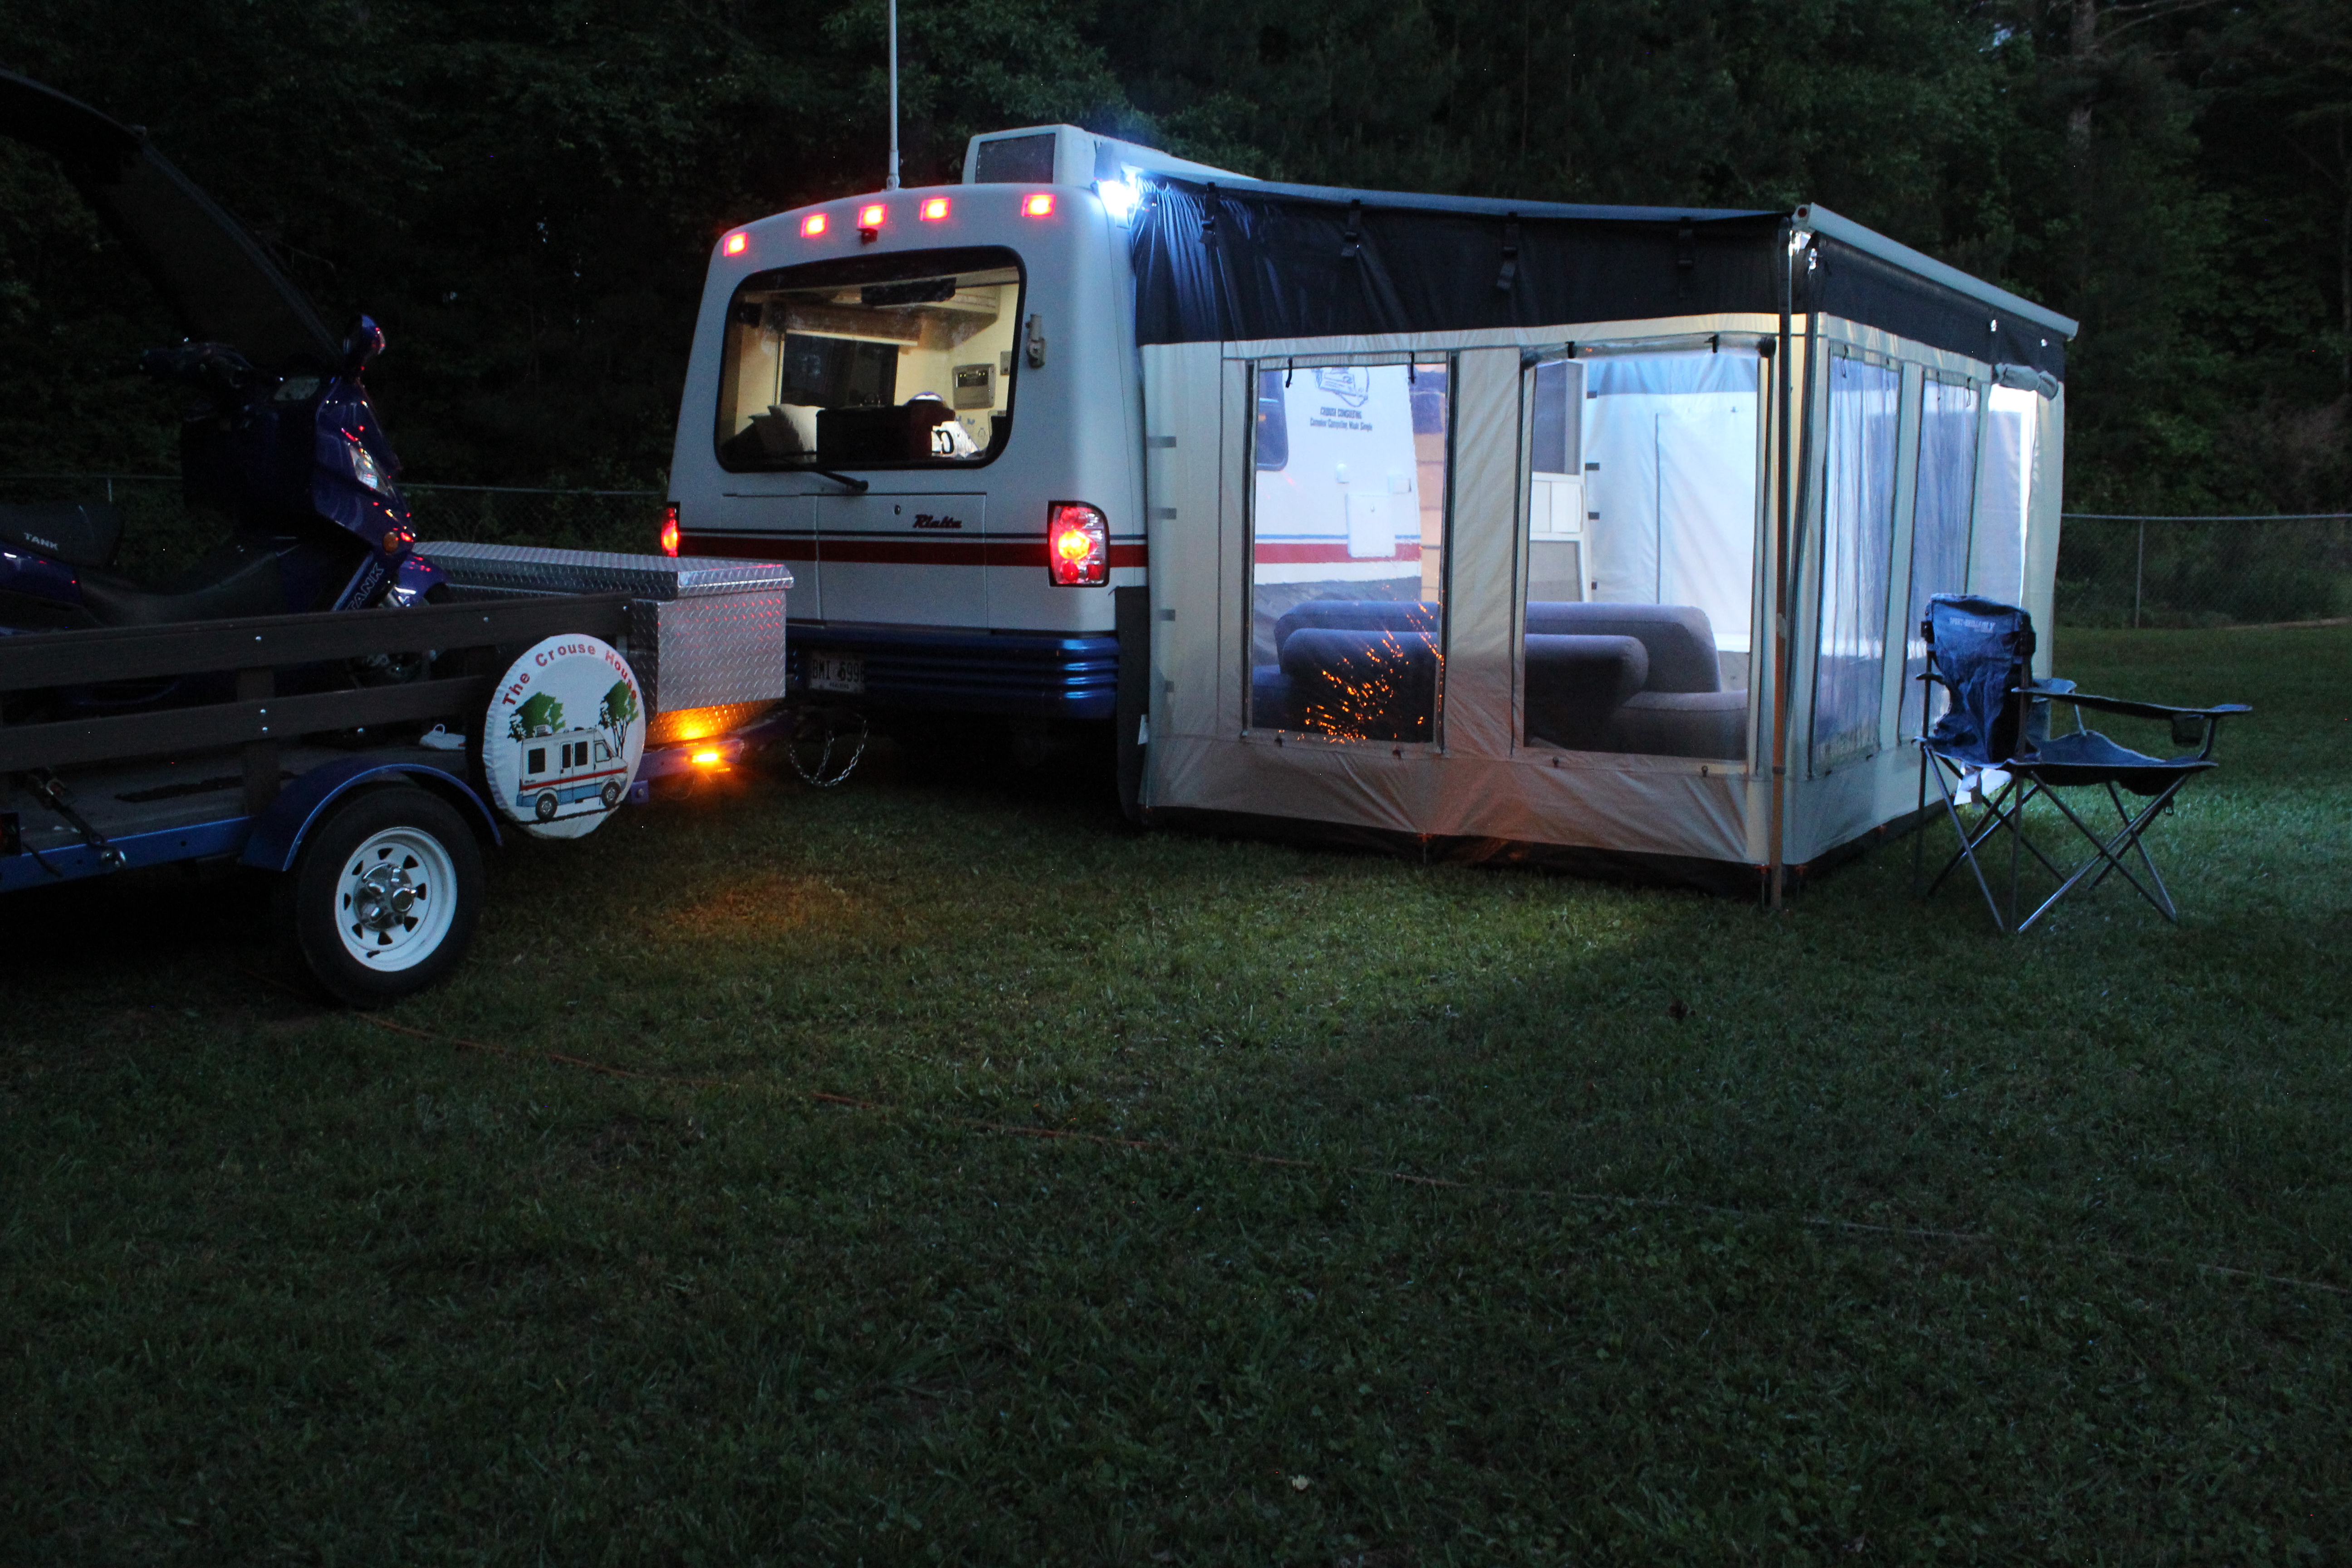
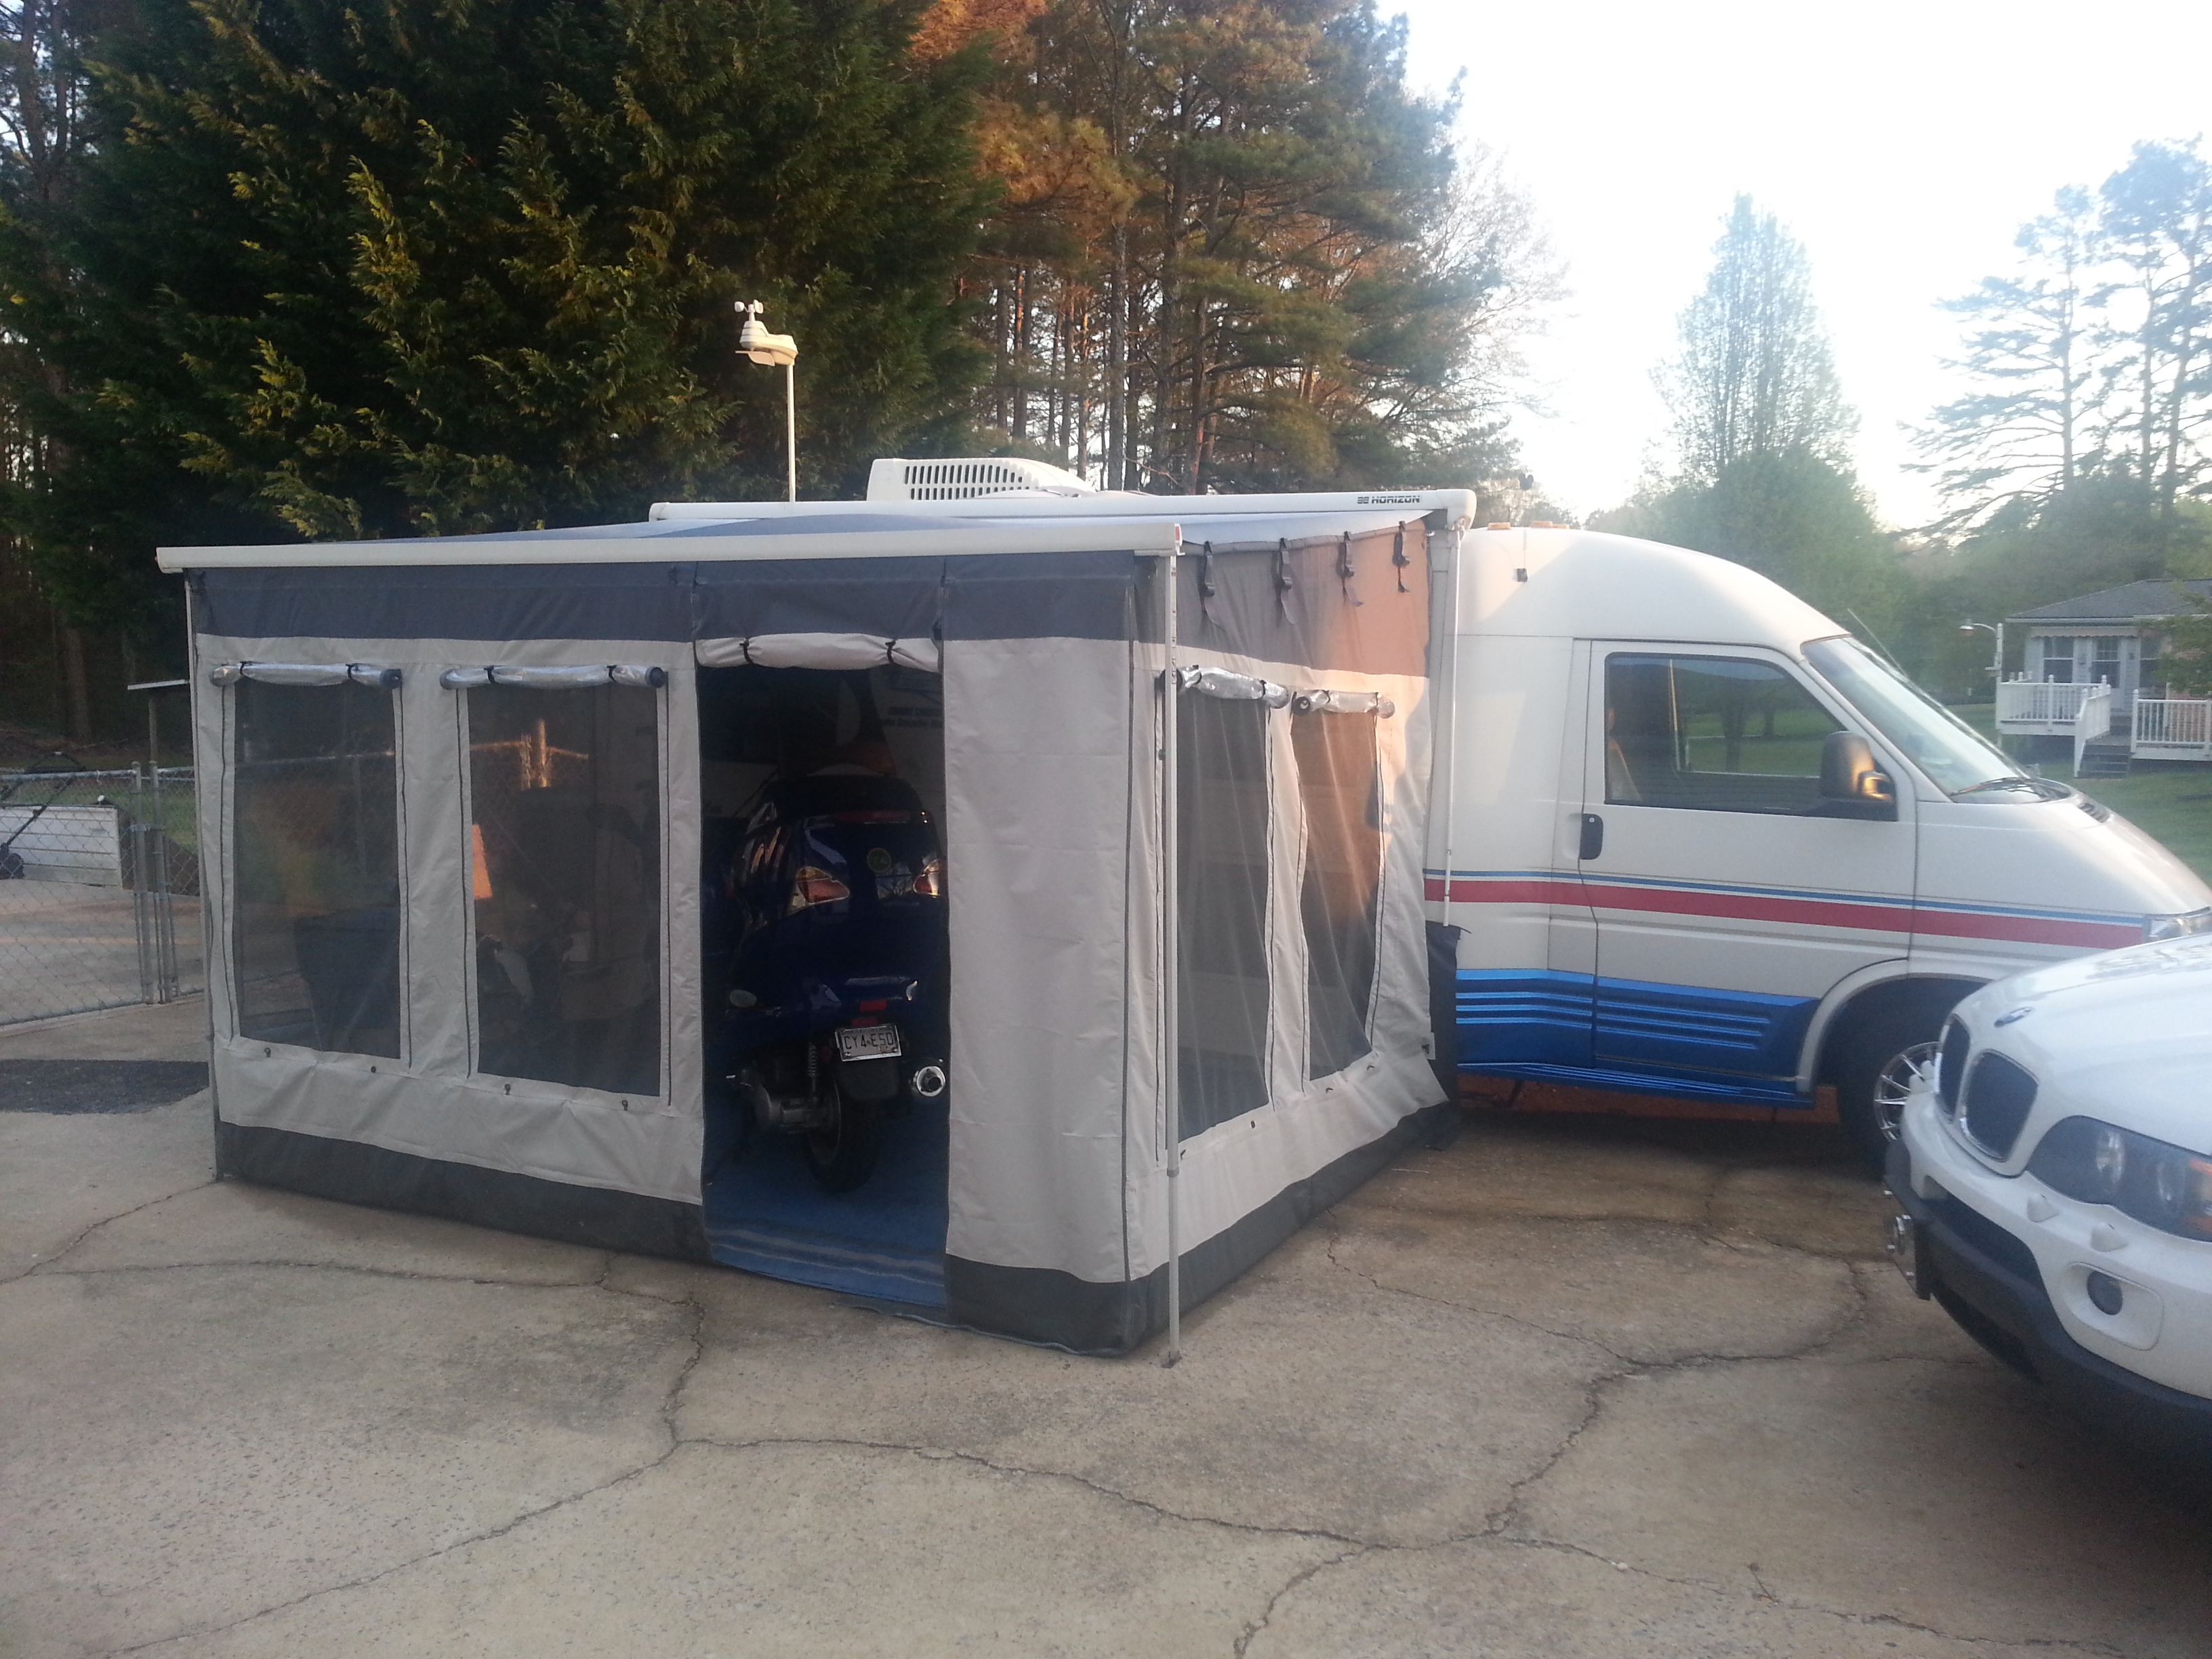
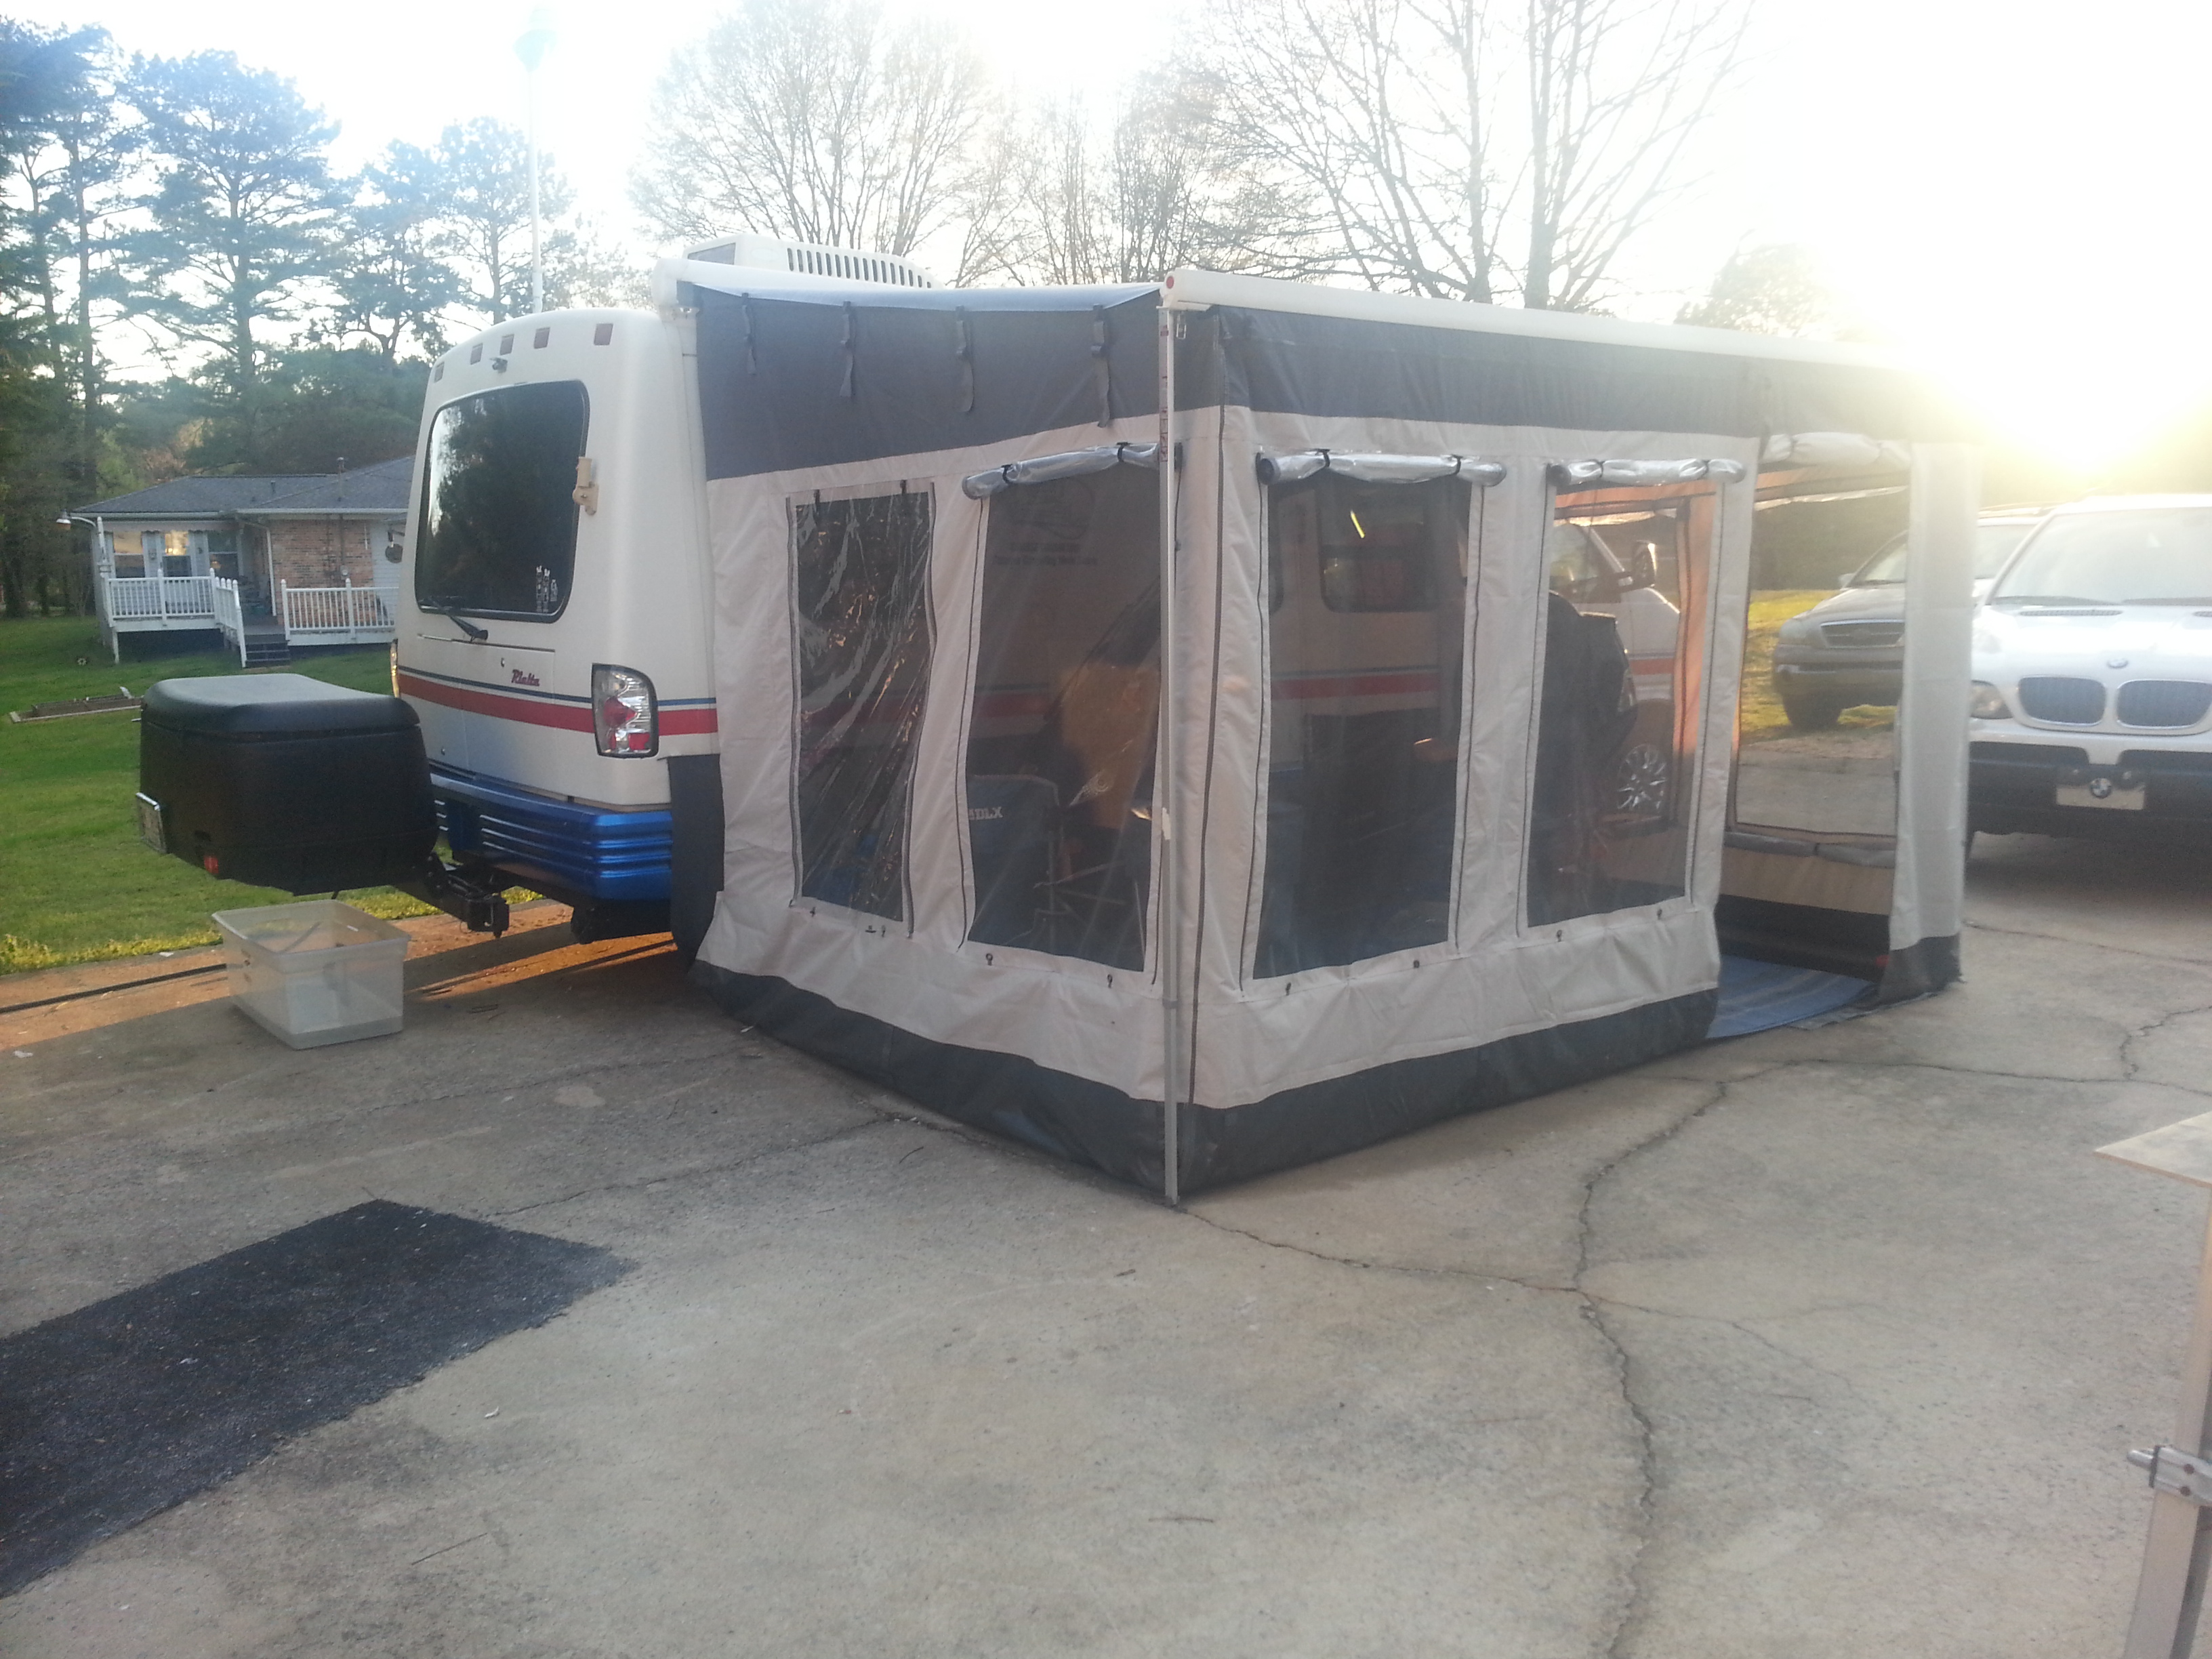
The add-on-room is very nice! I have the A&E/Fiamma awning and I wanted the Fiamma Florida Room BUT they do not make it for the Rialta anymore...Bummer. The difference is the height of the sidewalls the Rialta has such a low roof that it needed a special room with short walls. I found a Carefree model (Buena Vista) that works with their case awnings. However the awning was mounted to low to get the correct pitch so the sidewalls fit correctly. I needed 4 inches and moving the awning case to the roof did the trick. The room is very easy to setup (Only takes about 20 min) it uses 2 telescoping poles to support the sidewalls. It has clear plastic windows on the outside that roll up to allow air through the built in screens. Inside there are zip down shades that close the room for privacy. It will work on awnings from 10 to 13 feet in length (comes with one 6 foot front panel a 2 foot door panel 2 foot and 3 foot additional filler panels.) The door zips in and can be placed any where in the front wall. It also includes a skirt to fill in under the Motorhome. This creates a nice tight room that keeps the critters out! Oh, it also makes a great garage for the scooter!
I also have the Fiamma Arched roof rafter. This helps keep the awning tight and puts in some arch to help with rain run off.
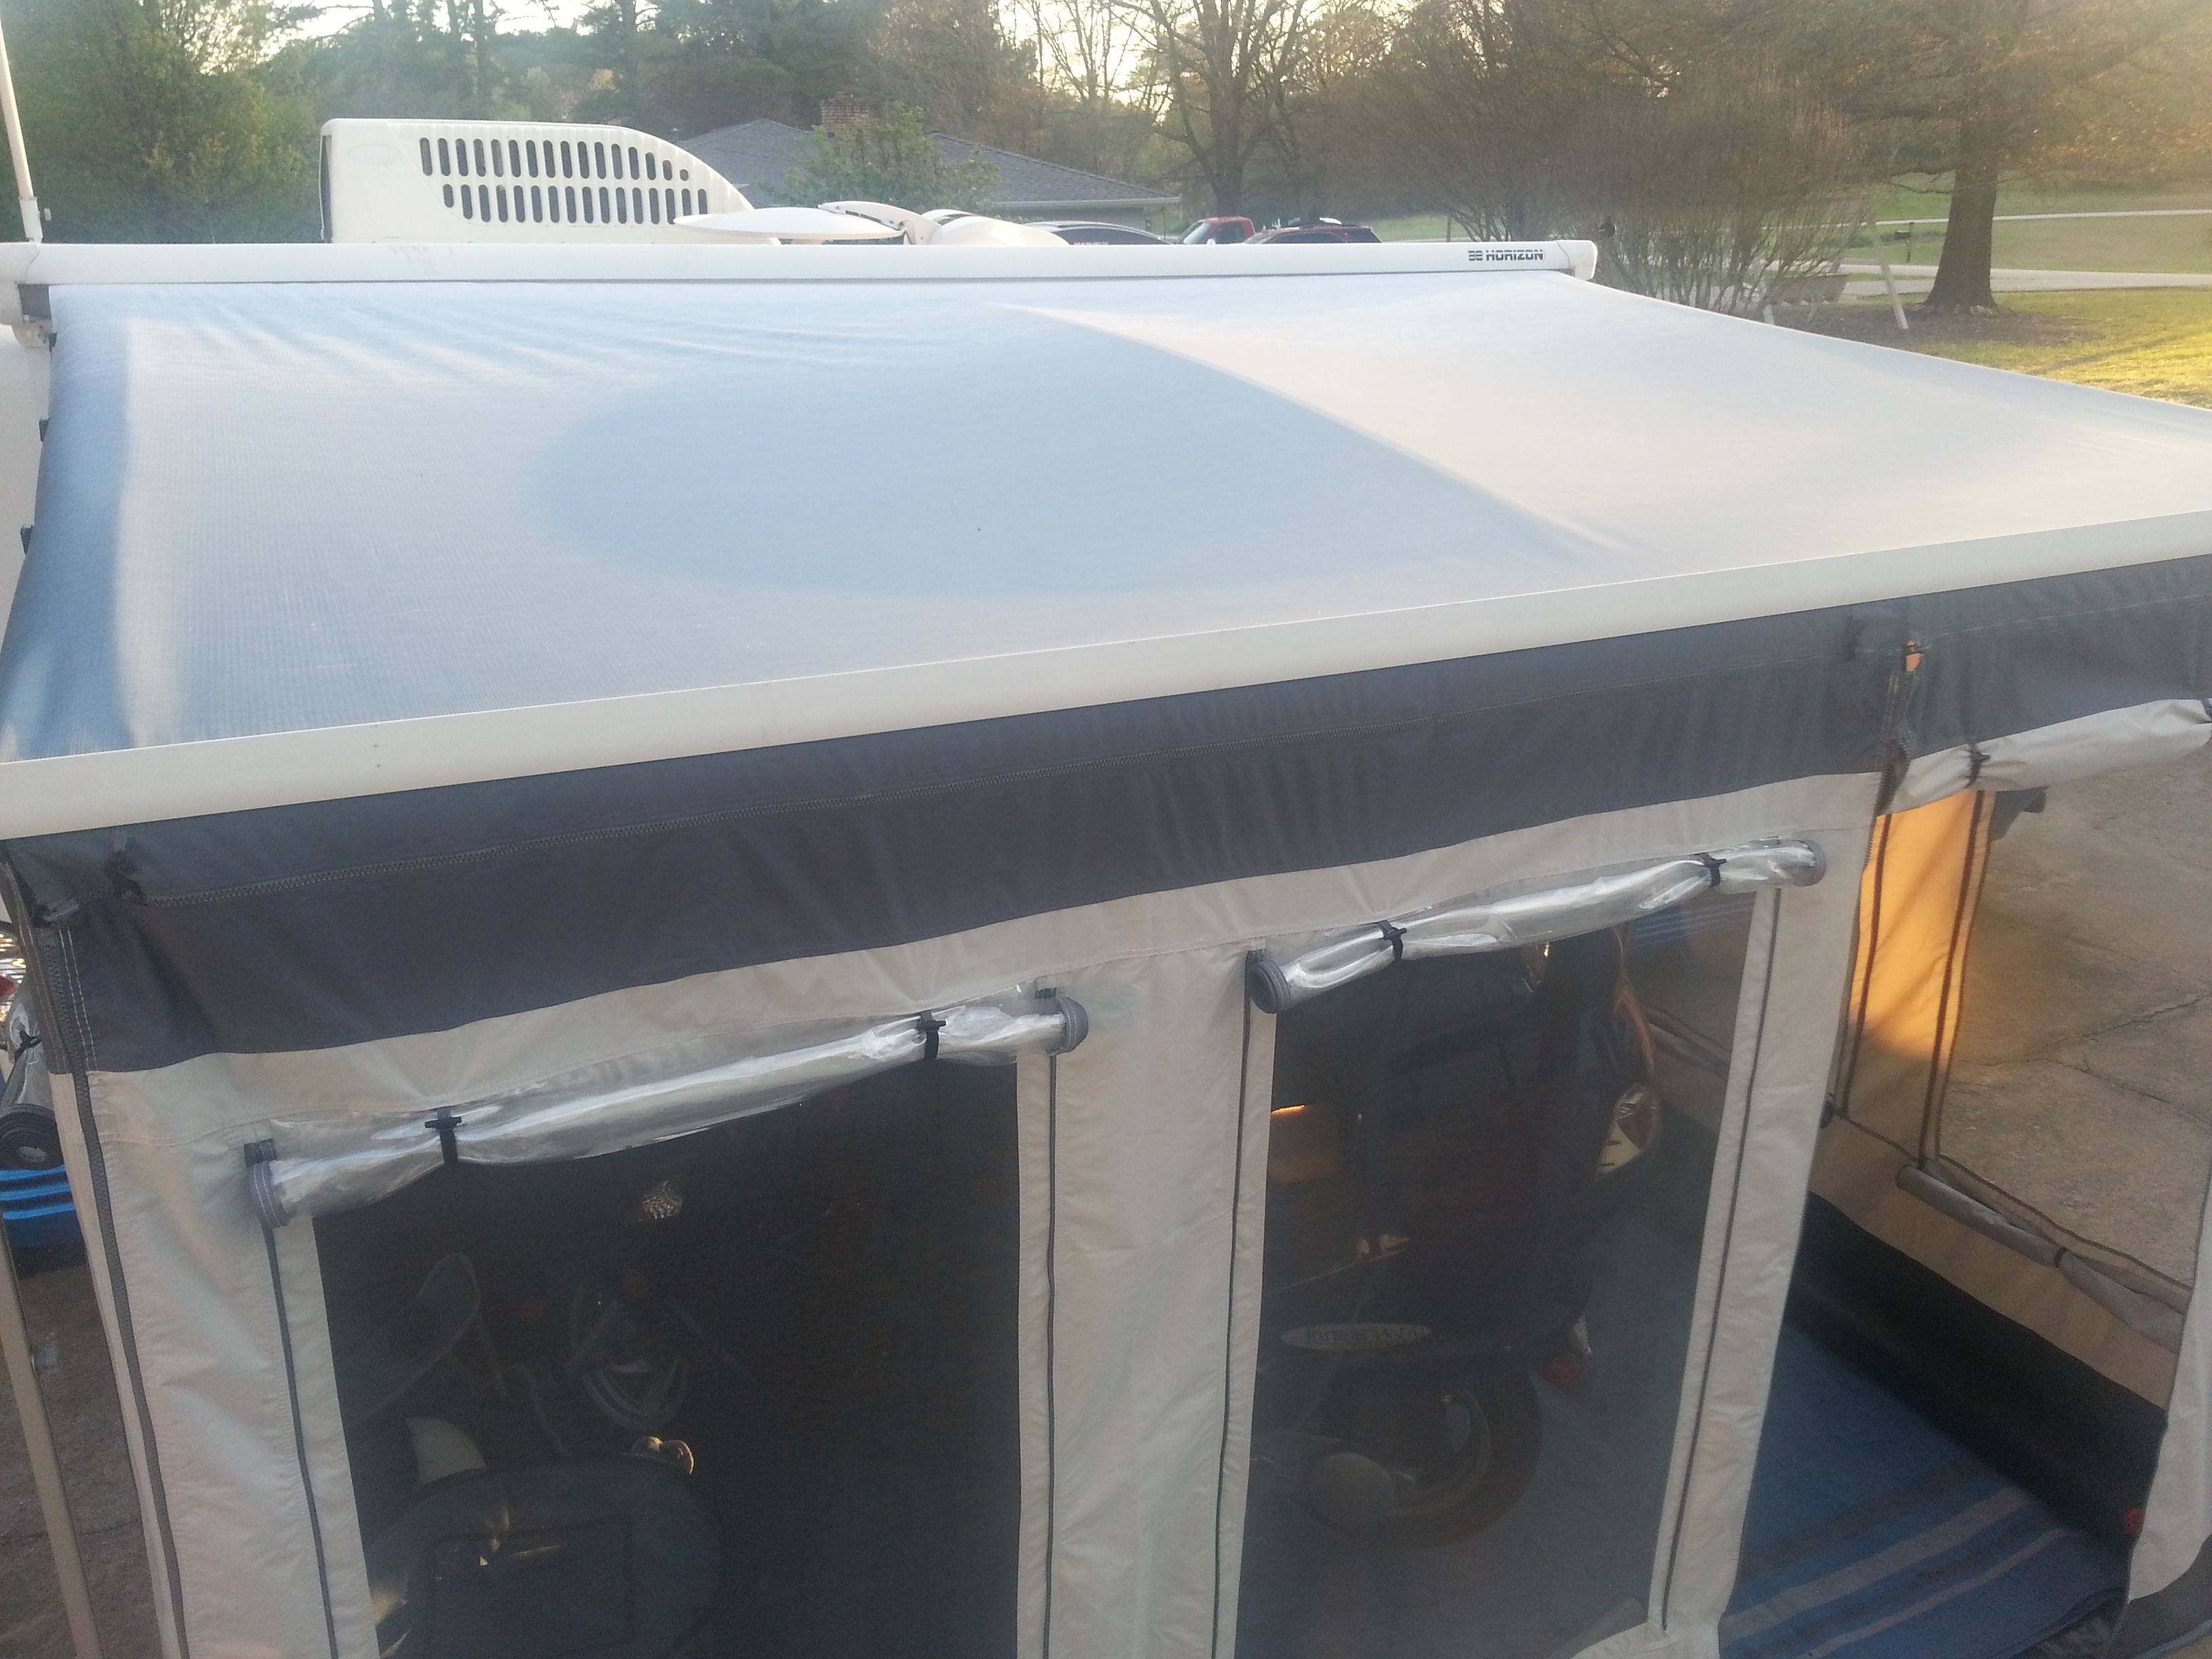
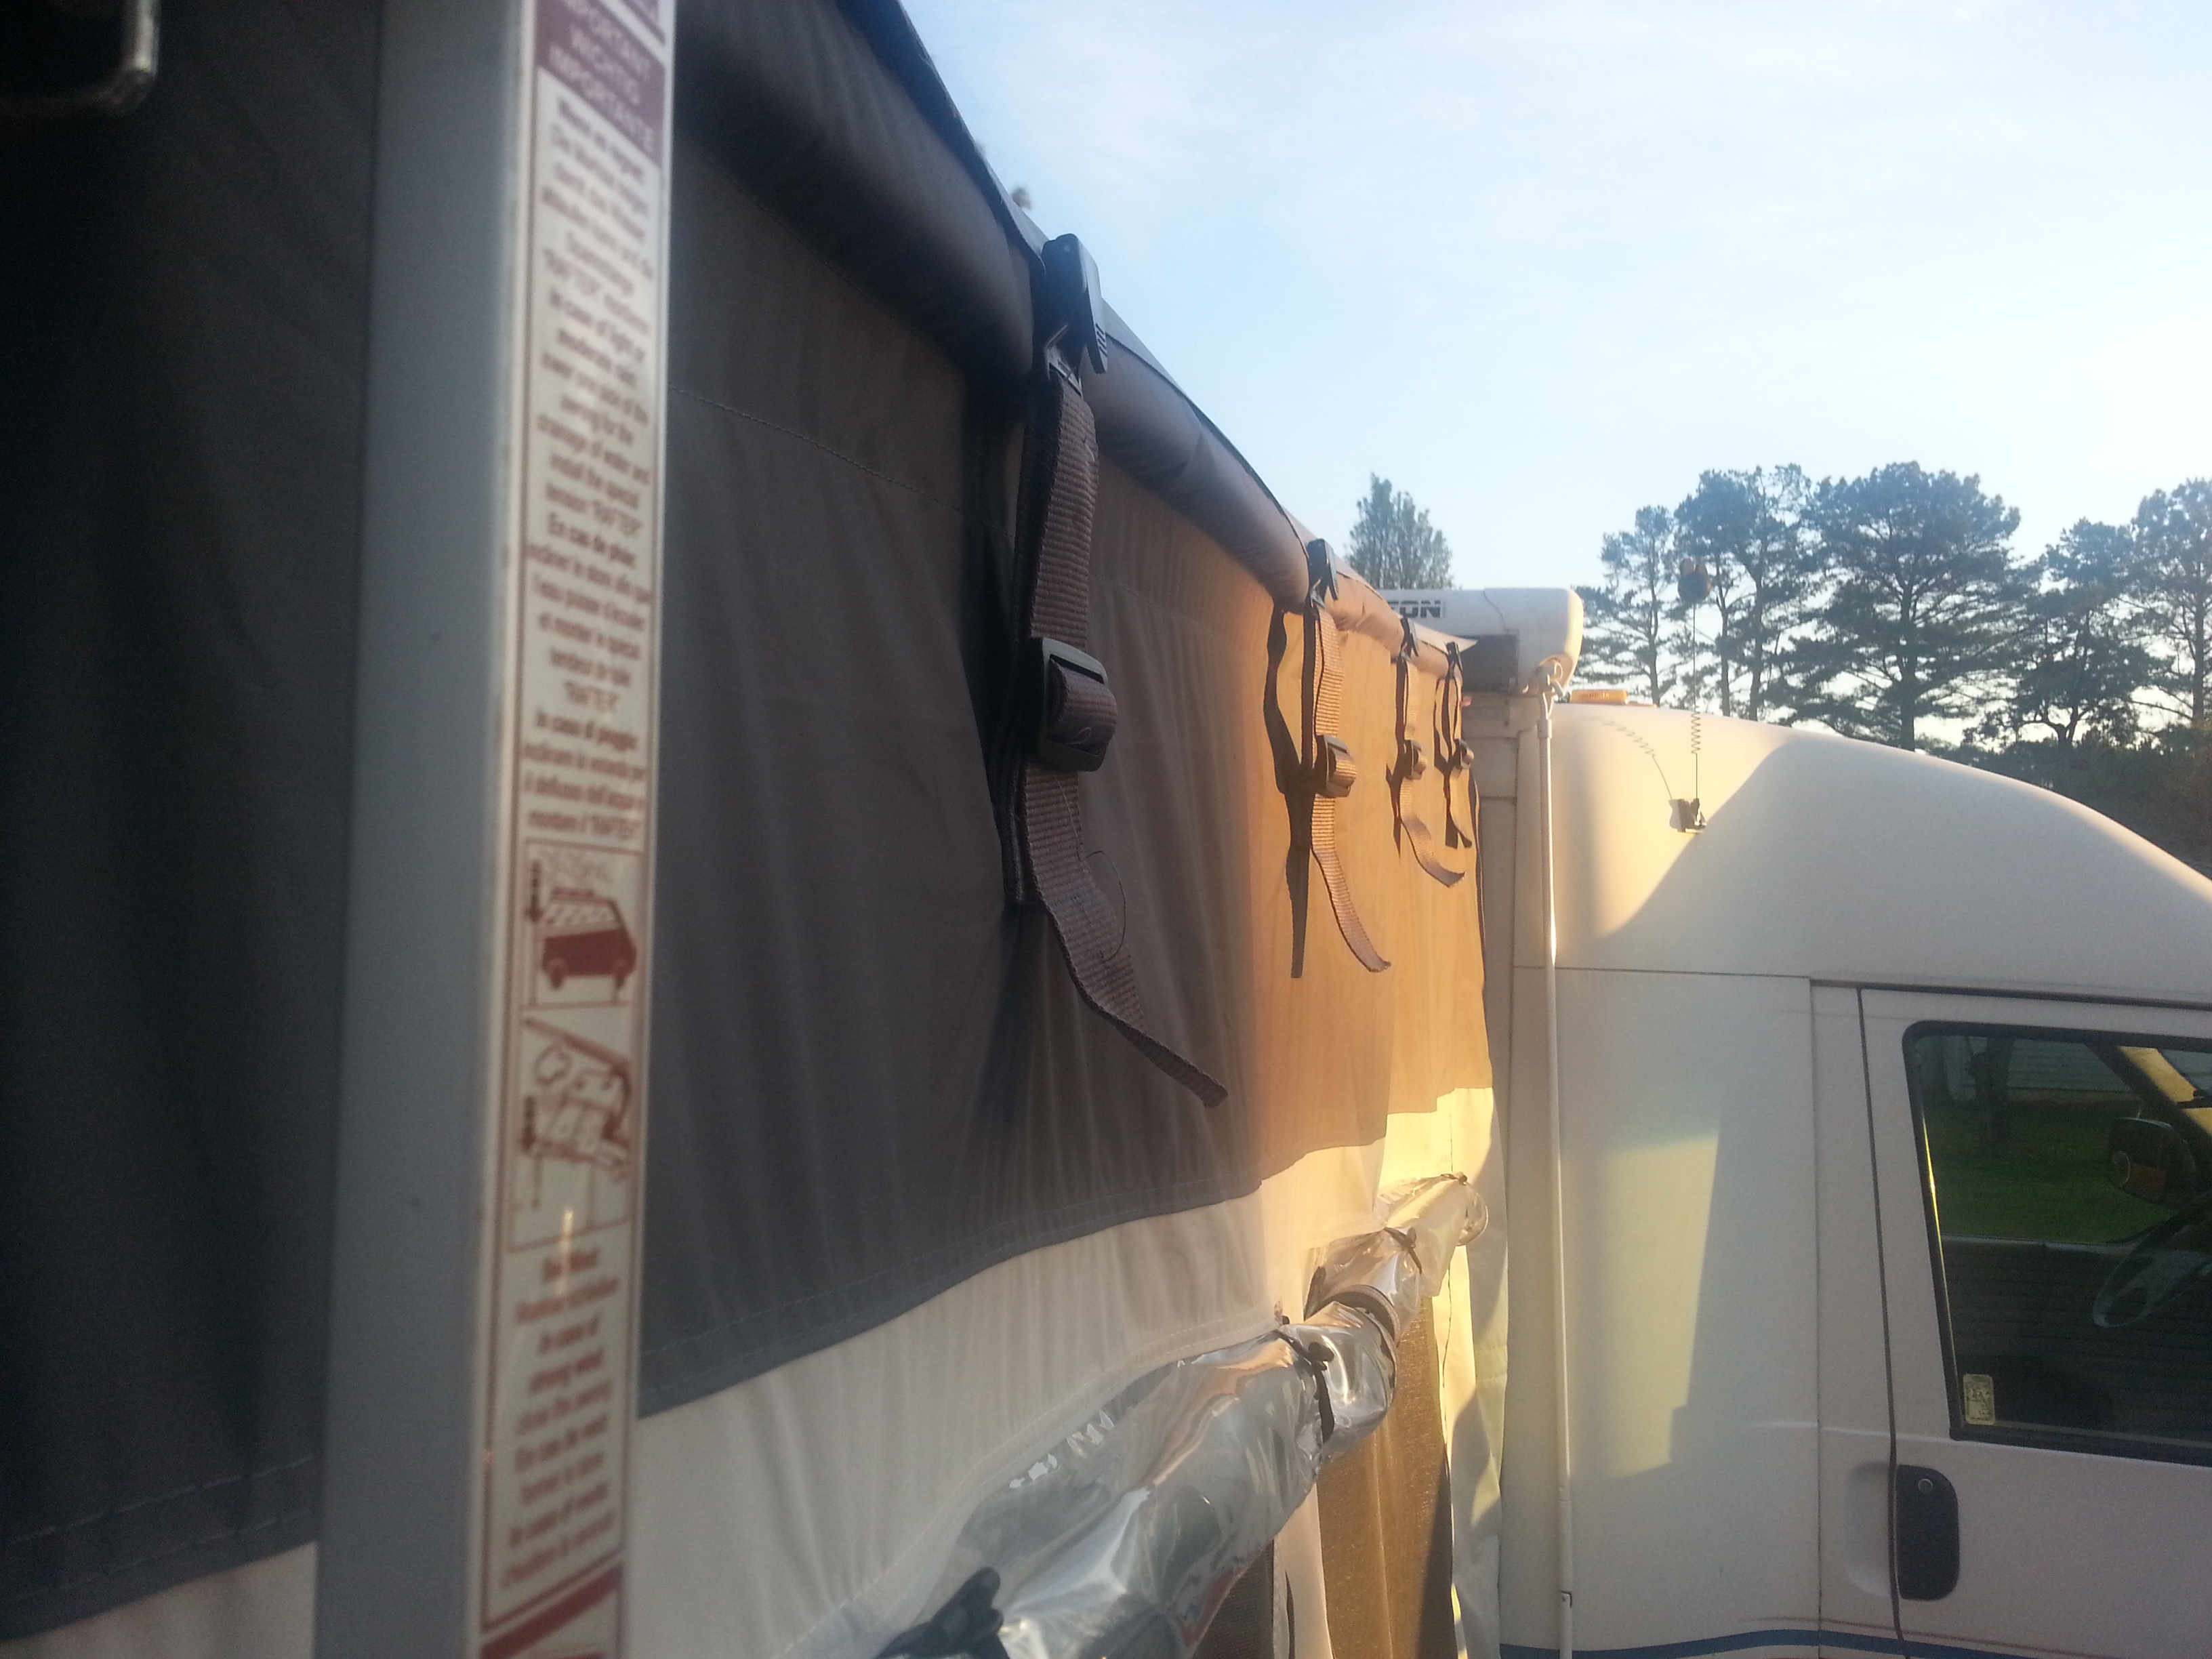
The rooms side walls are supported by rafters but they also have clips that keep the awning from flapping in the wind. They also help form a tight seal between the side wall and the awning.
The skirt covers the area under the Motorhome. The black tube was designed to hold down swimming pool covers in the winter. They are filled with water to hold down the cover. I got some of them to use when you can't stake down the awning (like when on a concrete pad or drive). You drain the water out and they take up no room and weigh nothing, unlike carrying several bricks or searching the campground for rocks.
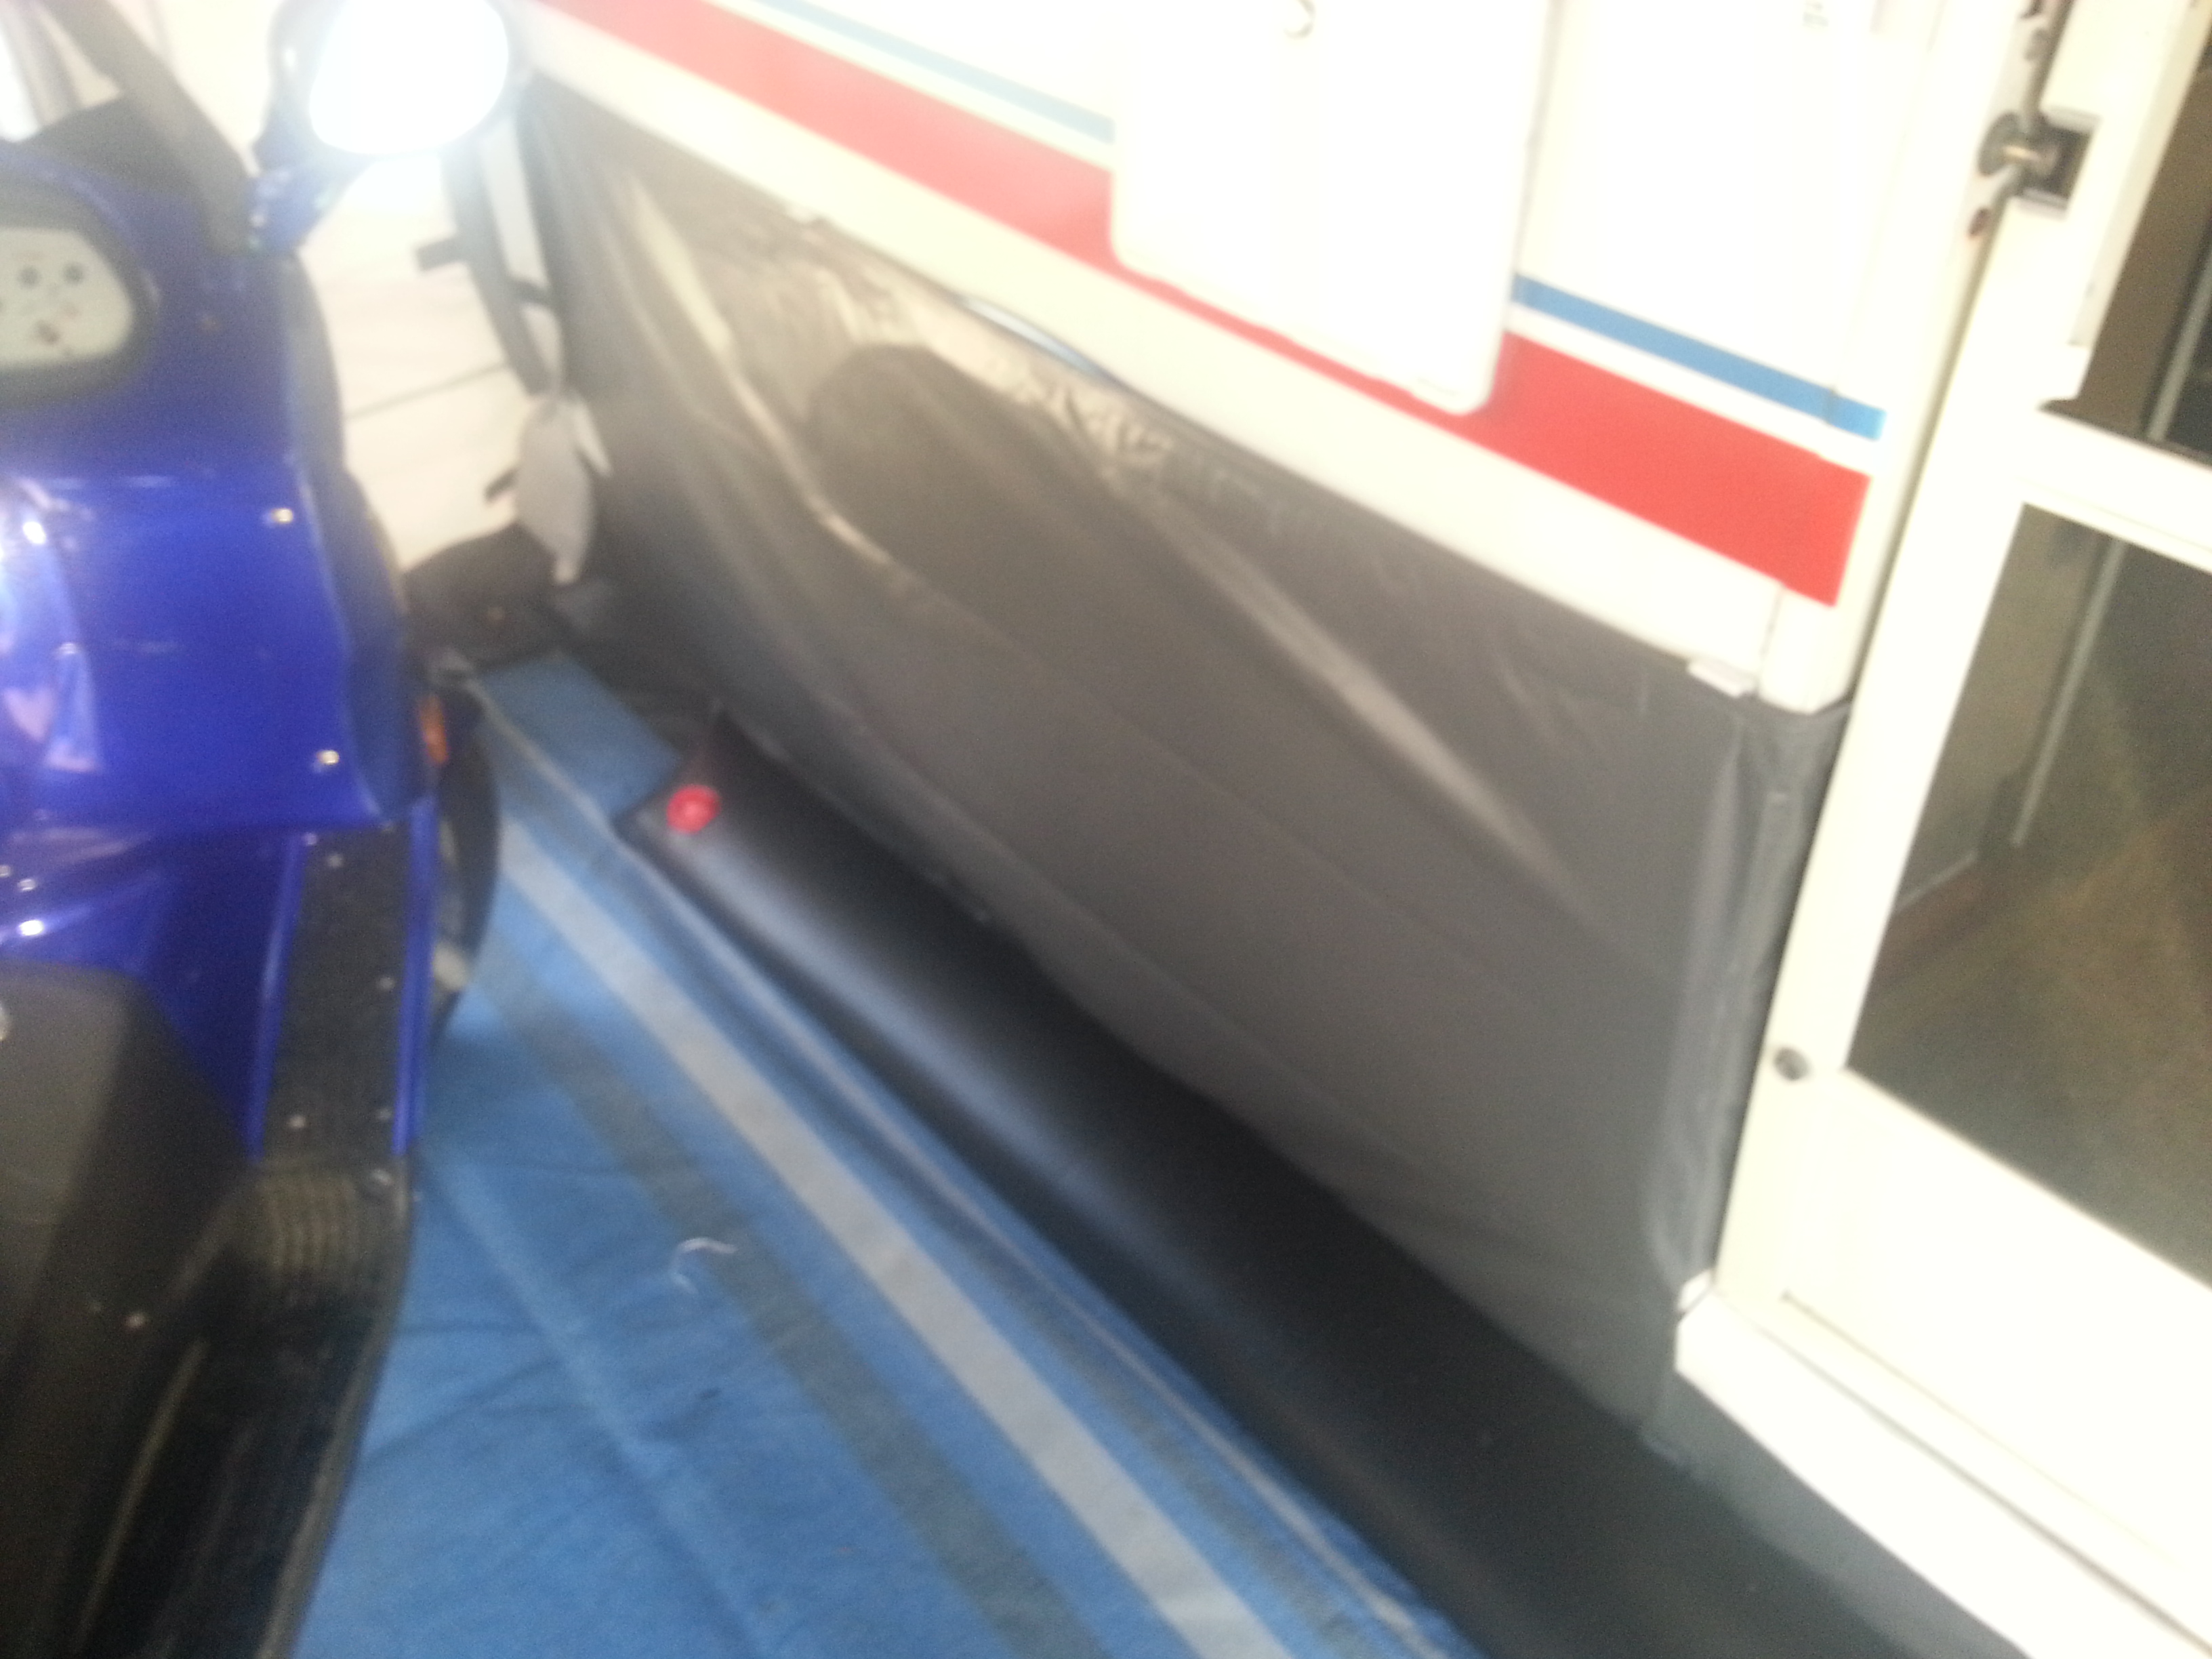
And it seals tight around the door. I added some Eterna Bond tape to the edges that wedge under the door frame and some Velcro to the door jams to keep the skirt in place around the door.
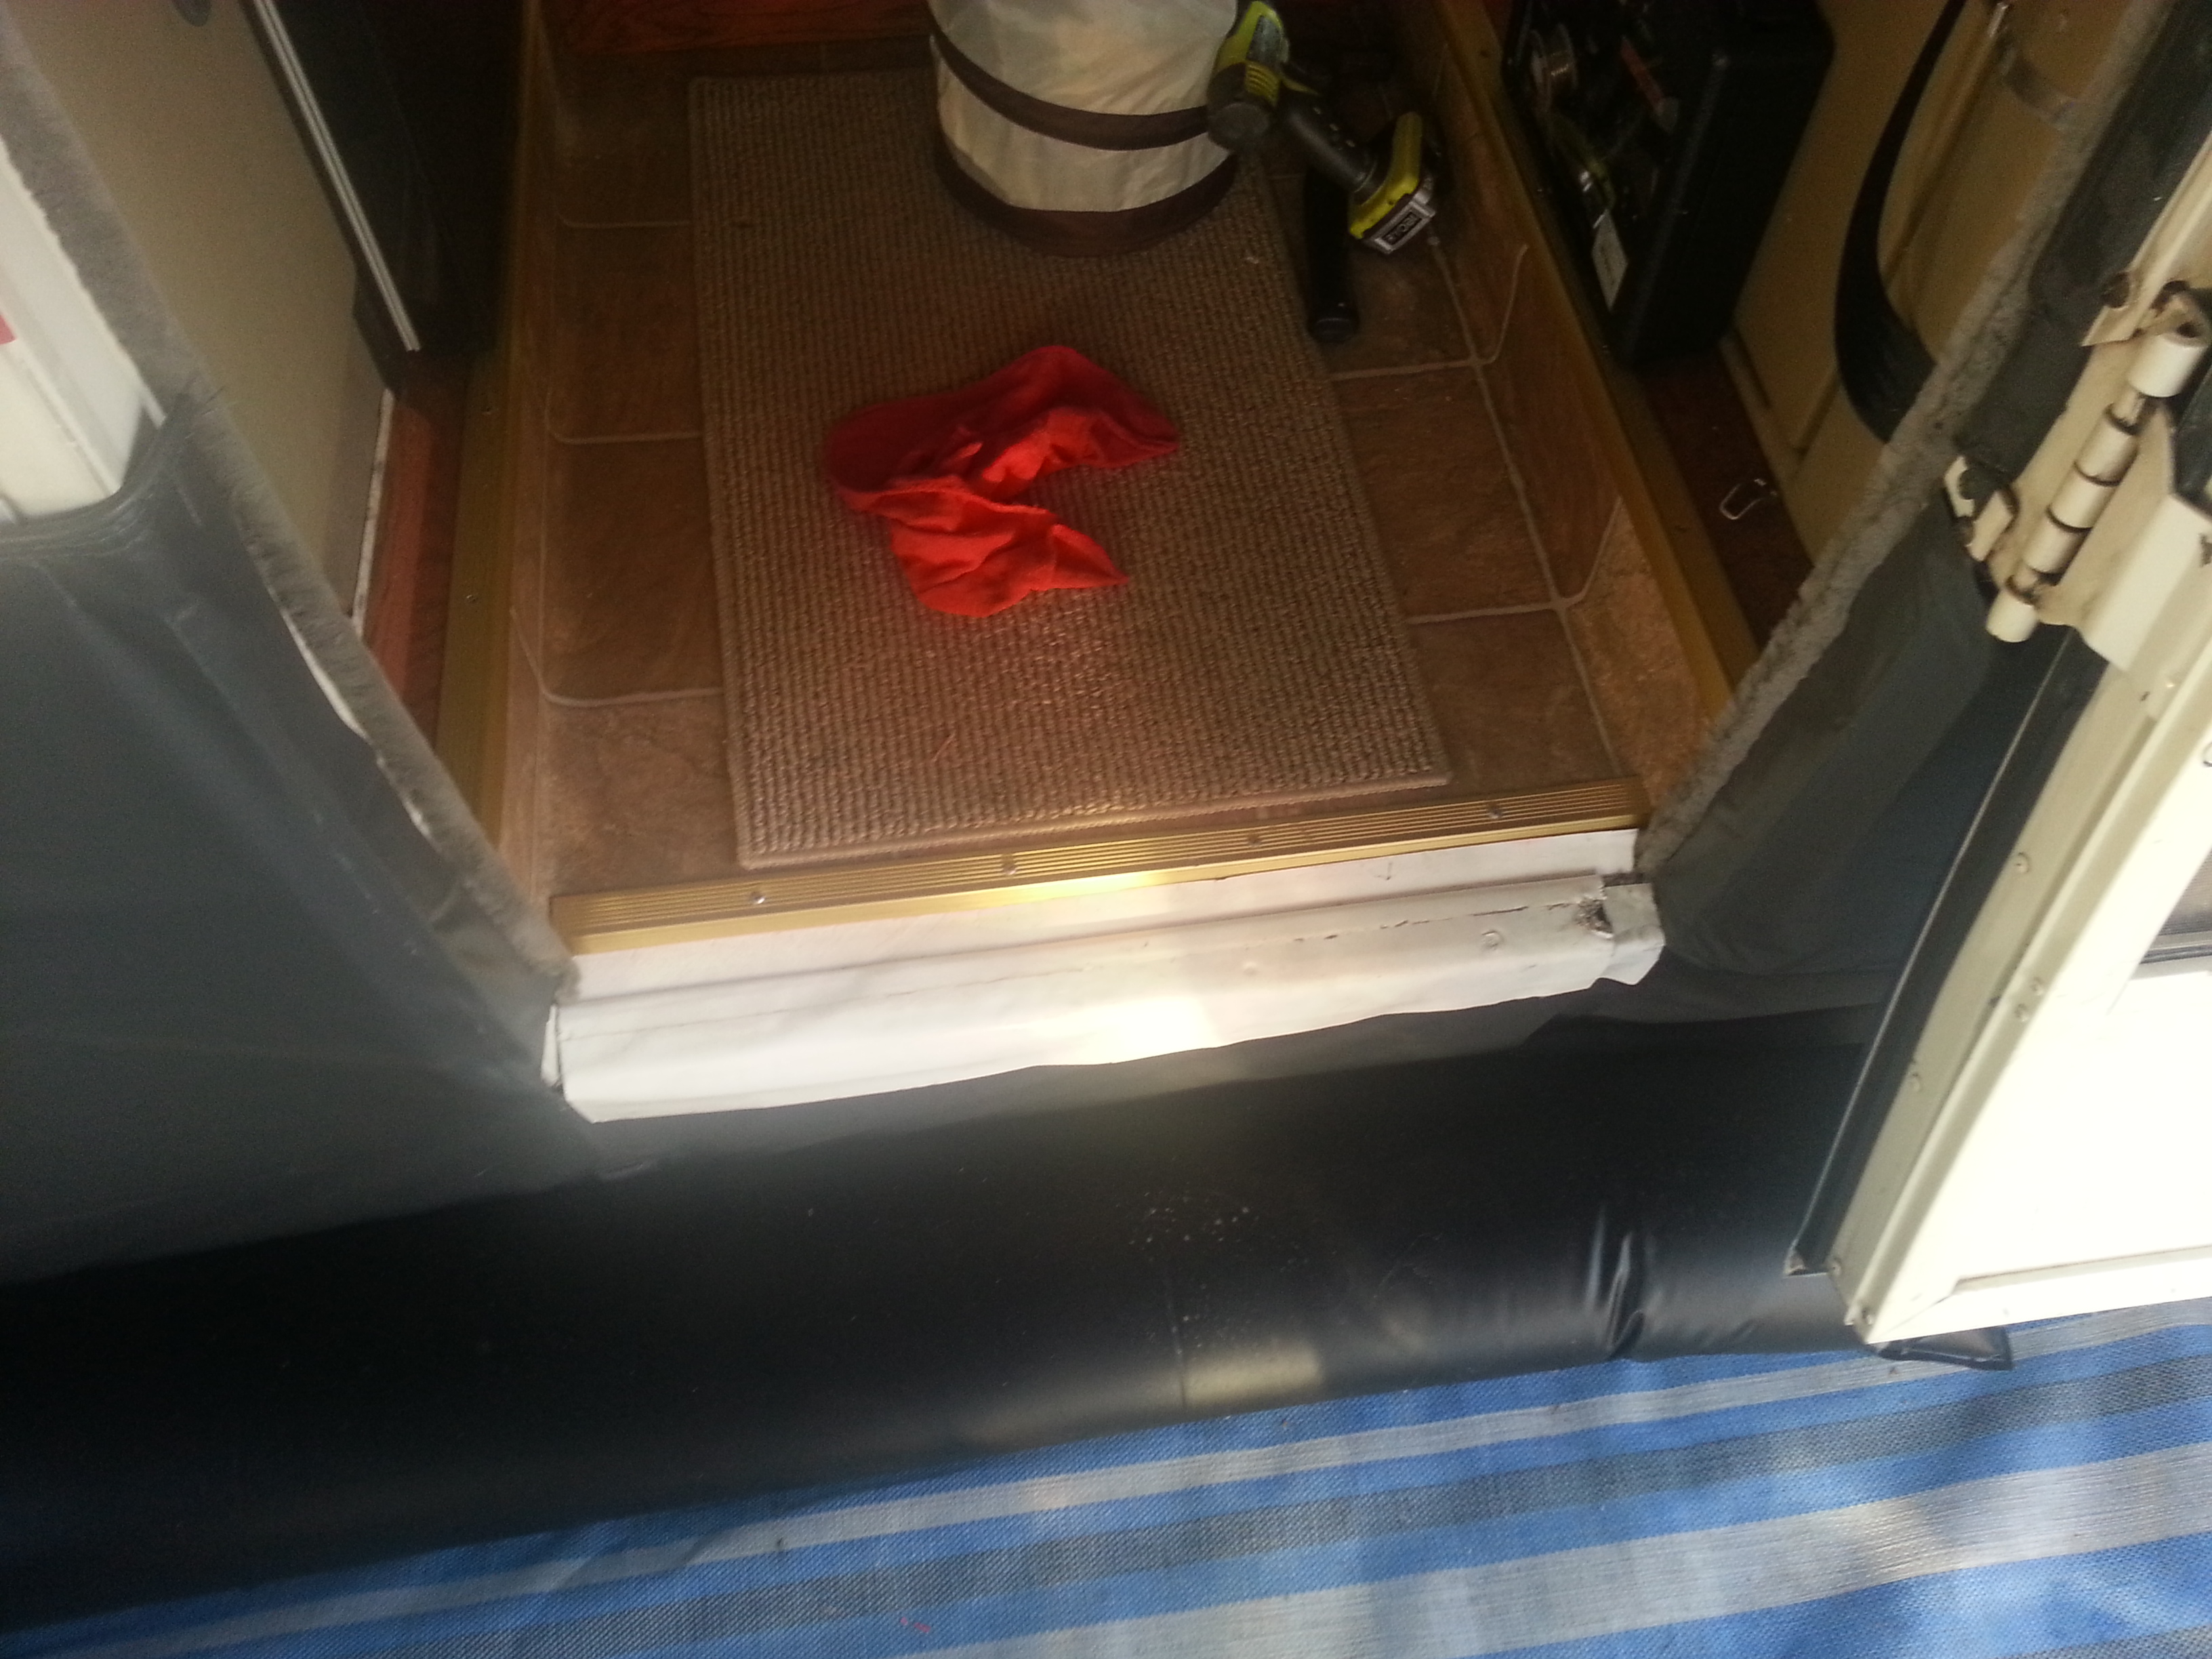
Lots of room in the add-on-room great place to park the scooter... The room more than doubles the living area of the Rialta. With 8X11 feet of un-interrupted floor space. I fold the extra length (almost 3 feet) of the walls inside the room then put a patio mat on top of that. This seals the room up tight and keeps you from tripping over the excess material.
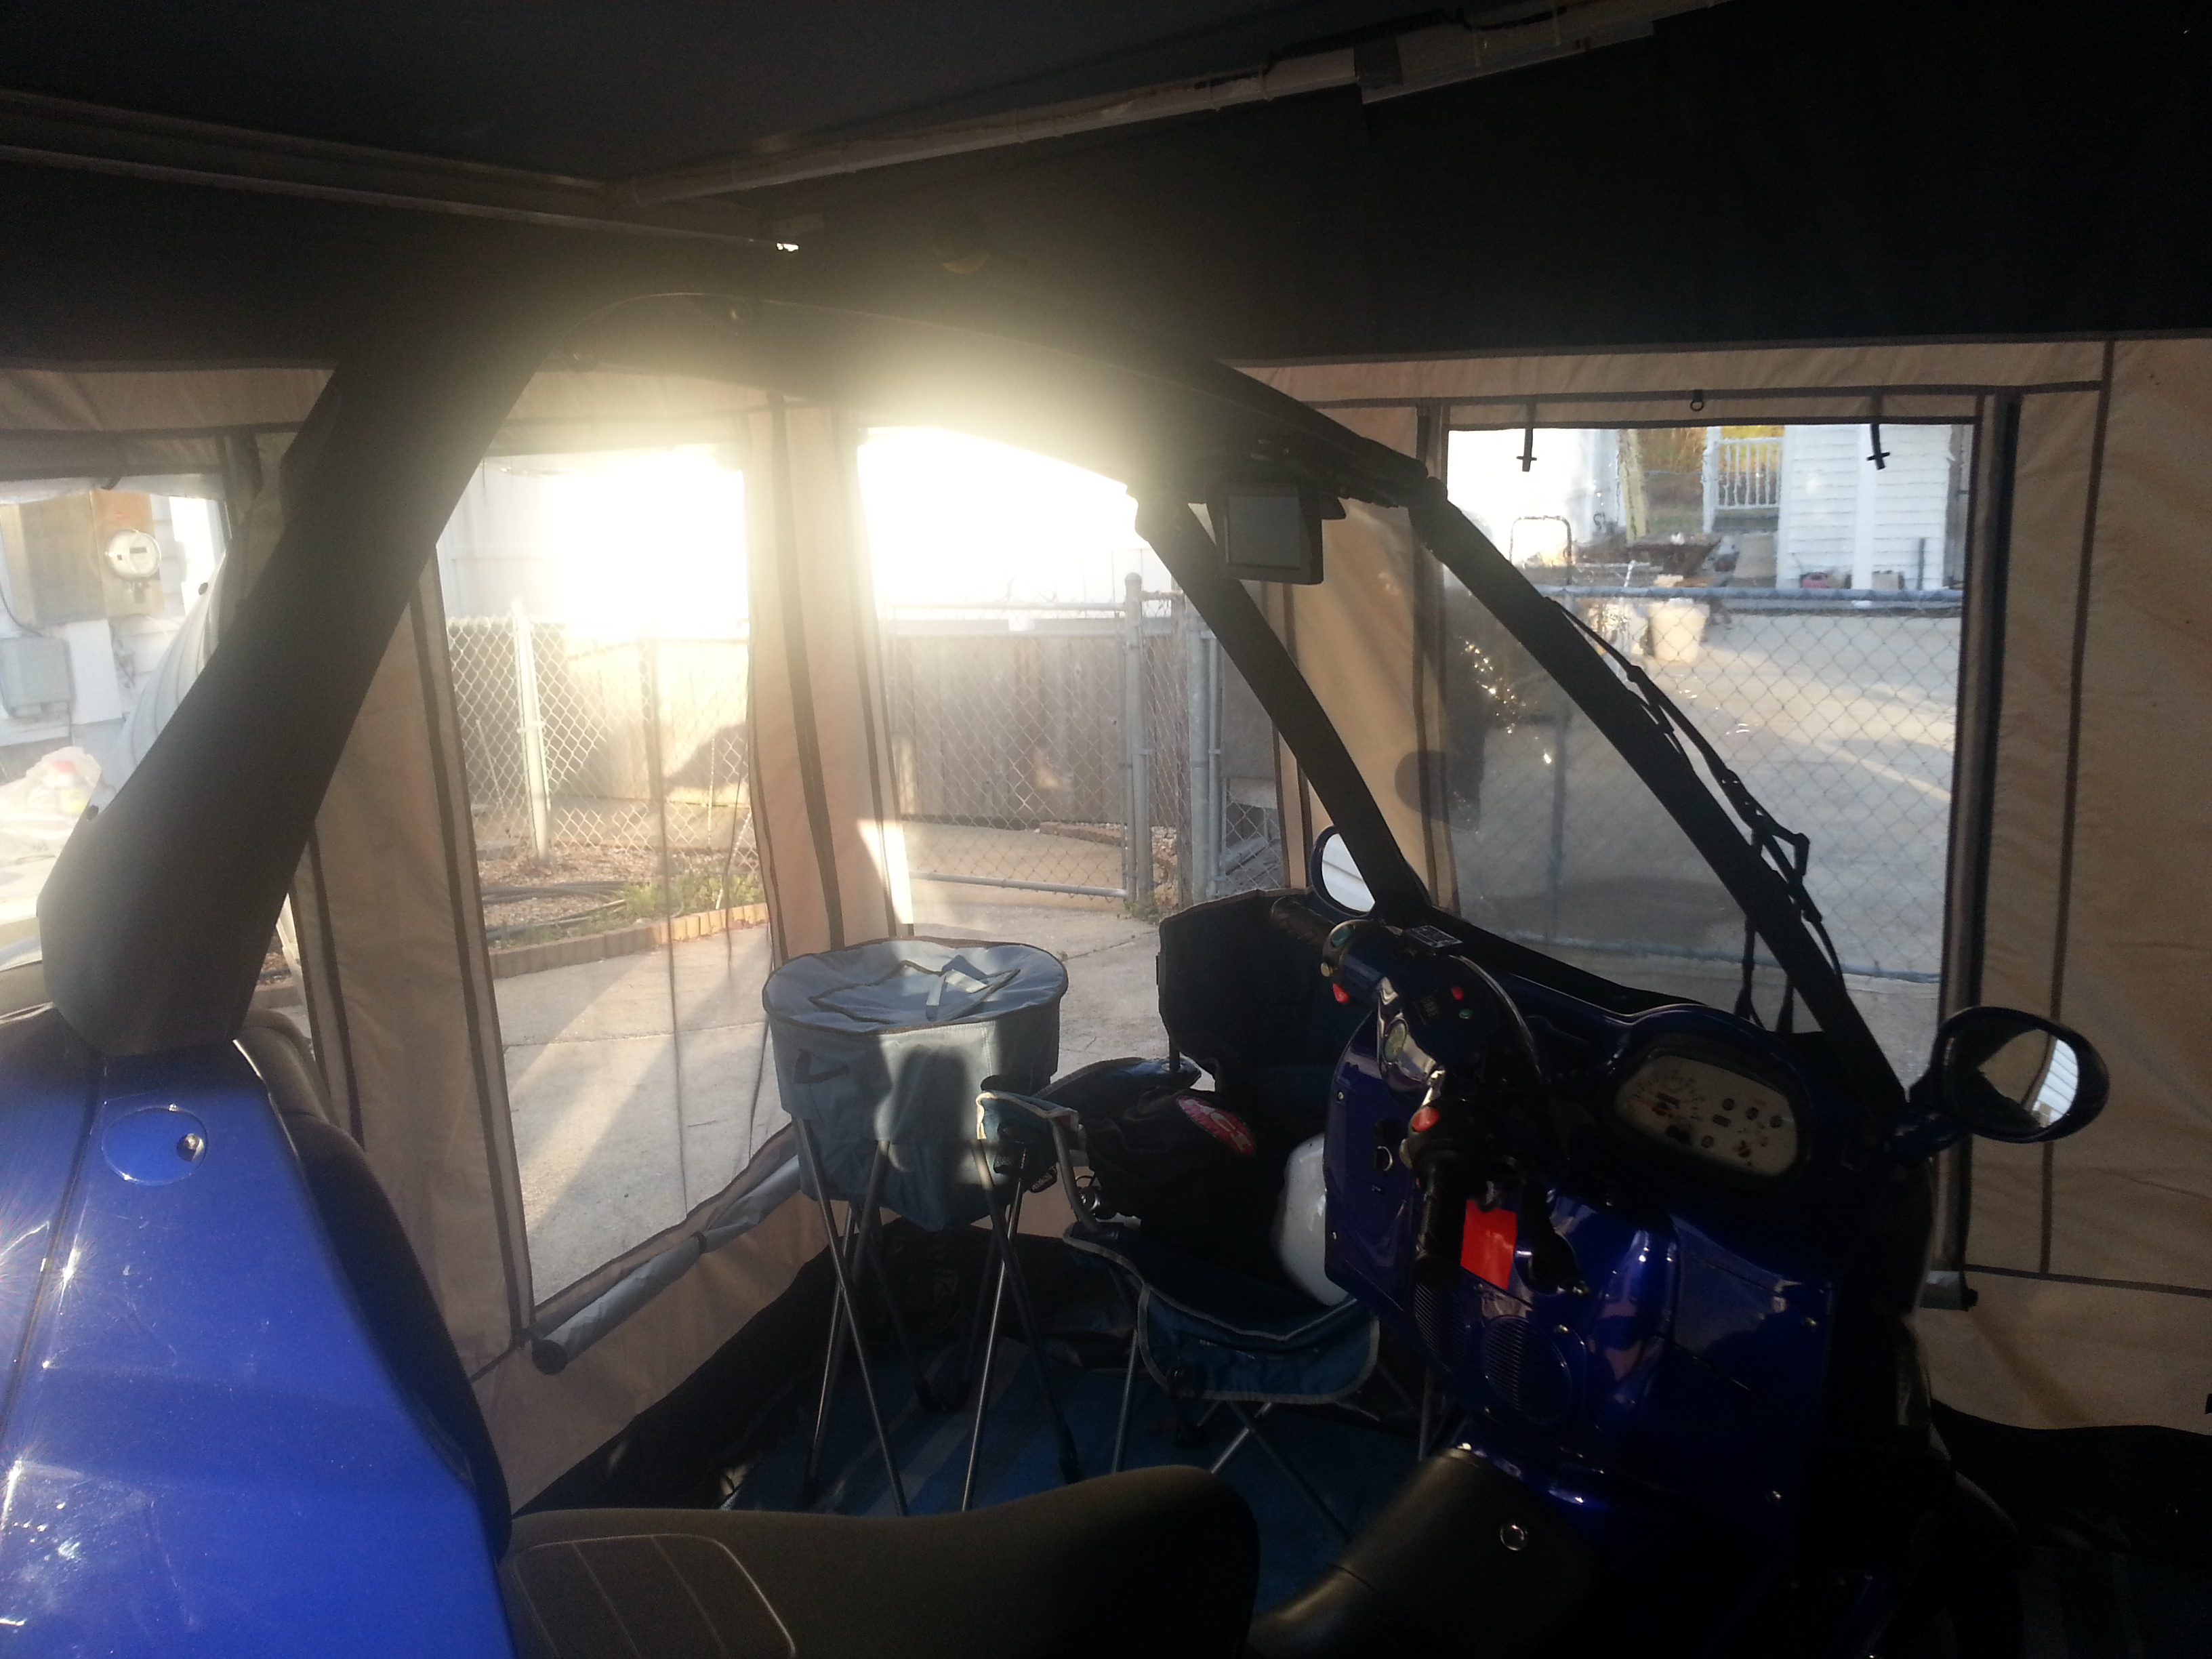

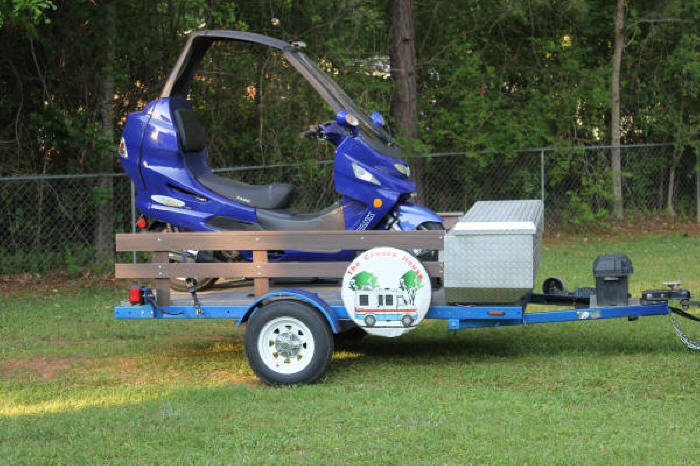
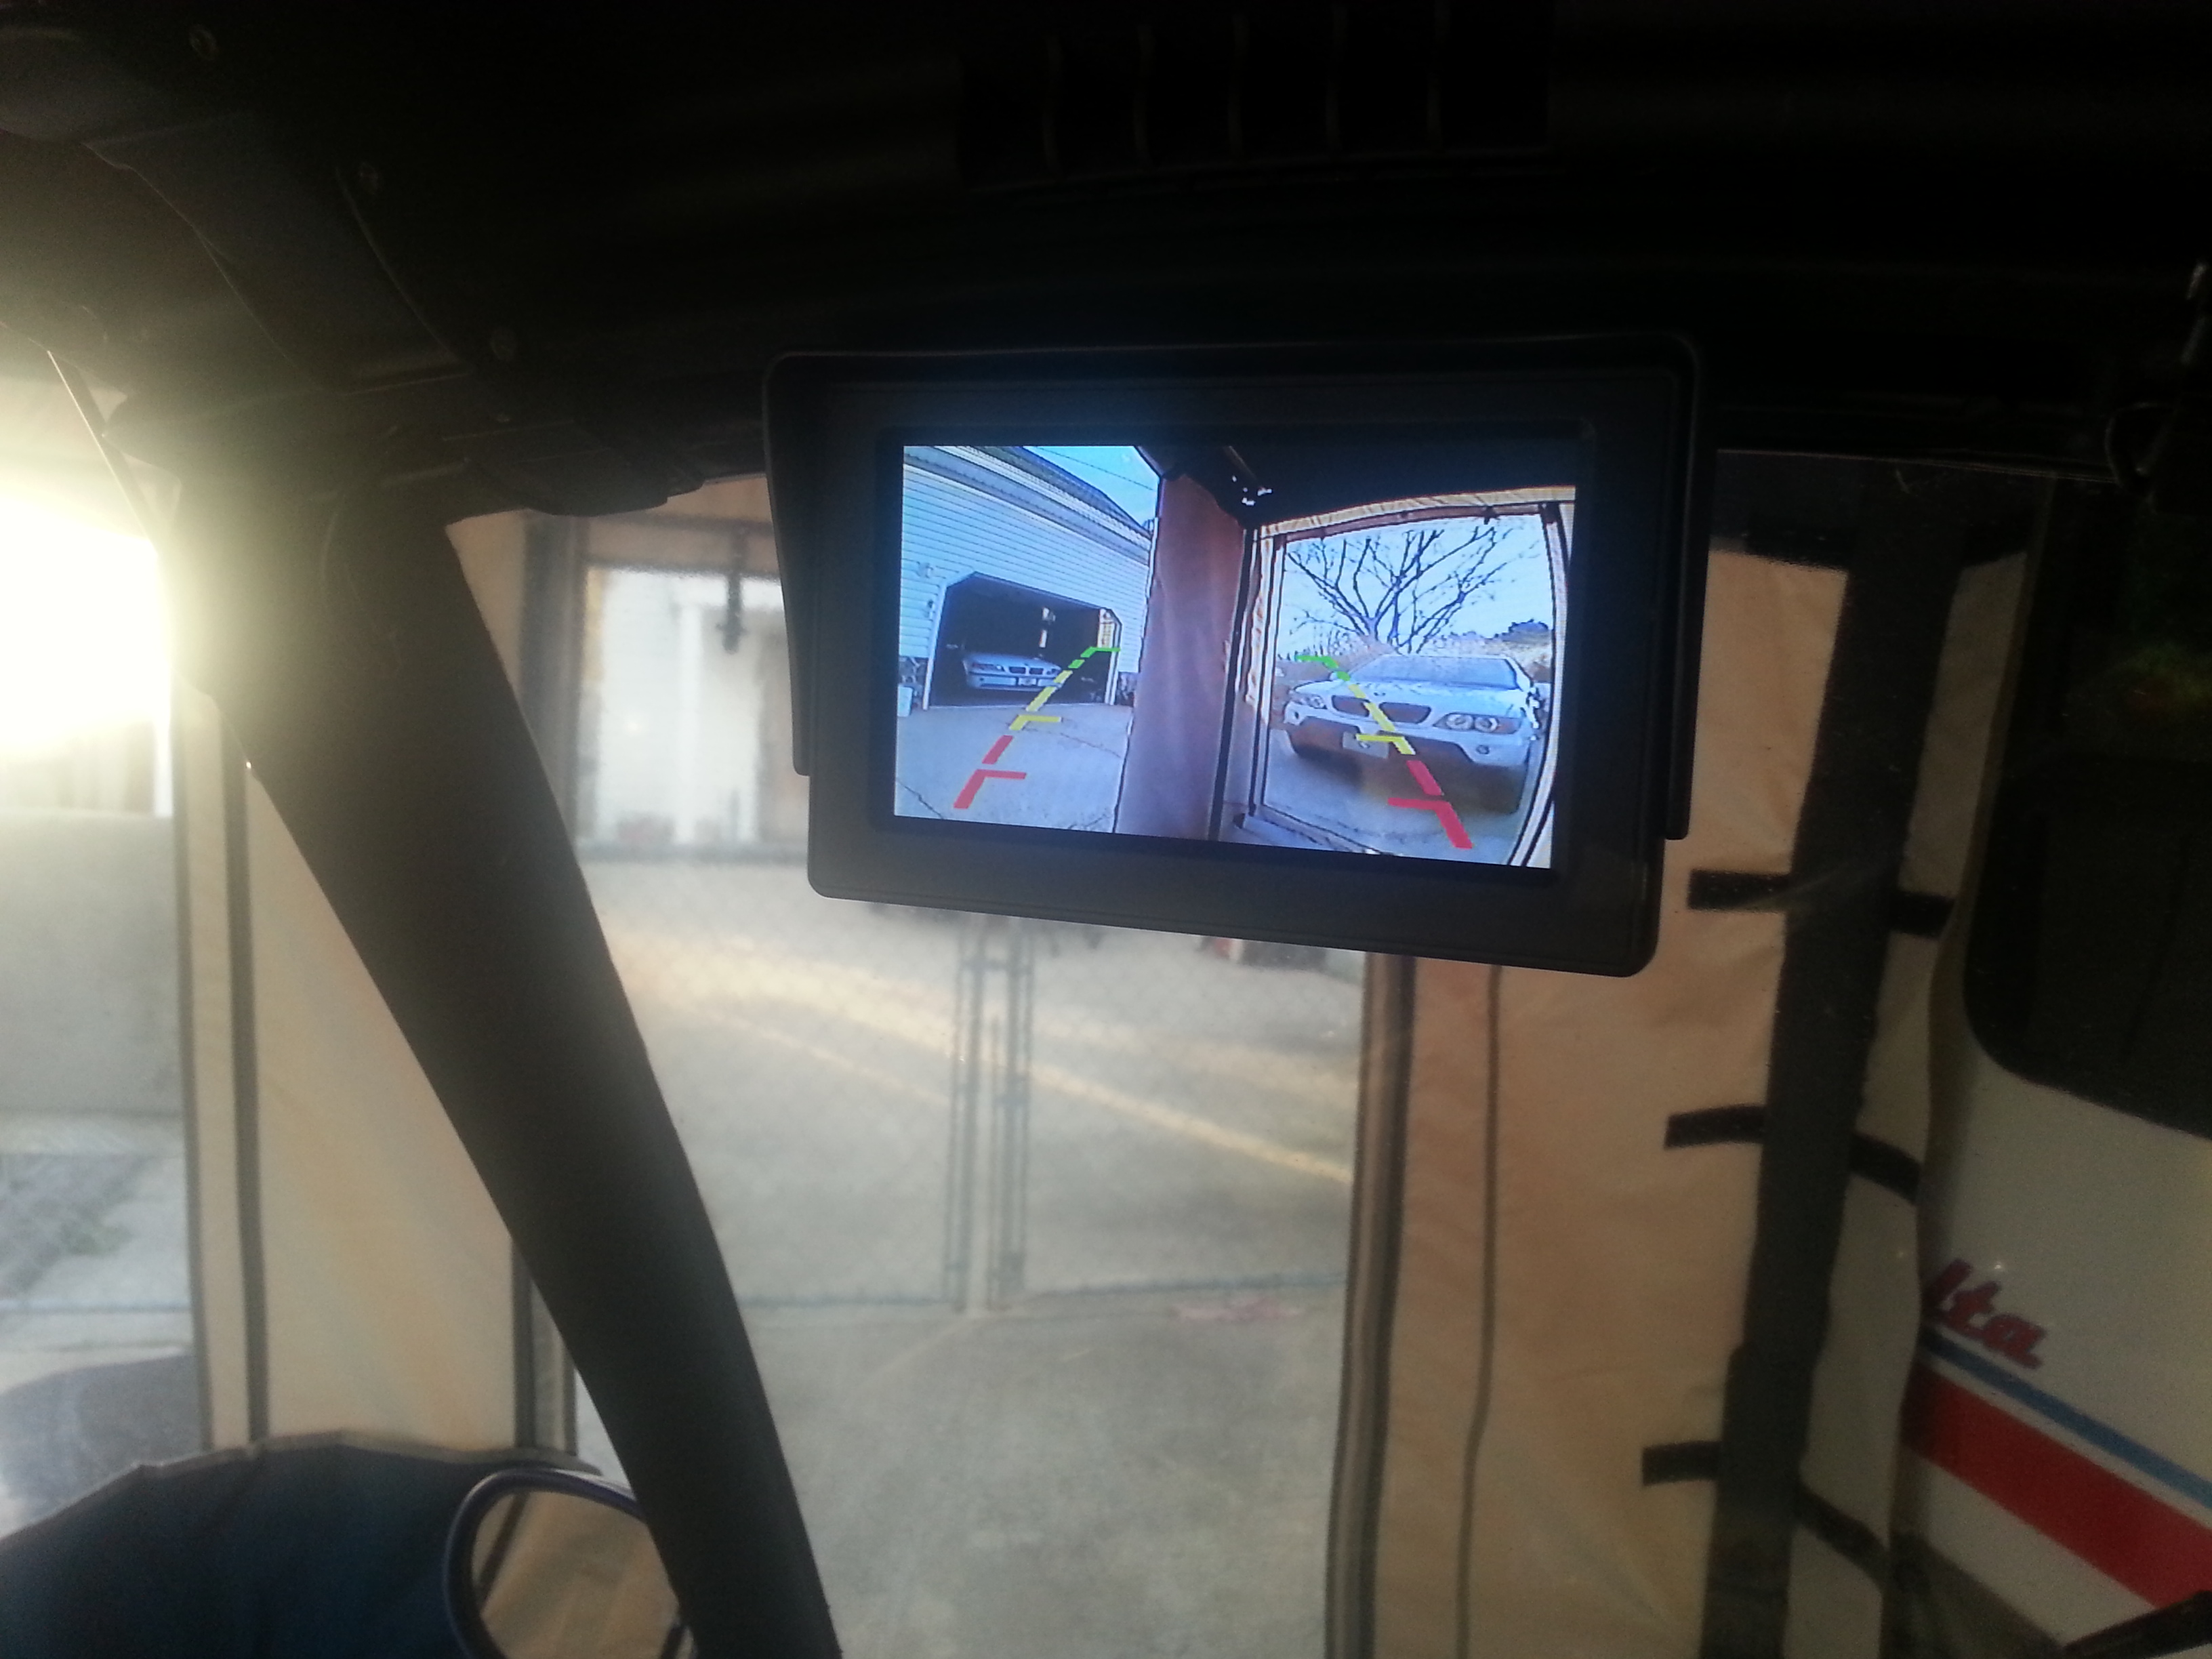
Speaking of the Scooter I went a little crazy and added a rear view camera to it. You really can't see directly behind you even with the side mirrors. I mounted the camera in the trunk and the little monitor to the windshield (it looks like a rearview mirror).
Friday 3-13-2015
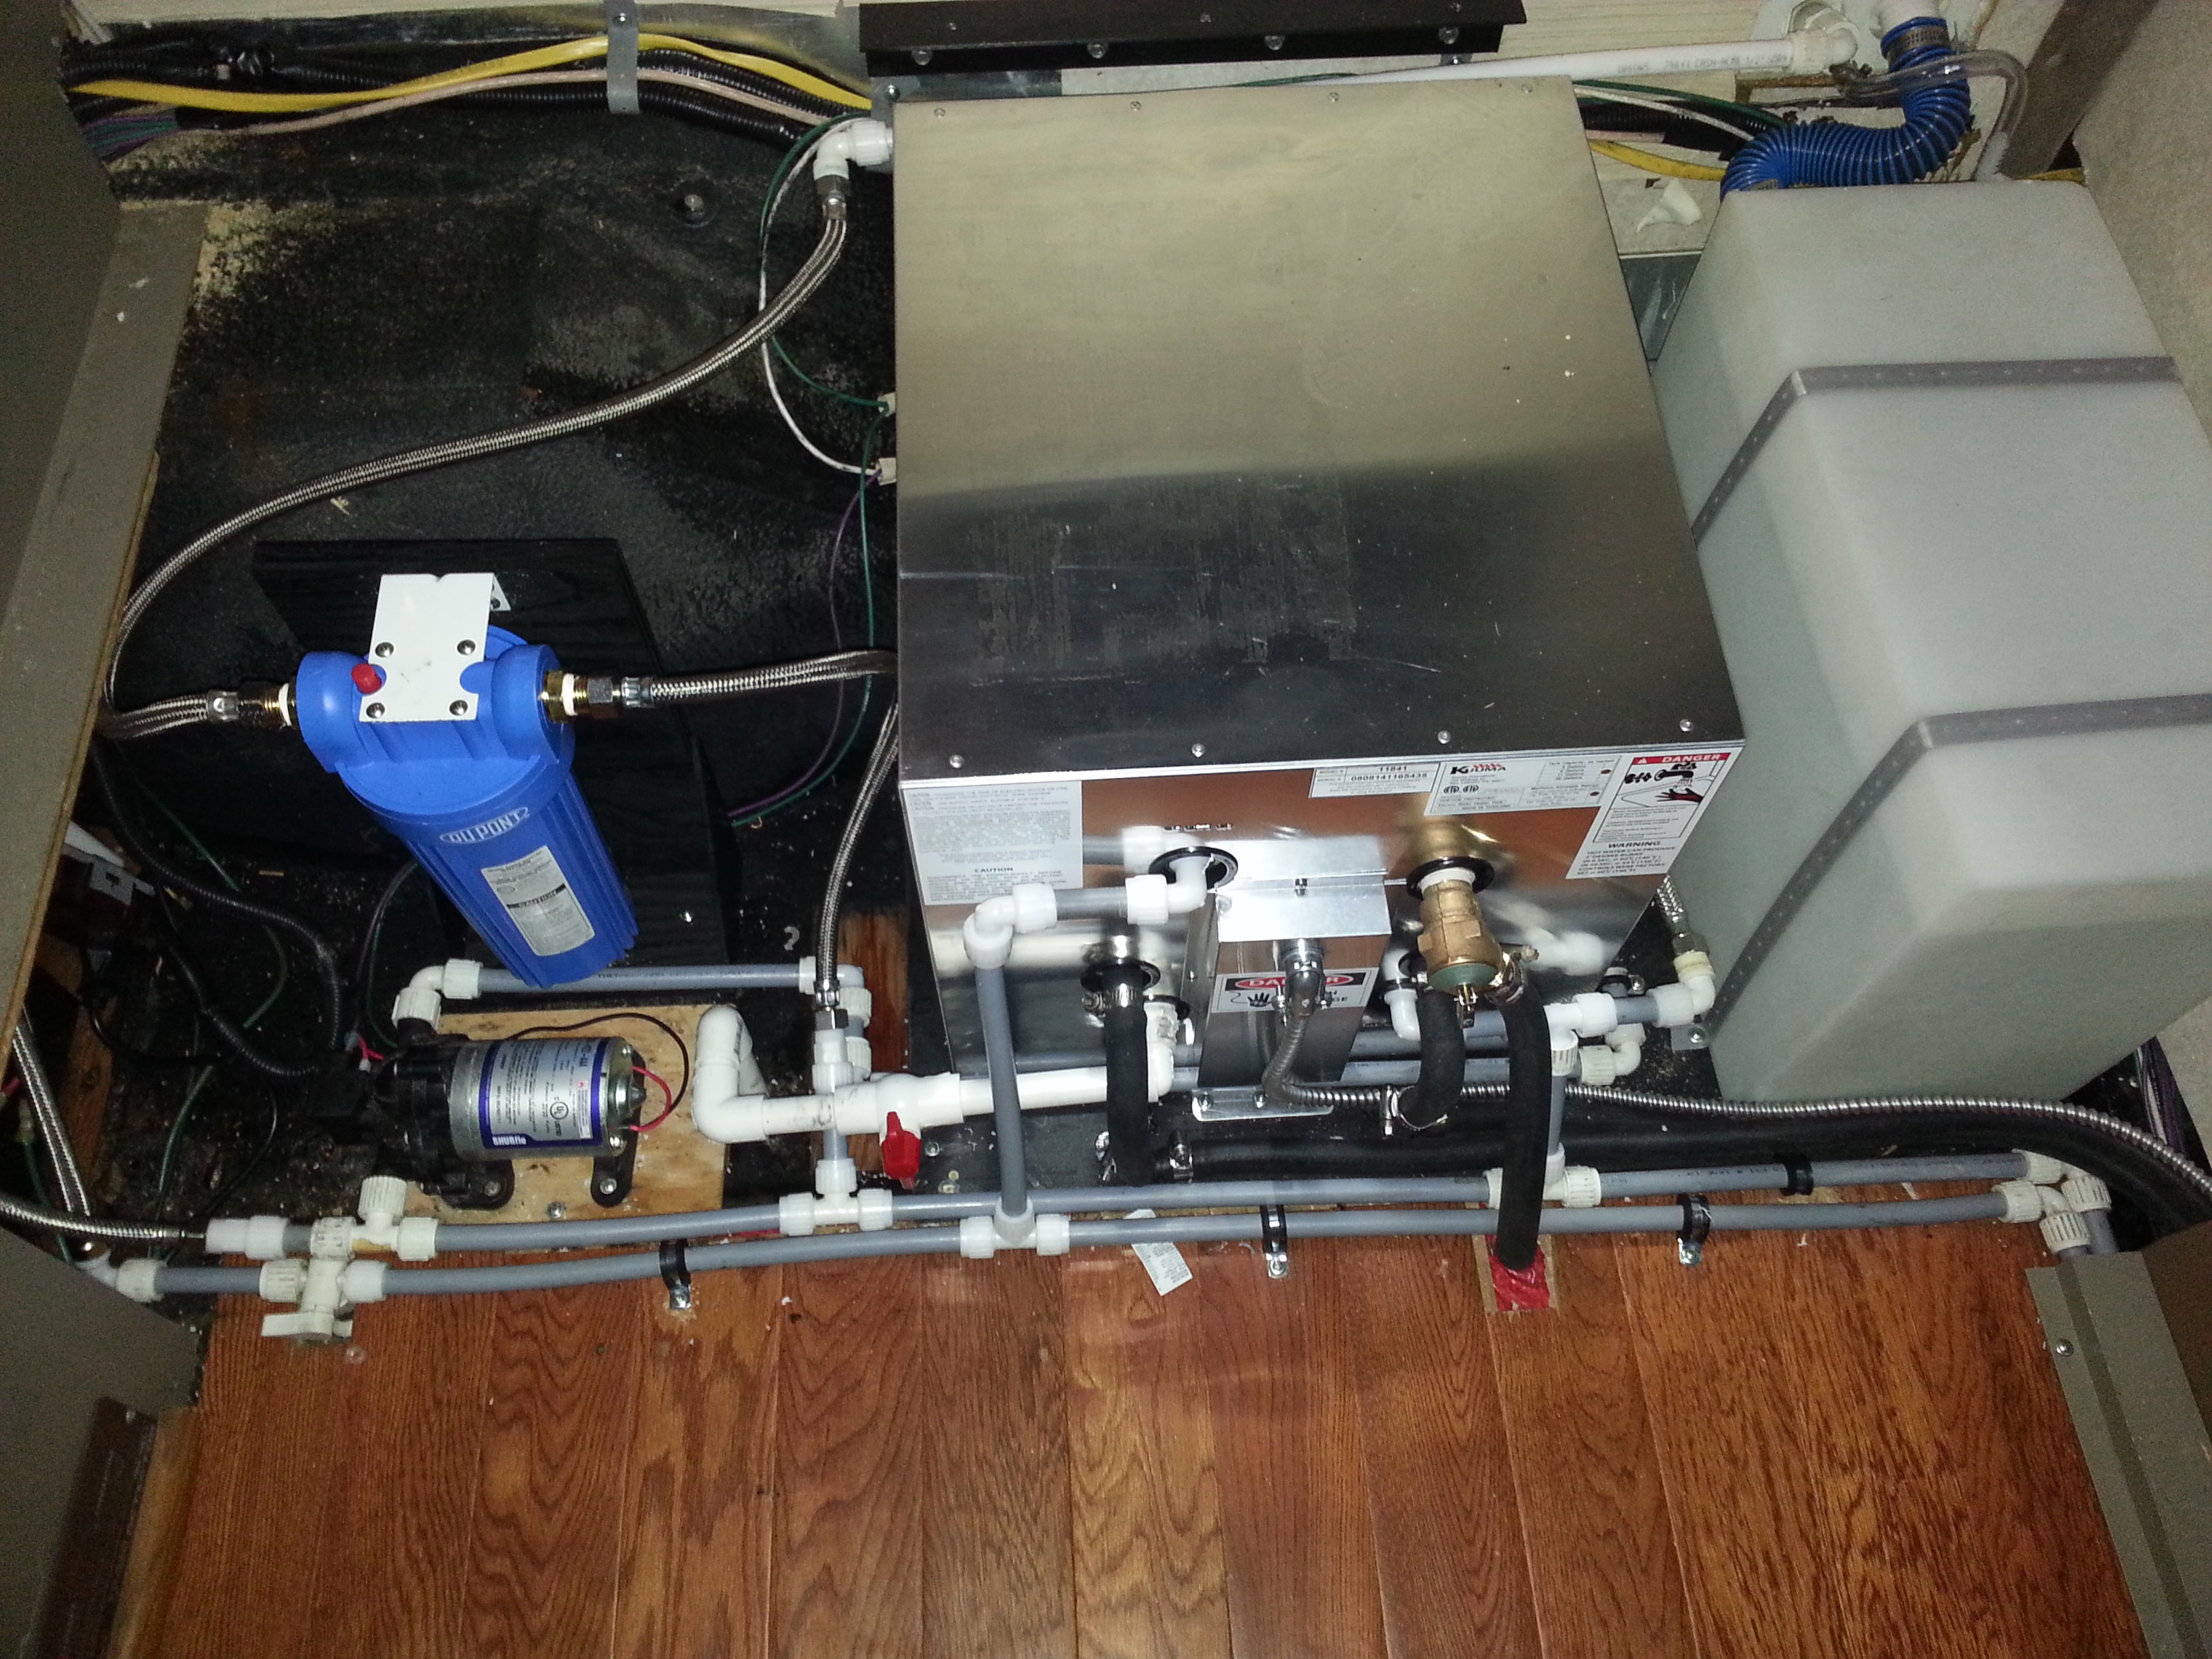
I finally got the water filter in and installed. It is a whole house filter that can filter 15,000 Gal. of incoming water. Since I can fill the fresh water tank from the city water connection the water in the fresh water tank will be filtered as it is filled! The filter is mounted to a wooden bracket I made. It is easy to get to and change the cartage by removing the kick panel under the seat.
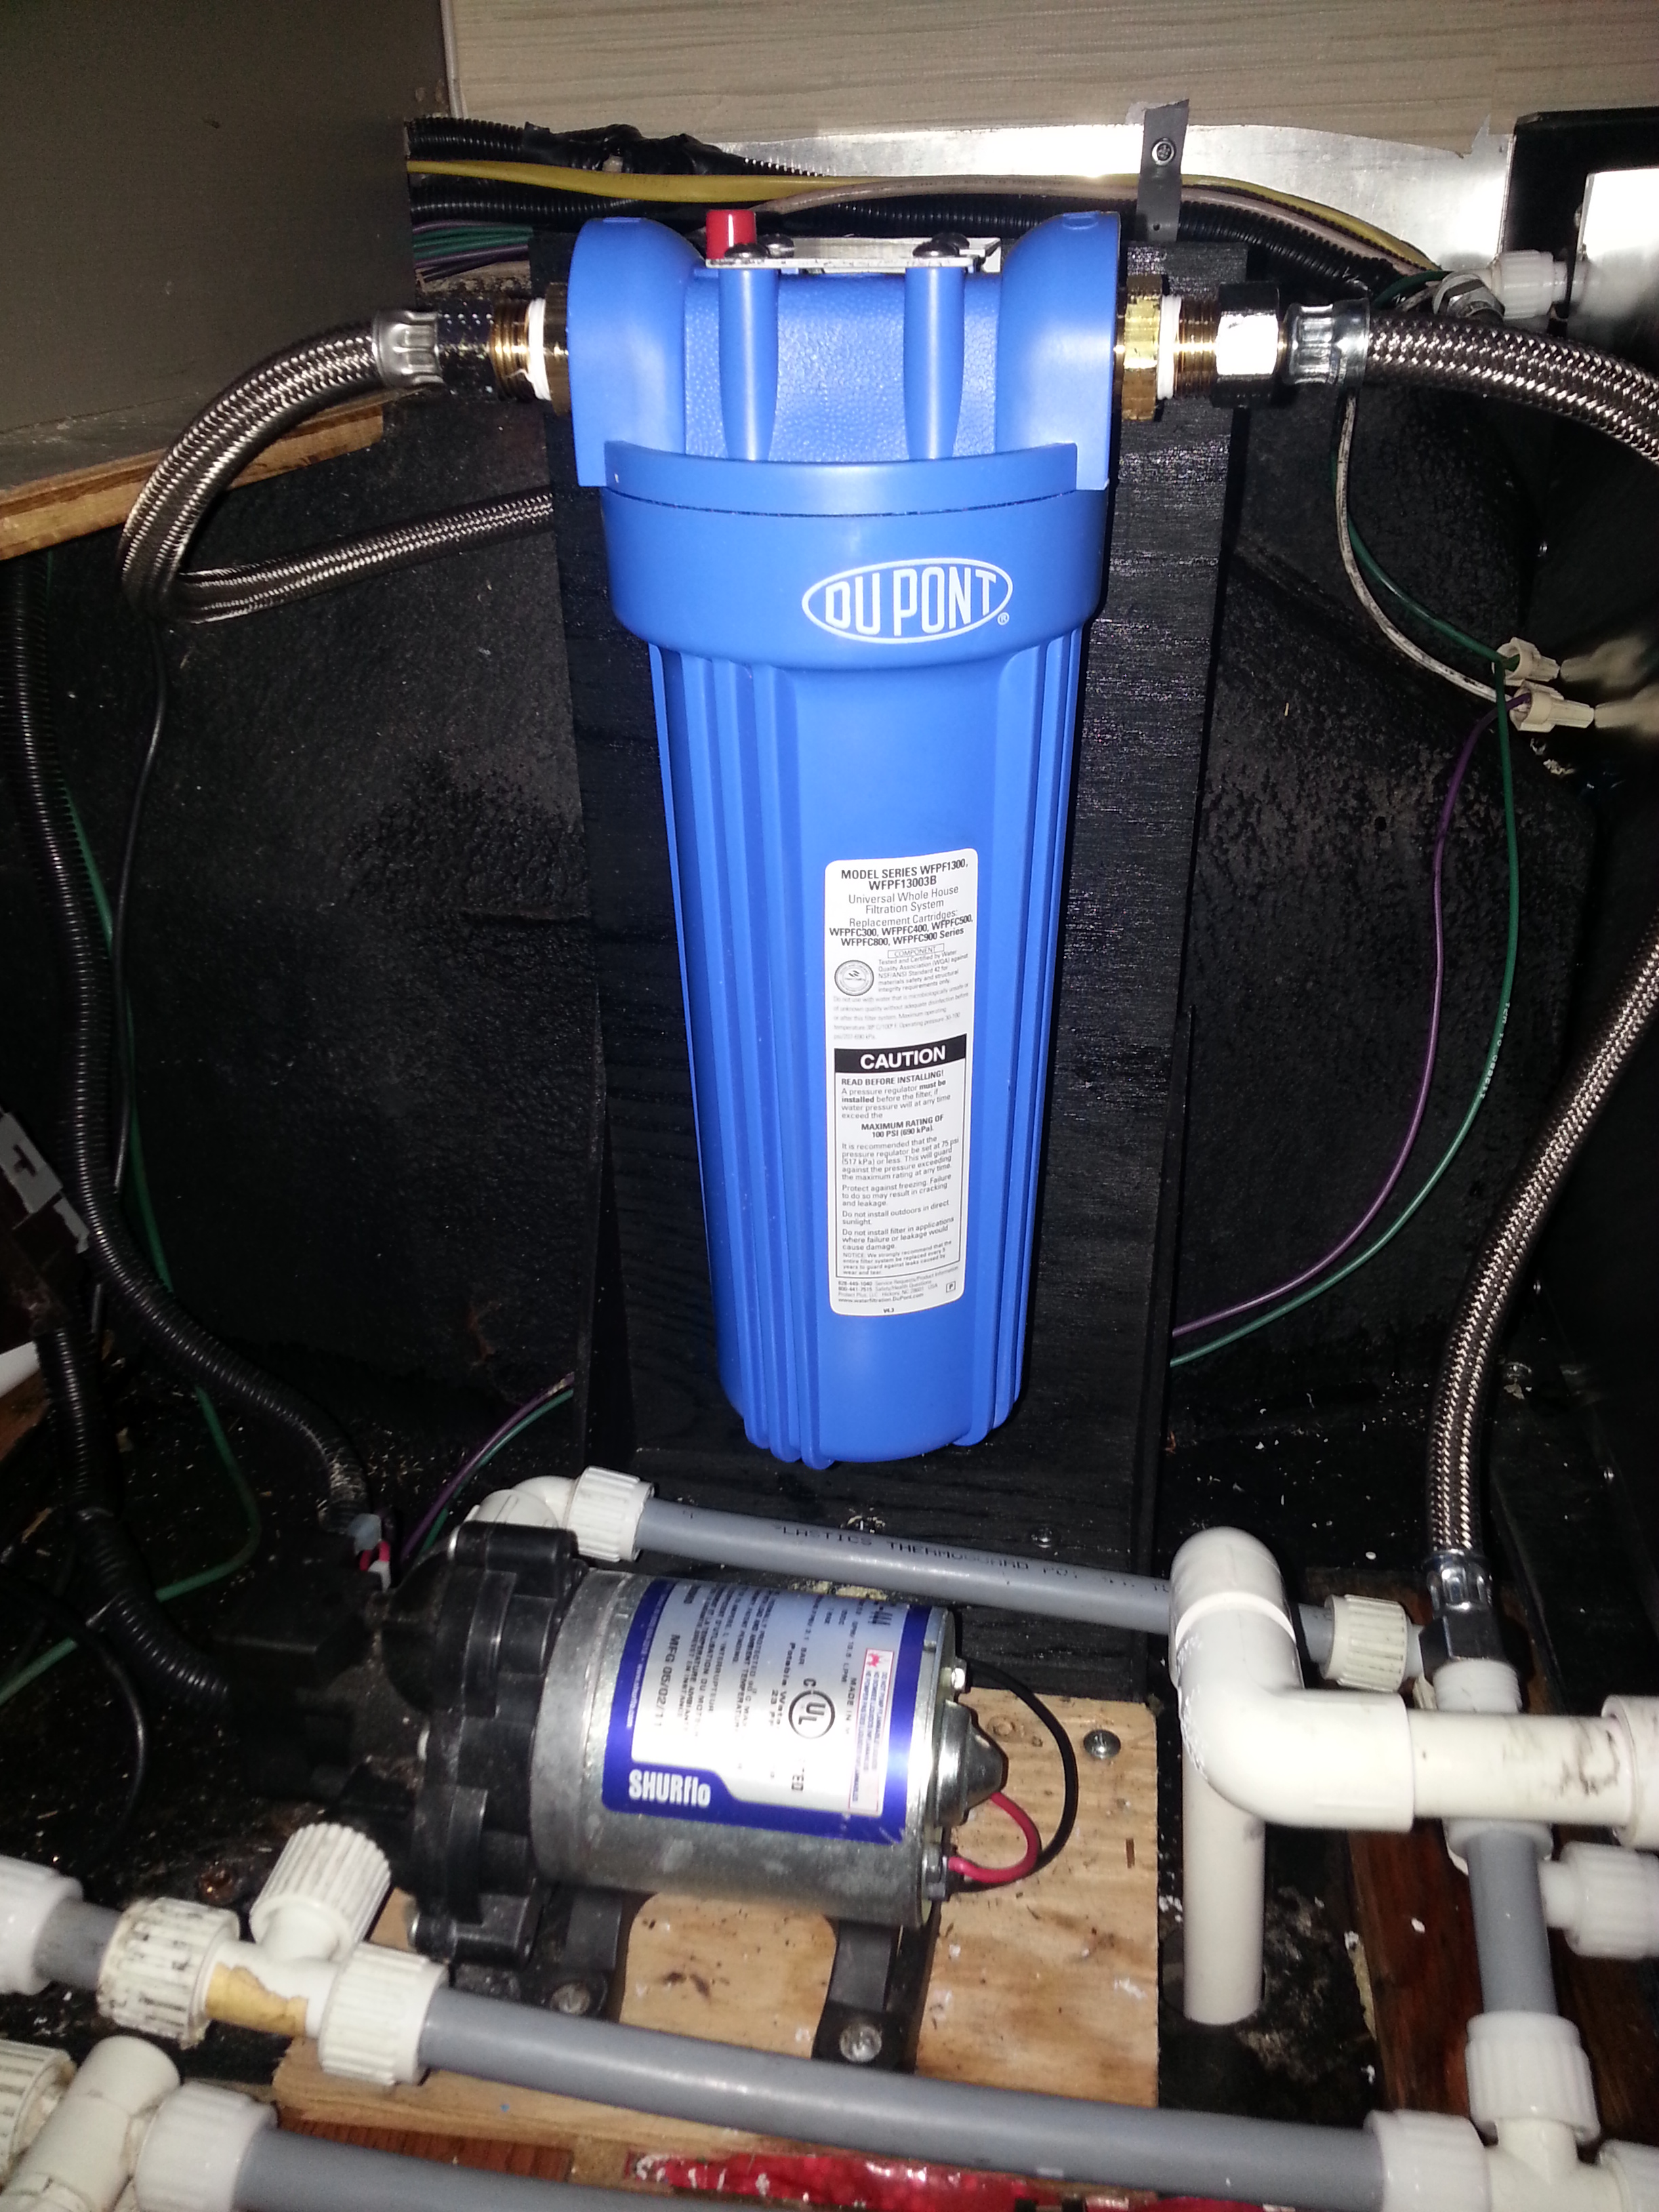
This looks a lot like the plumbing on a Submarine!
I also wallpapered the back of the Rialta with the same simulated grass cloth that I had used on the bathroom. I took down all the cabinets and the rear shelf (it needed some fixing because of some split mounting wood). I also added an upholstered section to the area below the table it covers the plumbing where it passes to and from the water heater.
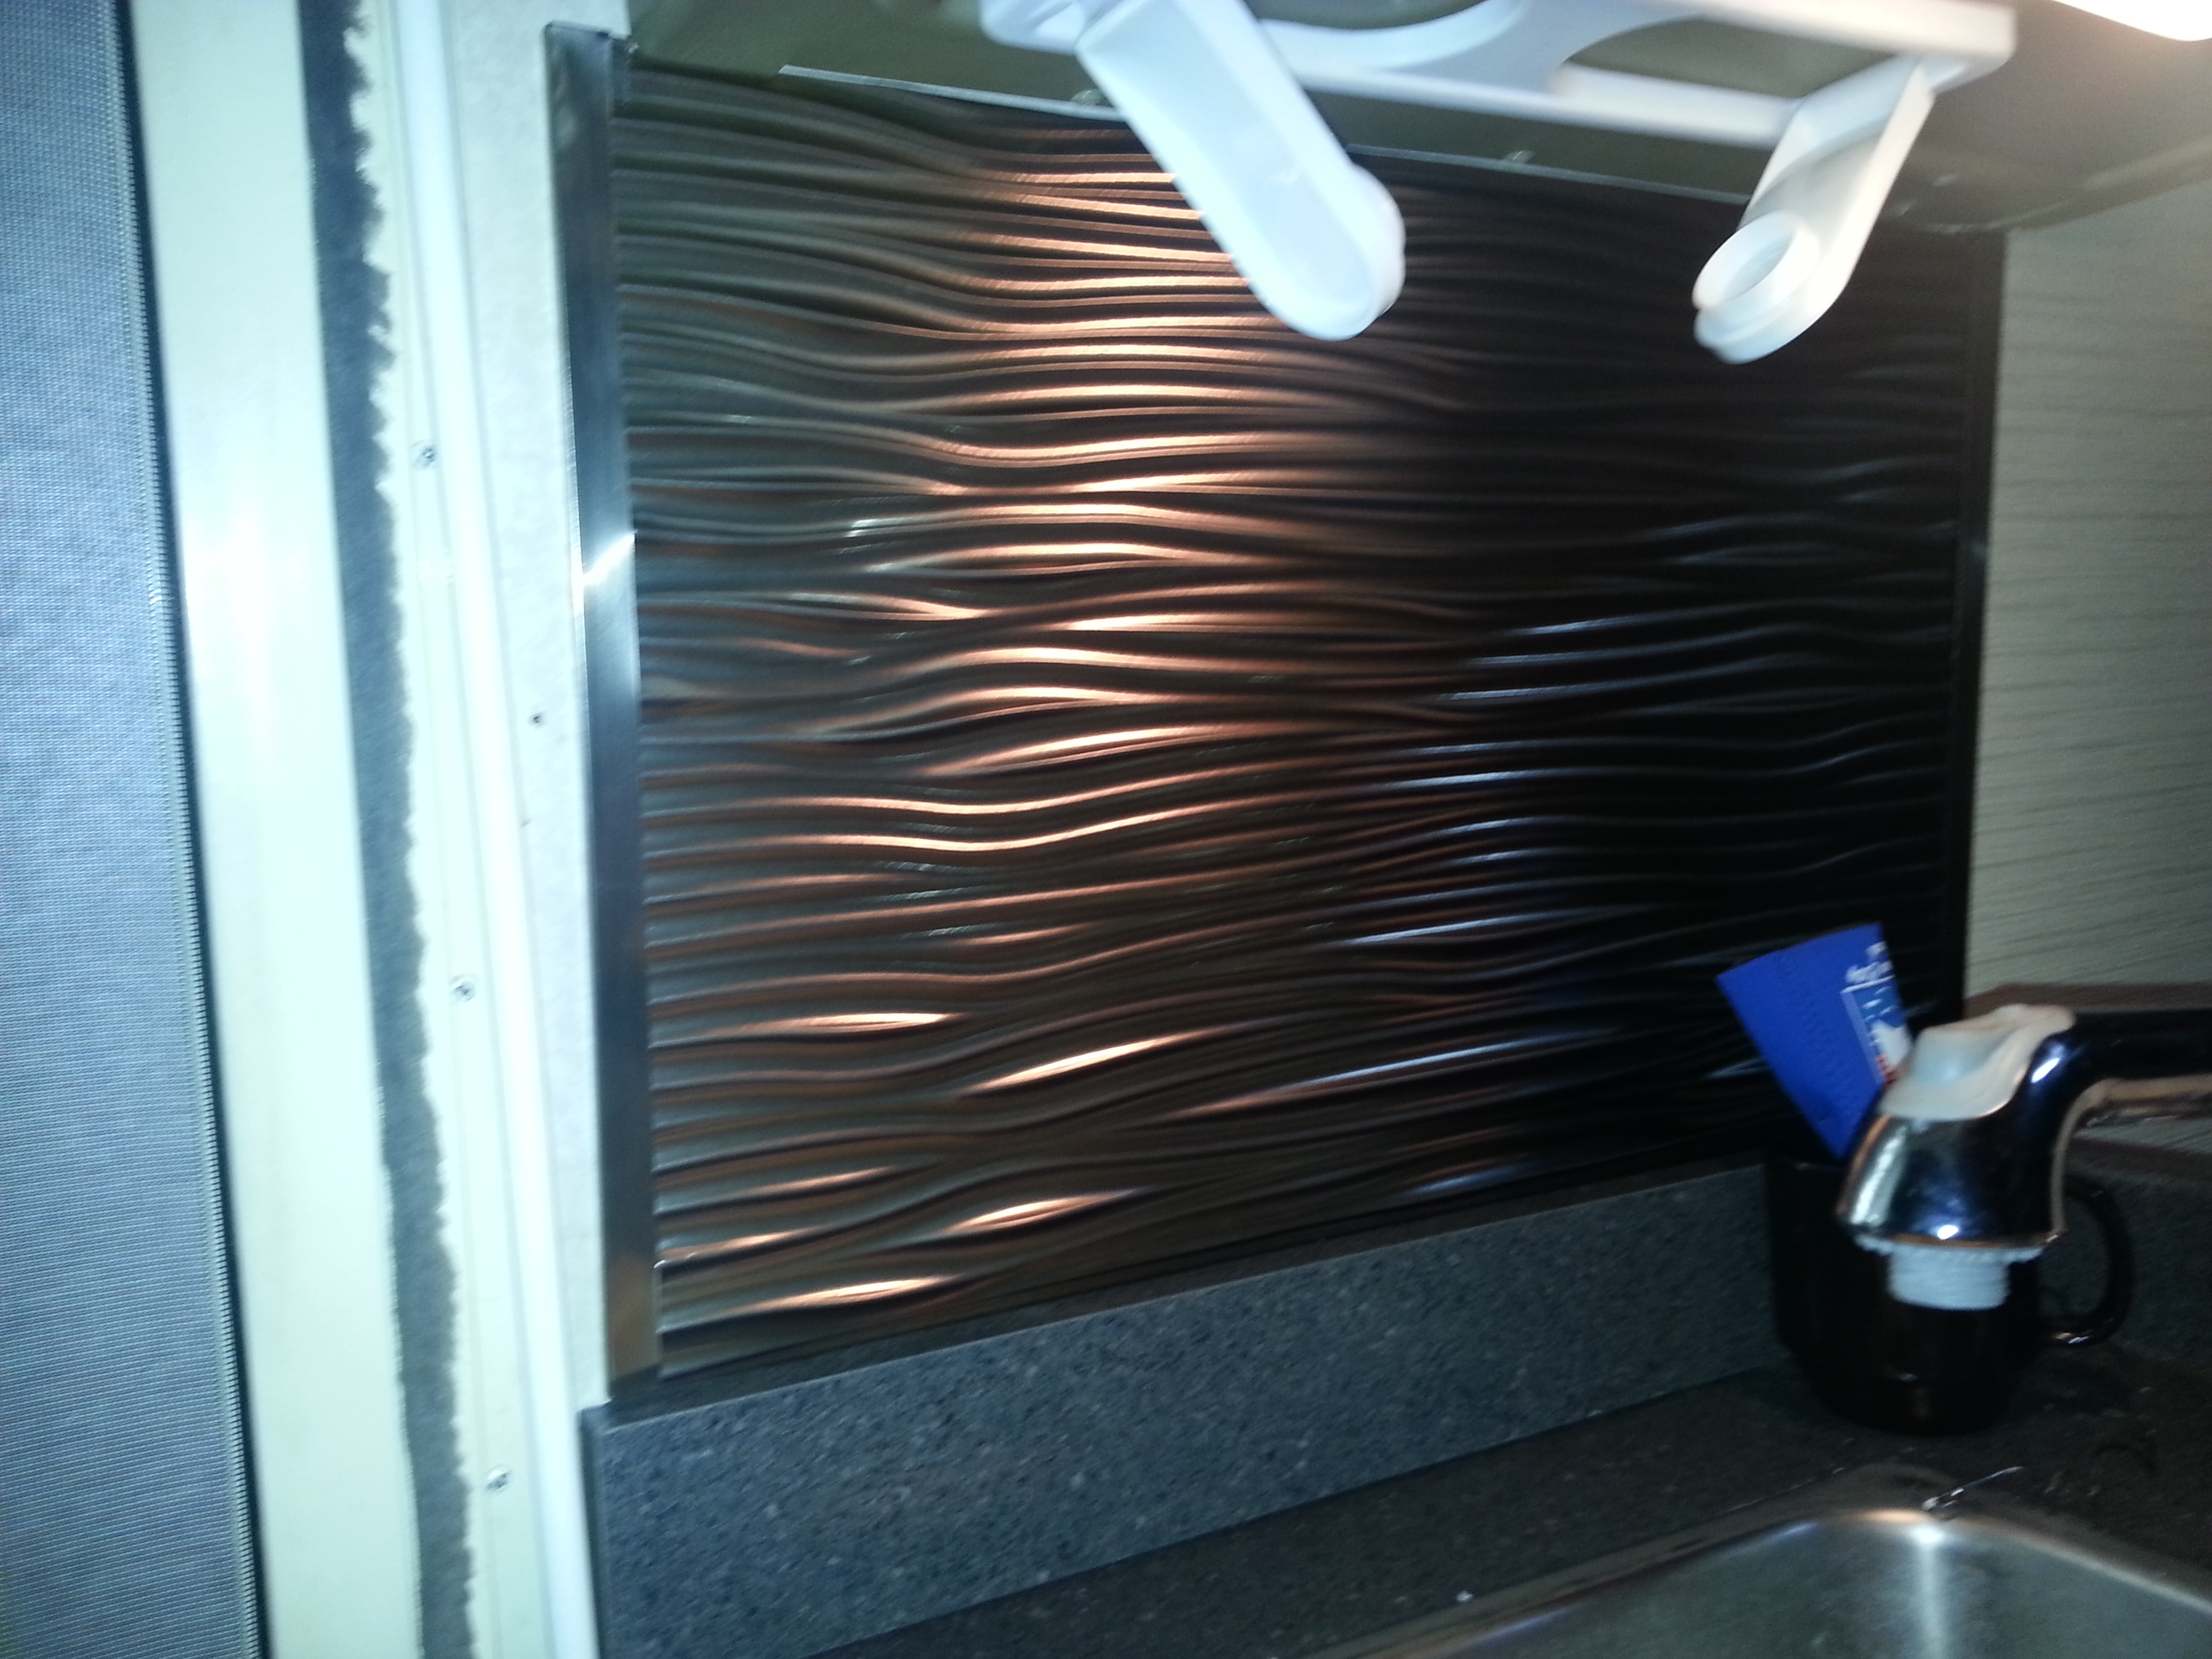
I also added a backsplash to the left of the sink. It is made of plastic and goes up with double stick tape.
Monday 3-10-2015
I received the electric wall heater from Home Depot today along with a few of the plumbing connectors that I was missing. I also made a Poe run and picked up a few thing to finish up the electrical to both the water heater and the room heater.
Ran flex cable to the water heater installed the drain line and the over flow (Pop Off Valve). Using the 90 degree ends on the Flex cable made the wiring nice and neat! I also decided to install a filter on the city water hookup and add the ability to fill the tank using the city water connection. This will also filter the water going in the tank when filled this way. To do this I used the 3rd inlet on the tank ran a line from the cold water inlet thru a cutoff valve then into the tank. Connect a hose to the city hookup turn on the valve and the tank will fill up FAST! I will be able to get to the valve from outside via the compartment door and I can watch to see when the tank is full. I hope to wrap up the plumbing tomorrow and test the system for leaks.
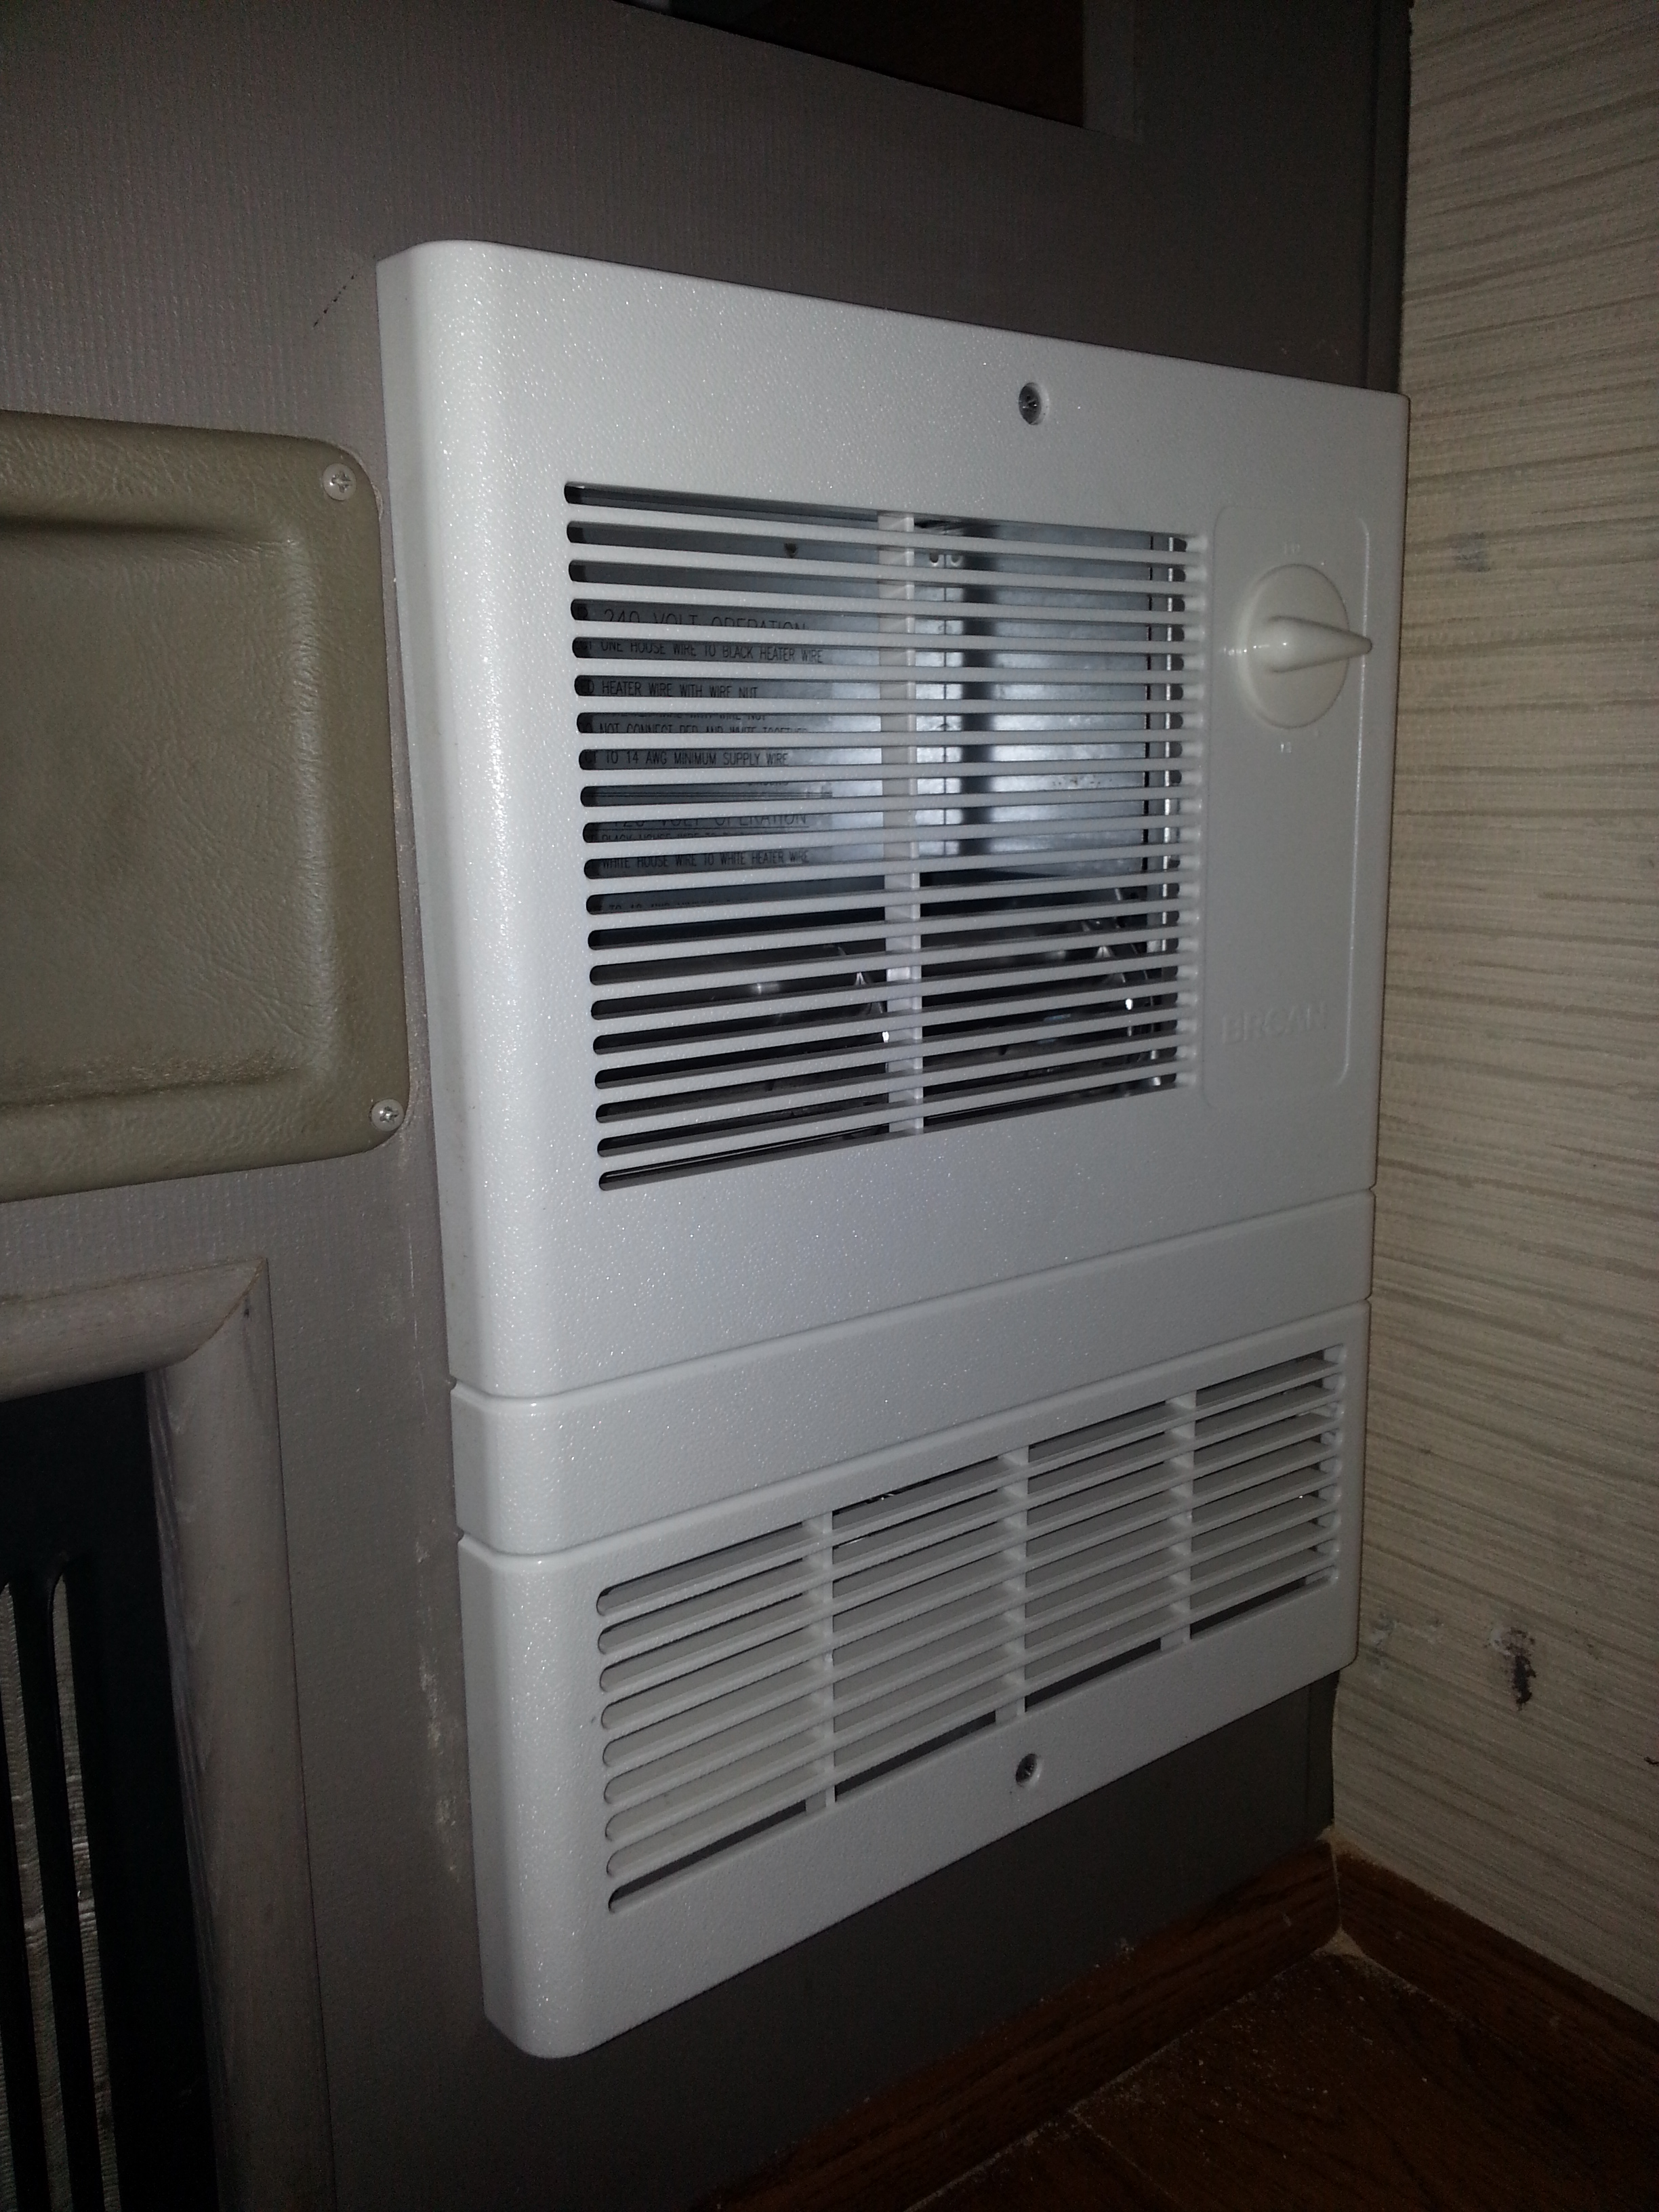
The new wall heater went where the old LP one was, just had to make the opening a little larger. I ran the power from the heater to the breaker box using Flex cable. I connected it to the breaker for the AC my thinking was you would not run the AC and the heat at the same time. However you can run the AC fan on low to circulate the heat thru-out the motorhome. The heater has a thermostat control and it gets HOT! it will run you out of the Rialta.
Here you can see the back of the space heater. It is only 4 inches thick and it fit perfect where the old unit was.
Sunday 3-8-2015
After a quick trip to Home Depot and the Auto Parts store I got back on the Rialta. I finished the new stove up last week and have had it inside so the paint could cure. I converted the gas range to an induction cooktop. I have had the cooktop for over a year and have been using it in the Rialta. We kept it stored in its carrying case in the closet. It took a little trimming of the metal frame and the addition of a Formica covered bottom and a tight fitting Formica filler to install the Nu-wave cooktop permanently.
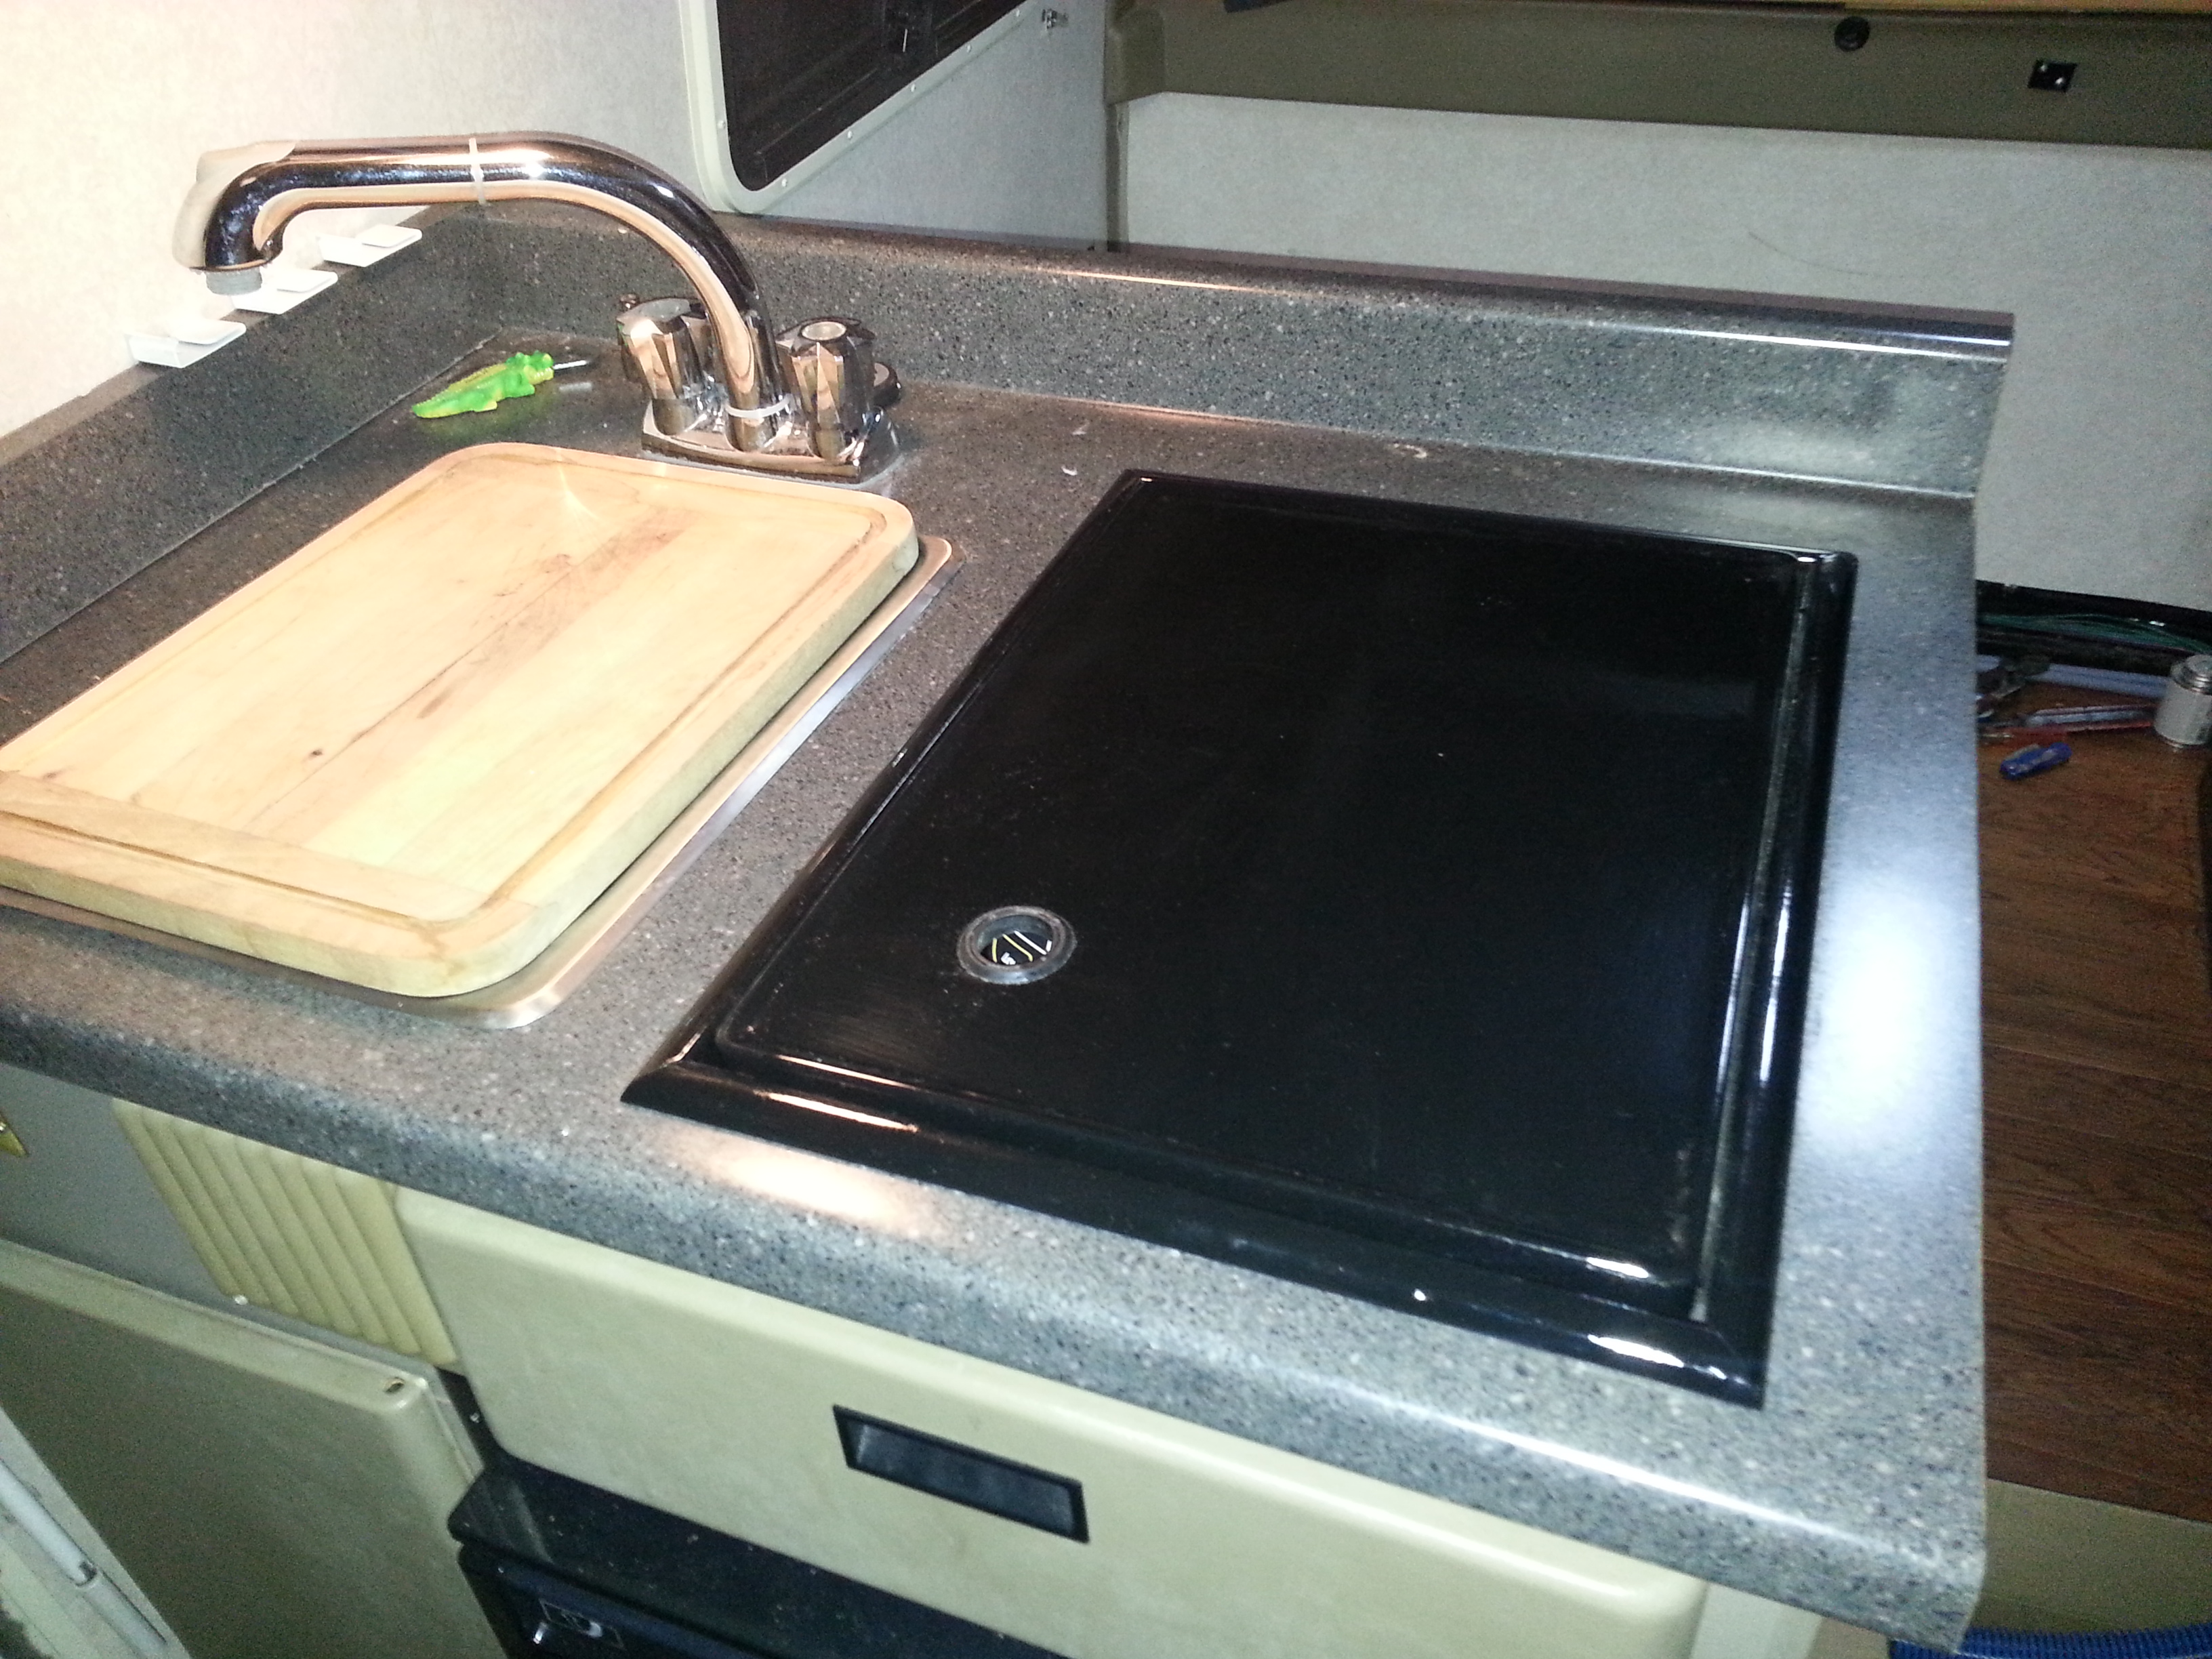
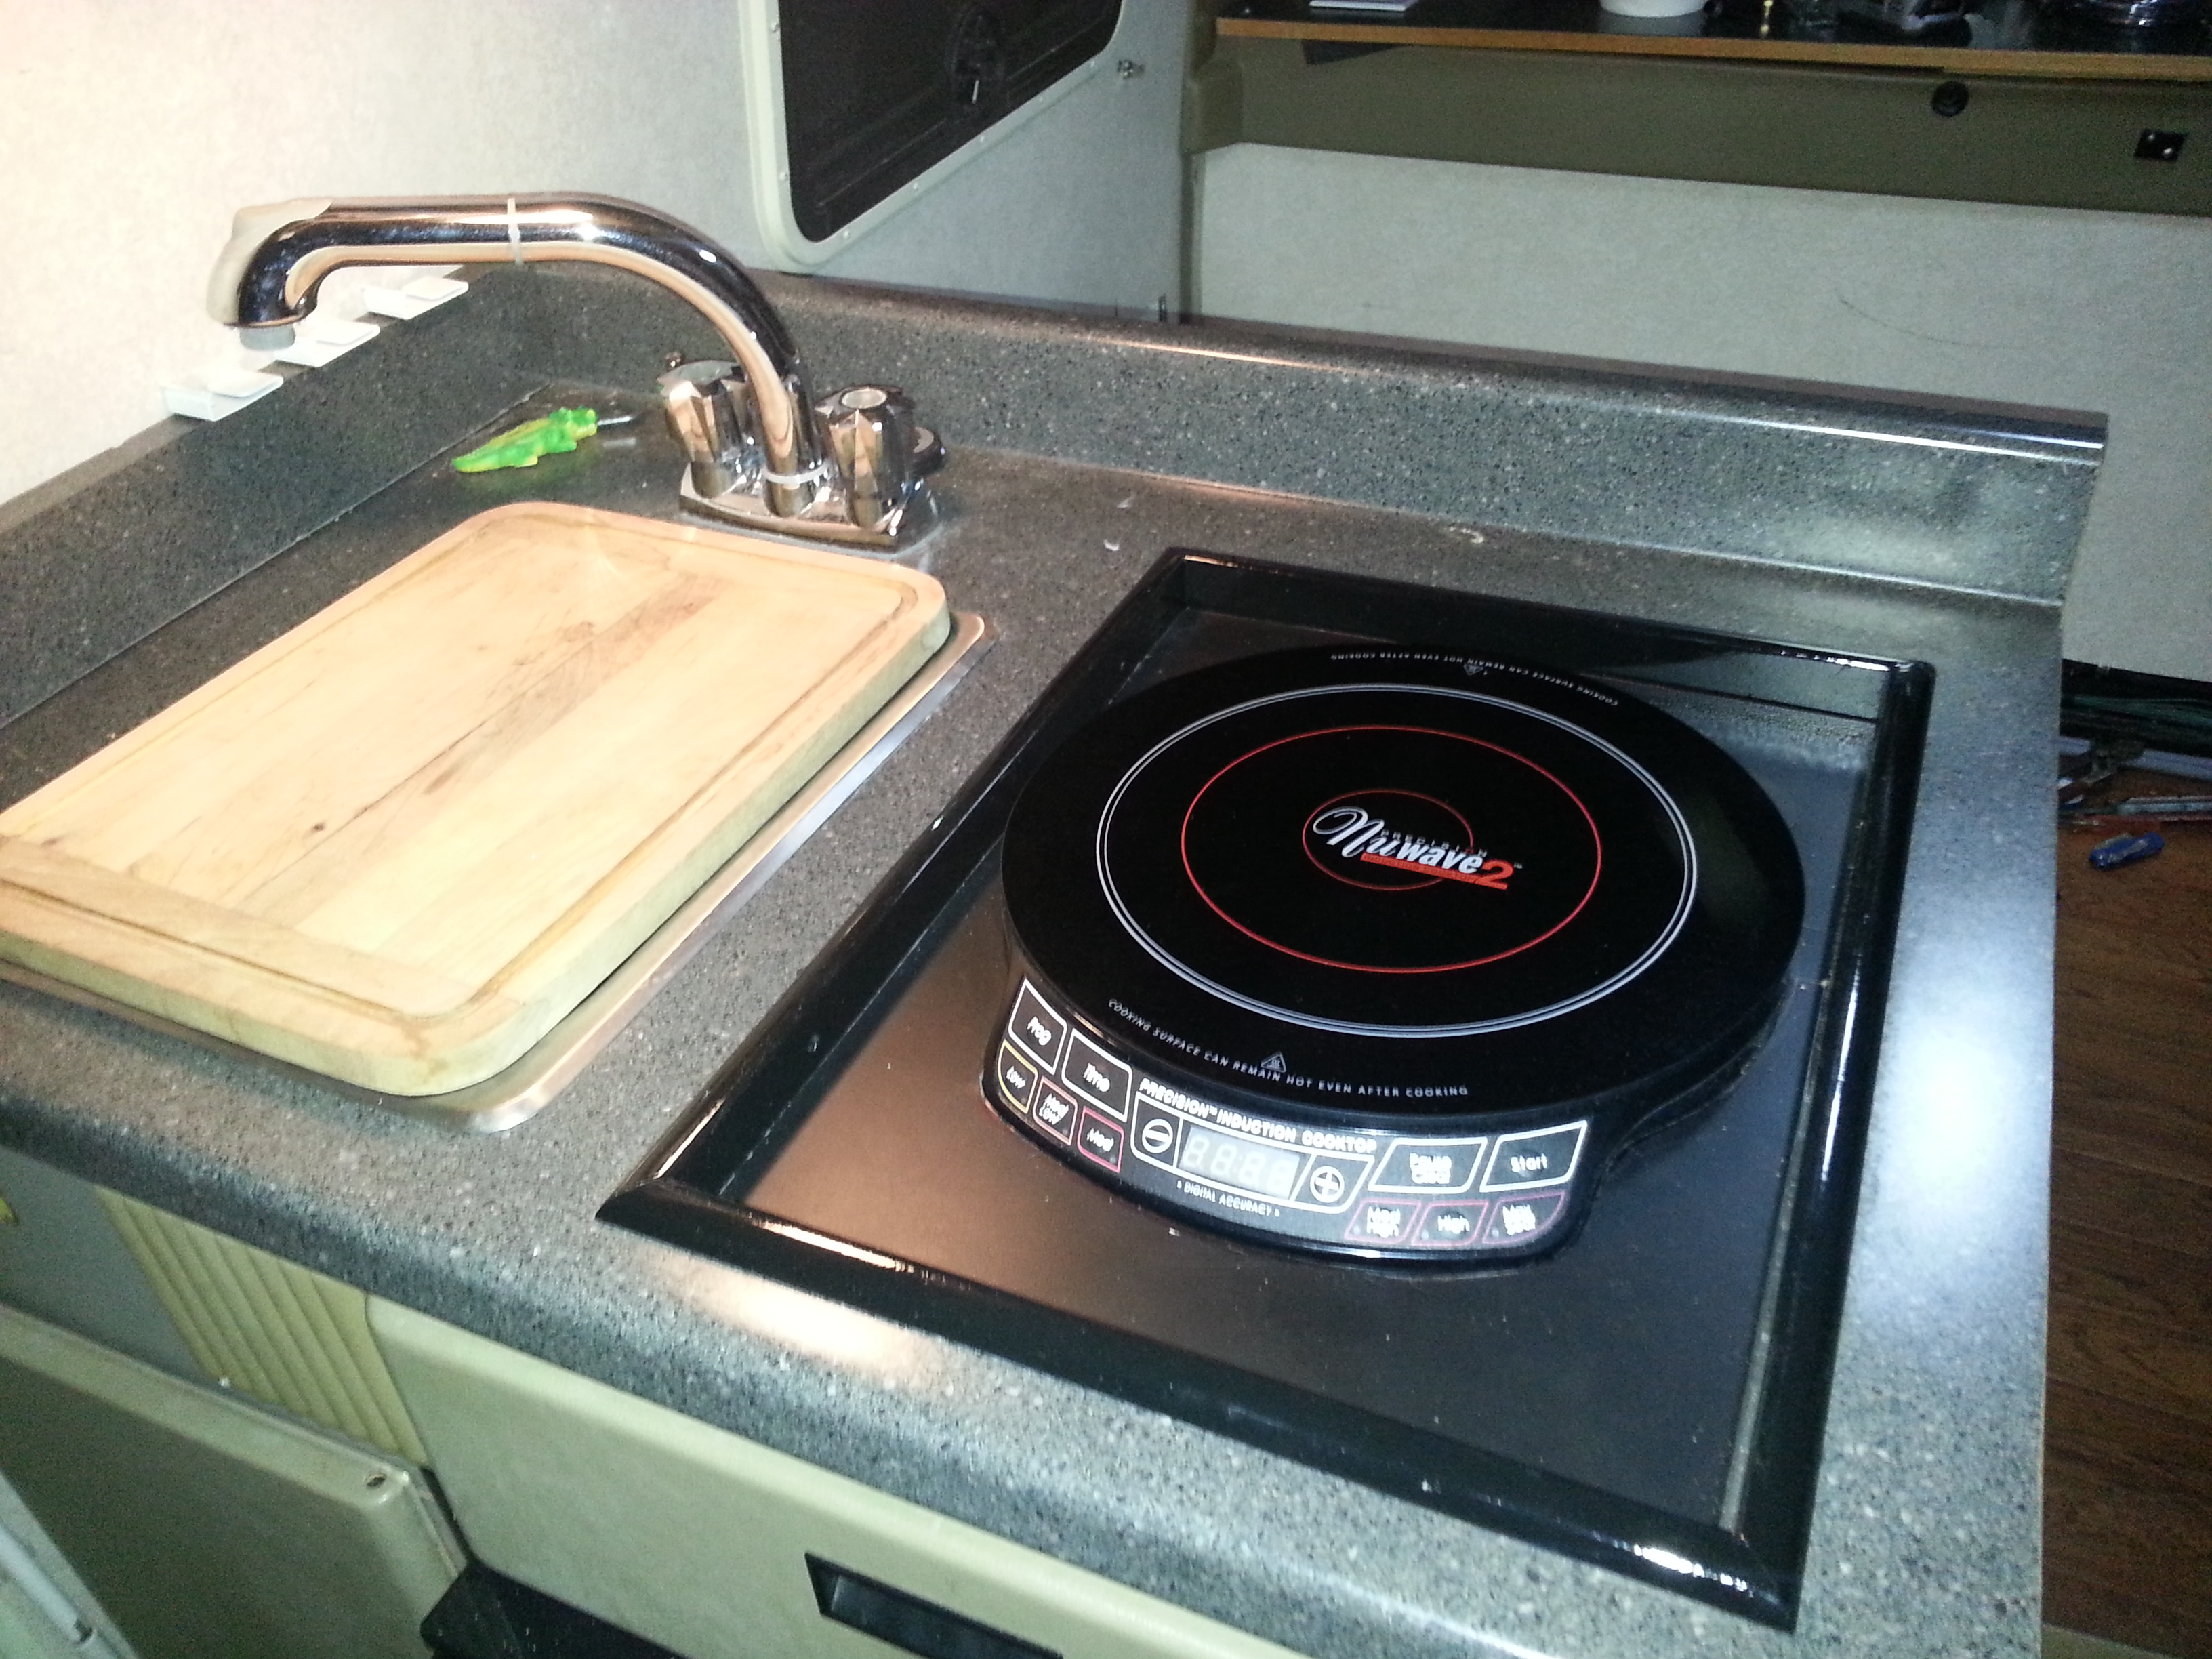
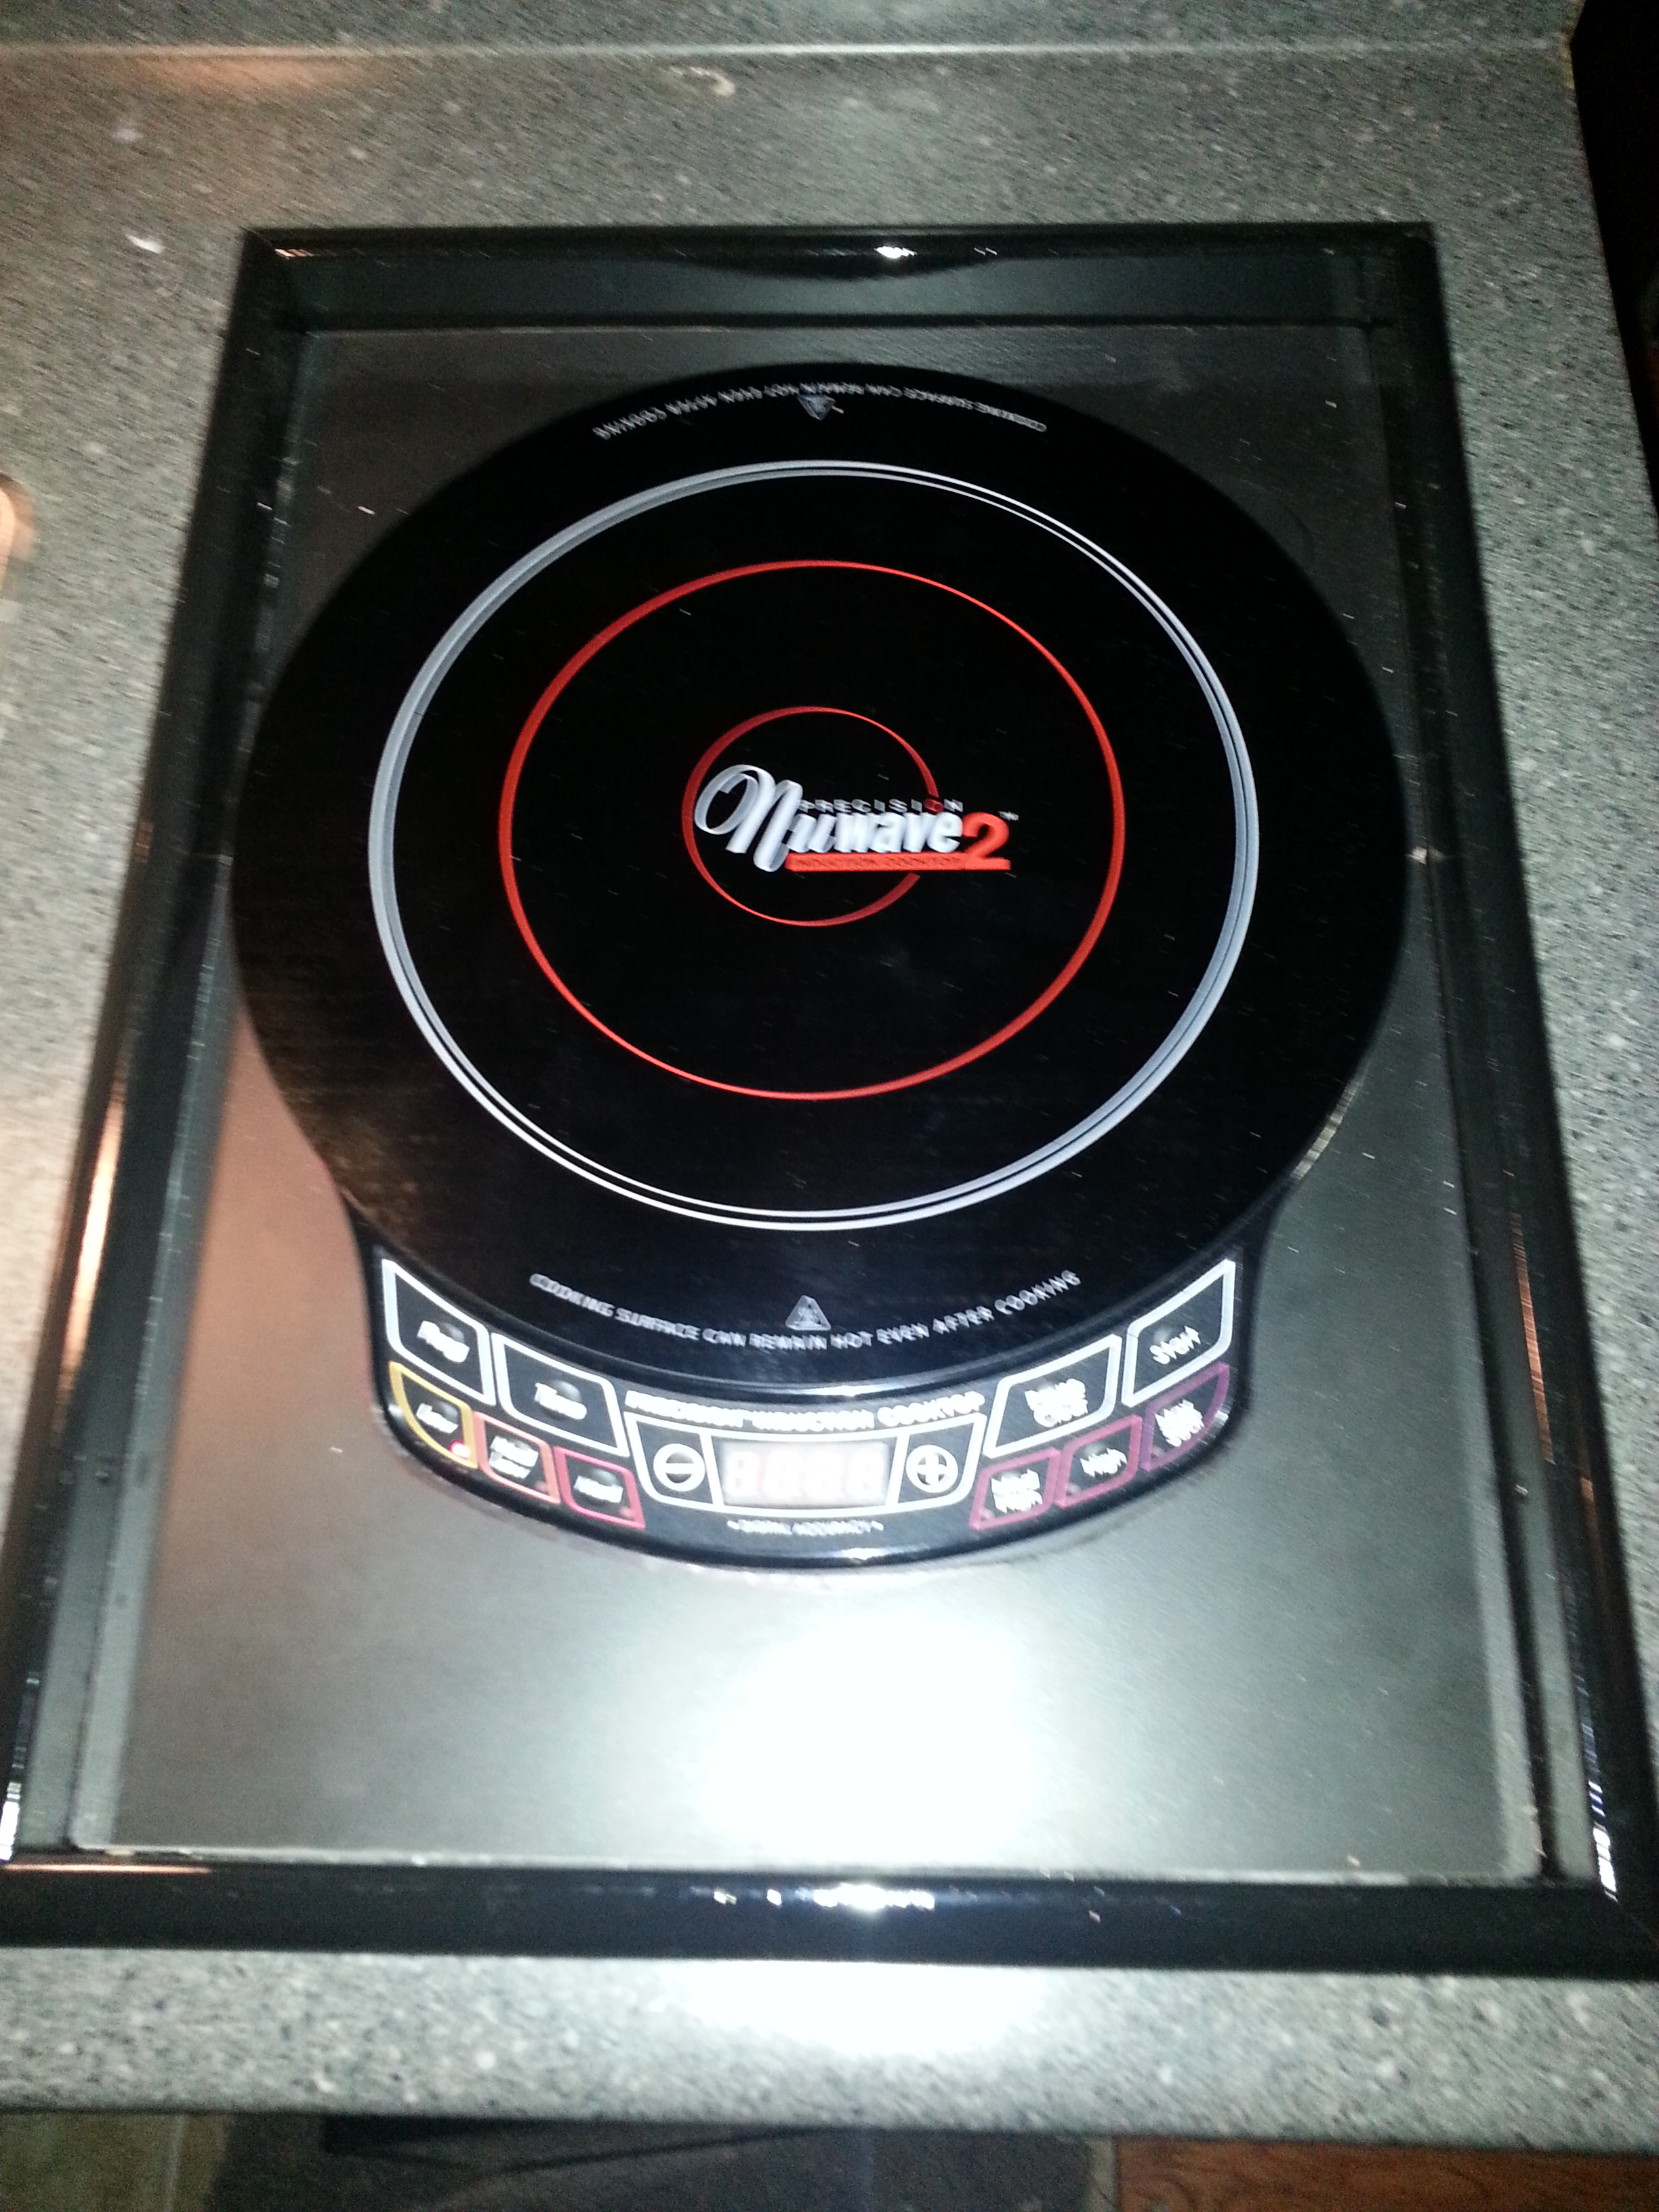
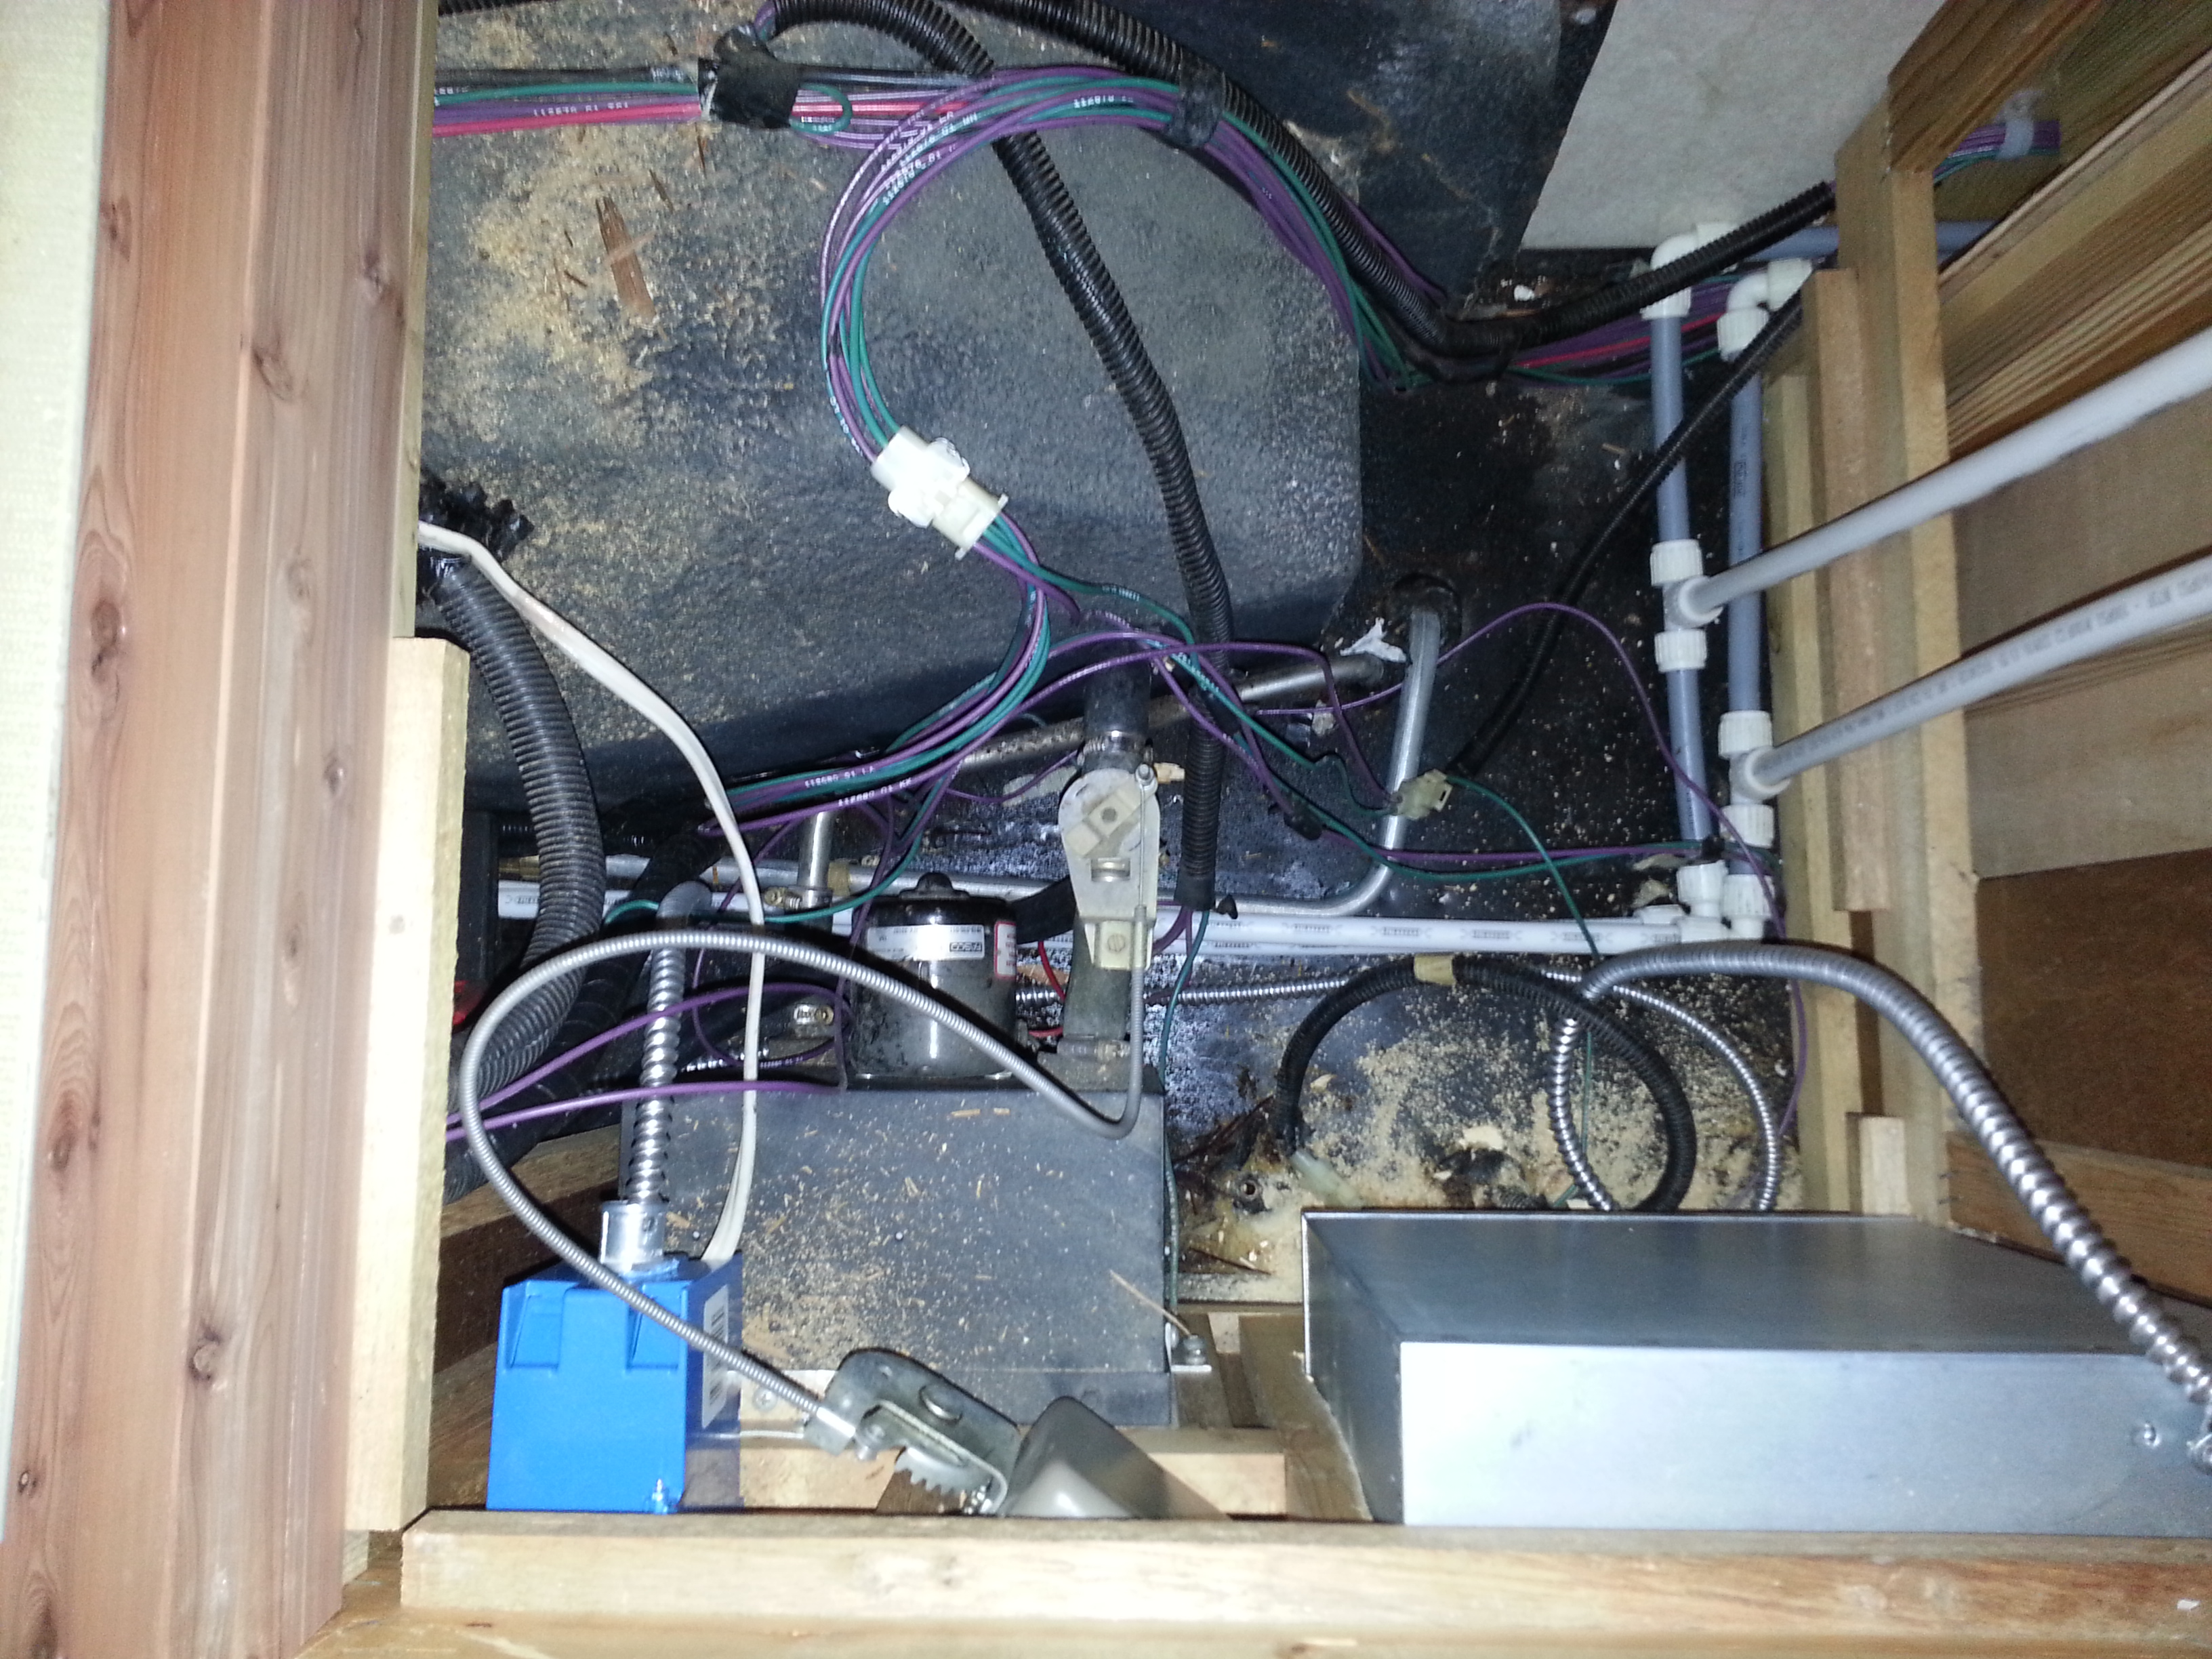
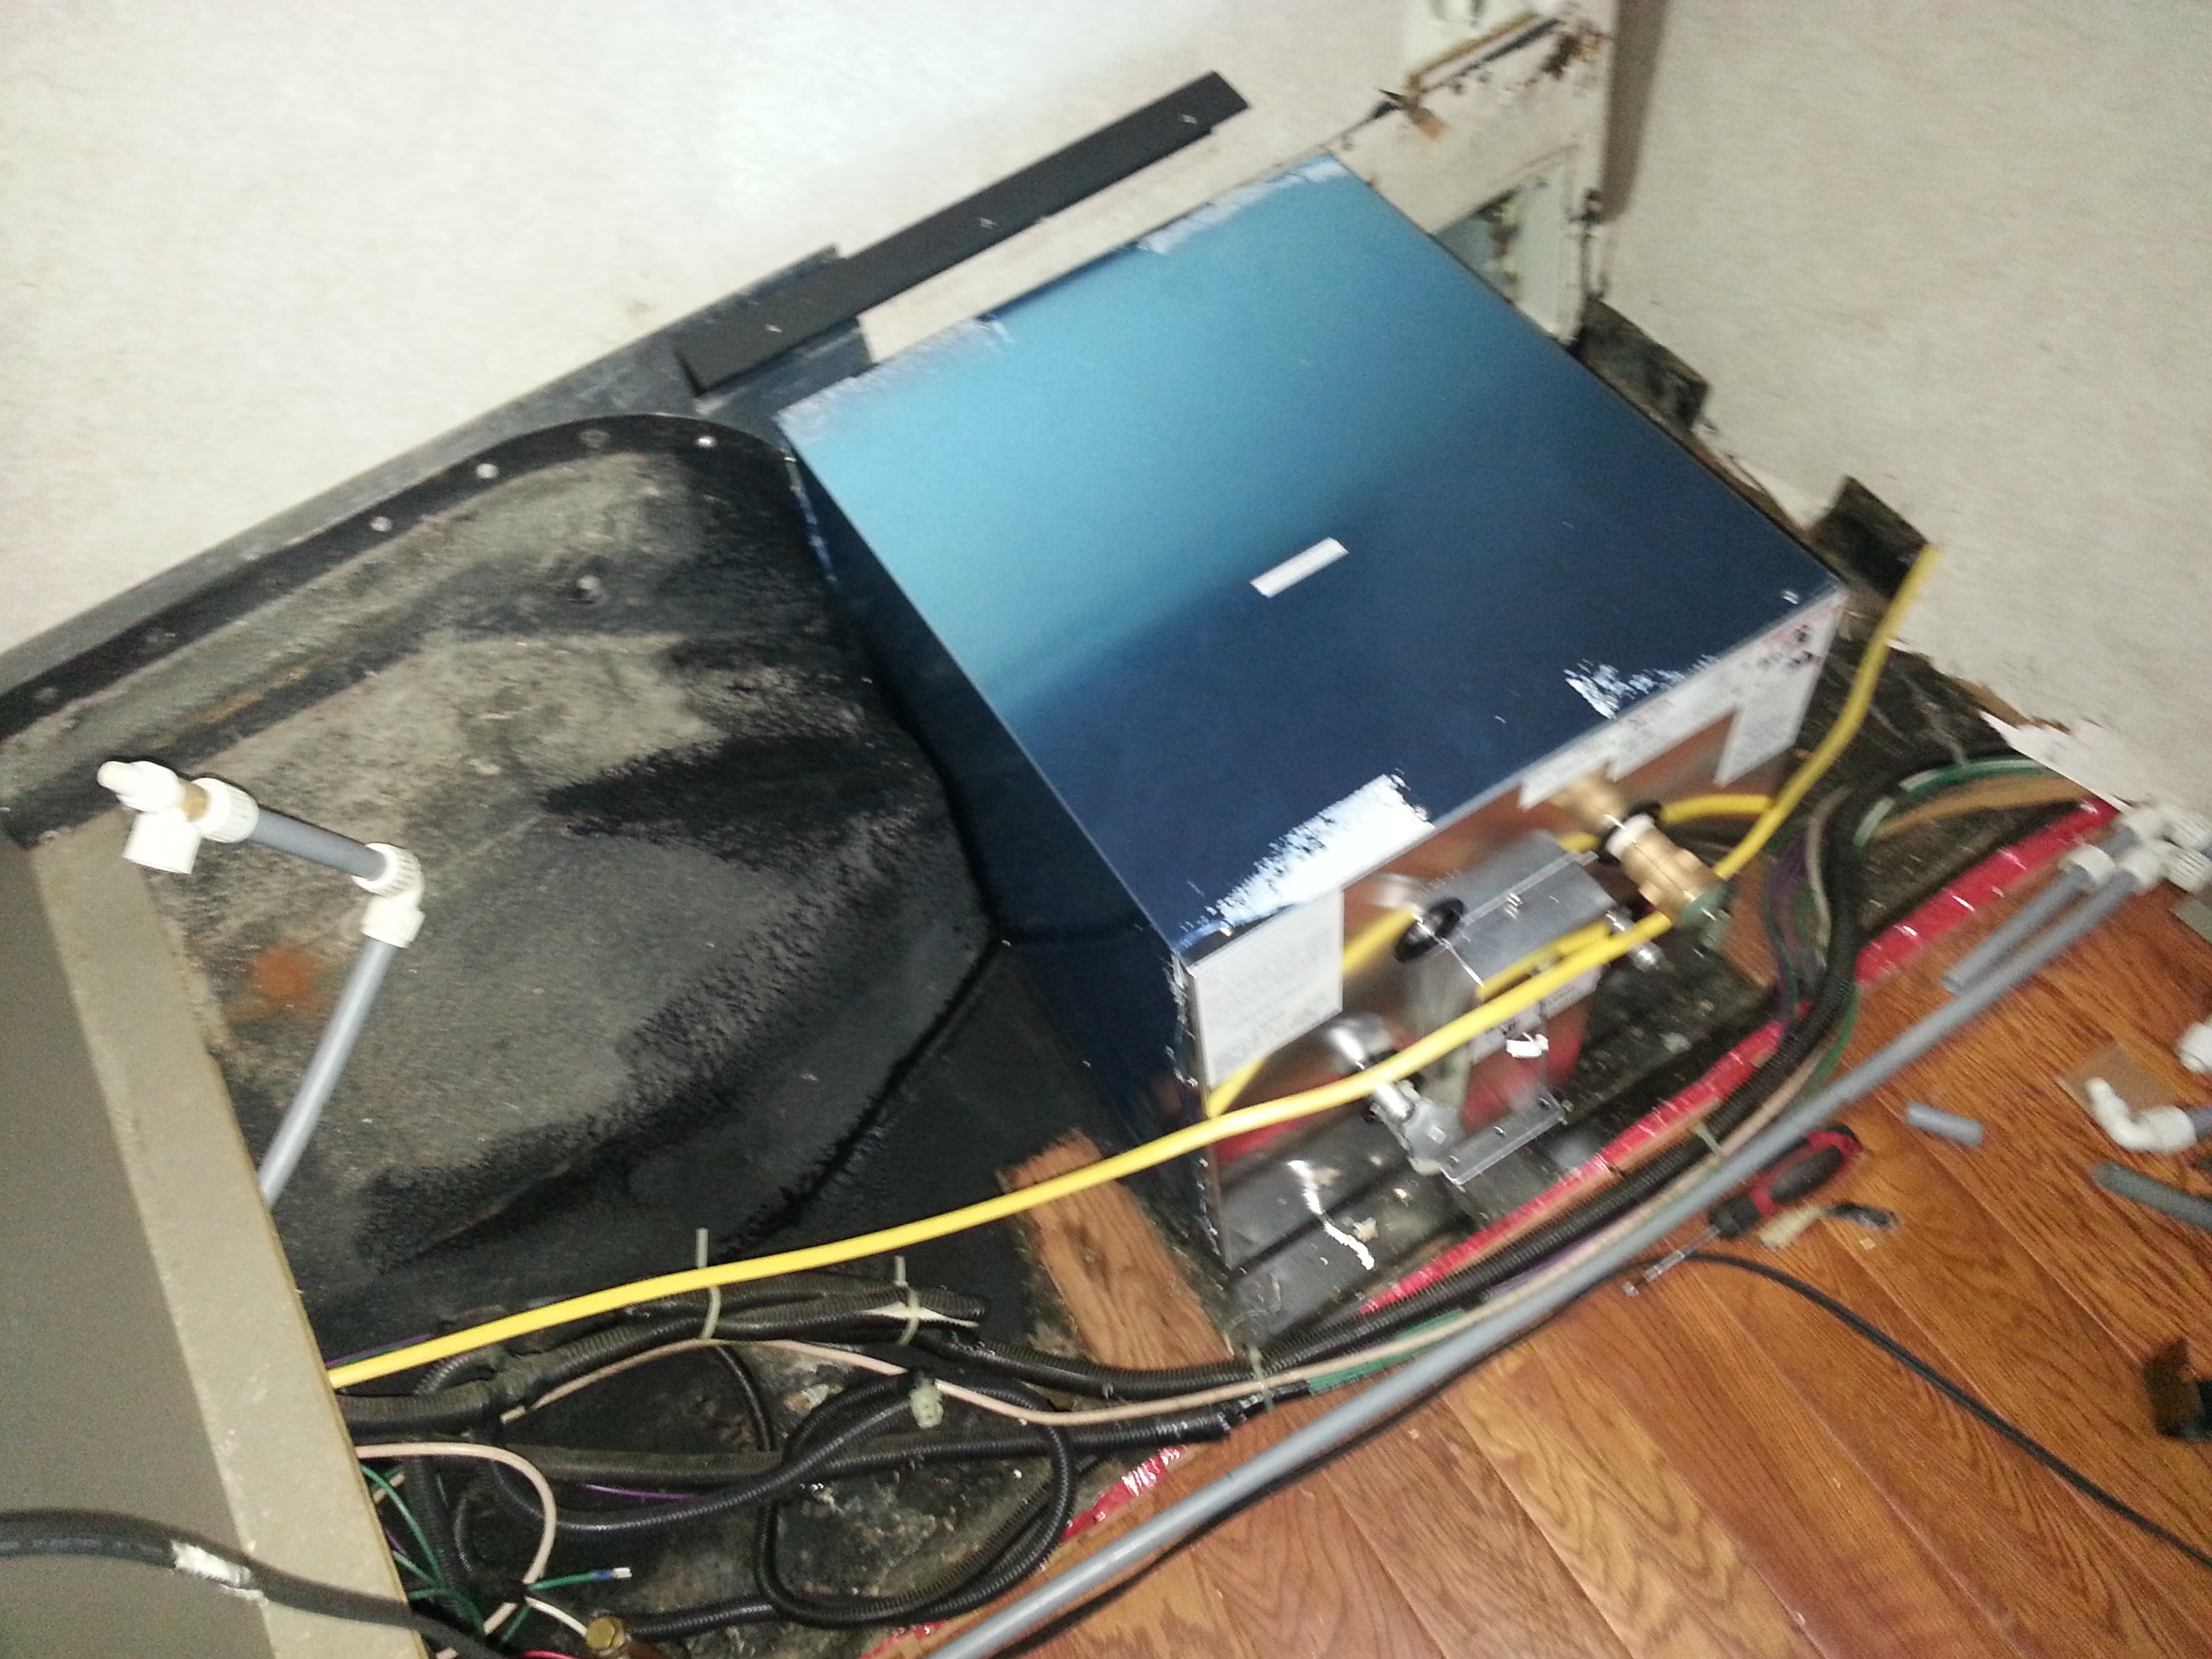
The Nu-wave itself does not get hot only the pan/pot gets hot so it is a lot cooler to cook in the Rialta than the open flame of the gas stove. I also got the water heater and water tank installed and most of the plumbing done (still waiting on some fittings due here tomorrow). One of the big challenges was to clean up the messy wiring that Winnebago did in the first place. as you can see in this photo there were wires going everywhere!
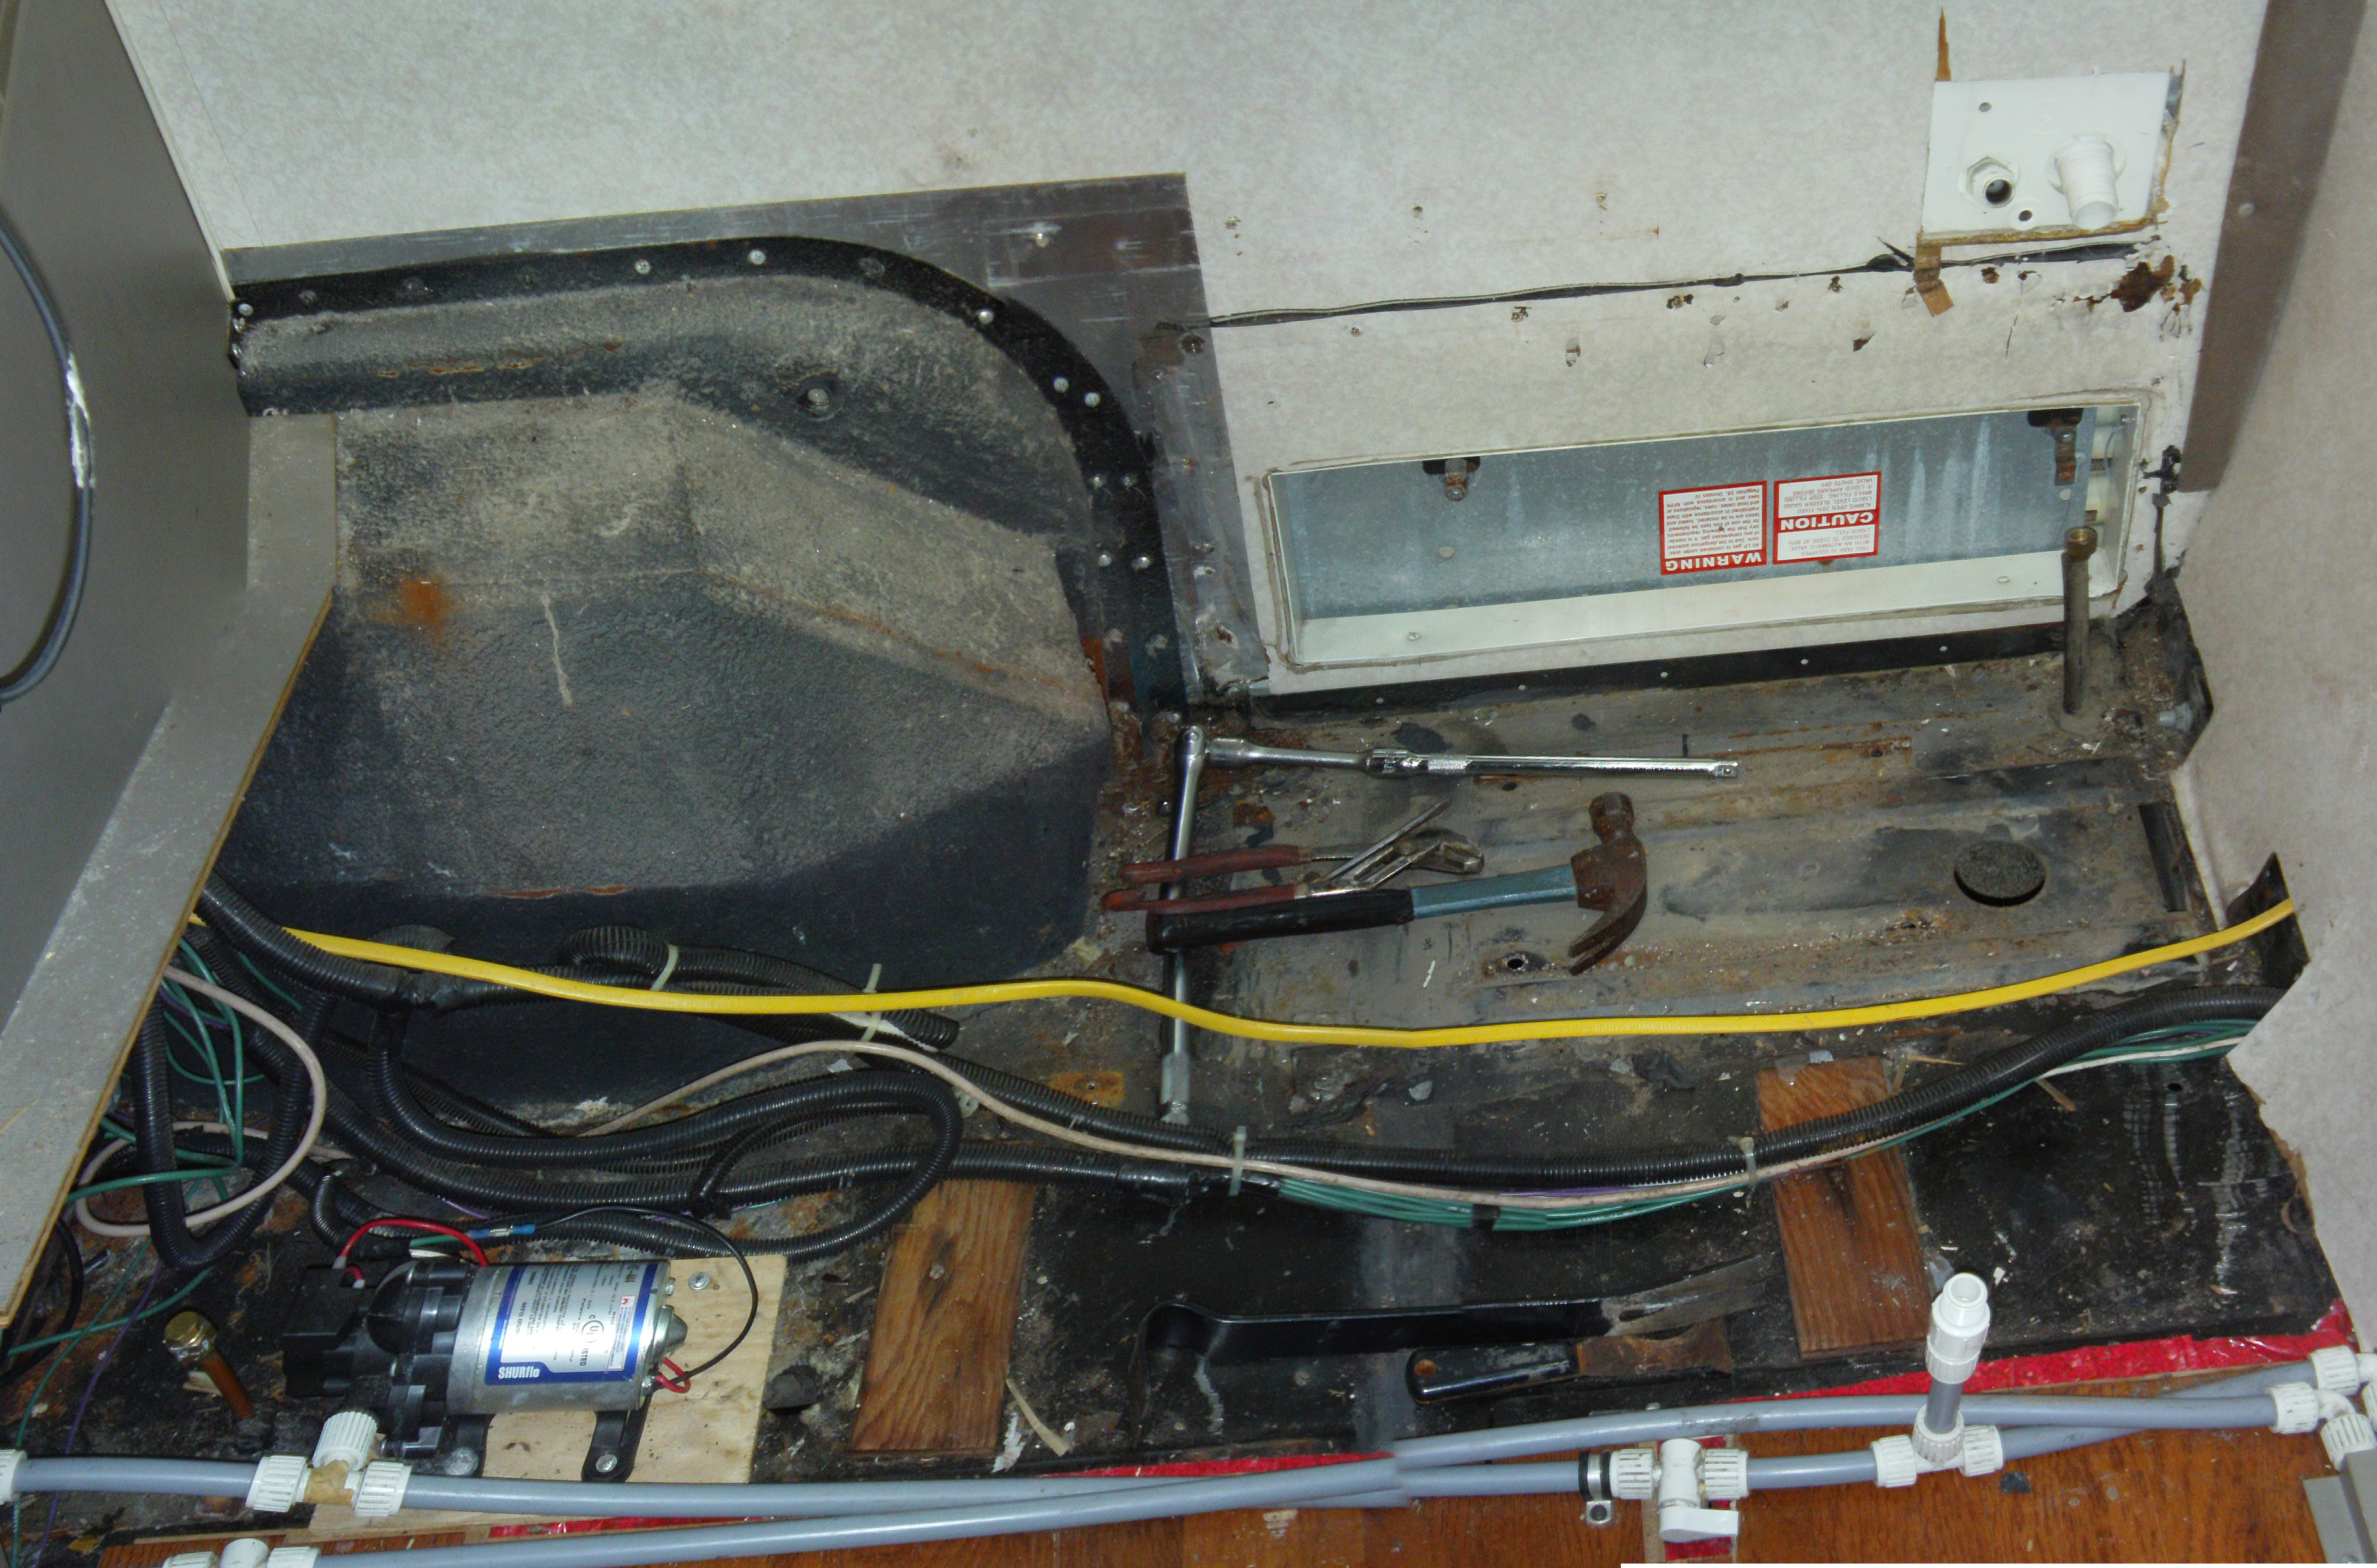
I did not need some of the wires any longer like the LP sending wires. After un looping and sighting the wires I found that I had enough slack to run them against the outside wall. This made room for the heater, tank and plumbing.
I routed the engine heater hoses and purchased some elbows and some molded 5/8 hose. I cut the molded hose to make the connections to the tank then the elbows to connect those to the lines running to the engine. All the hoses run across the back wall, I plan on building a wooden chase to cover all the wiring and plumbing.
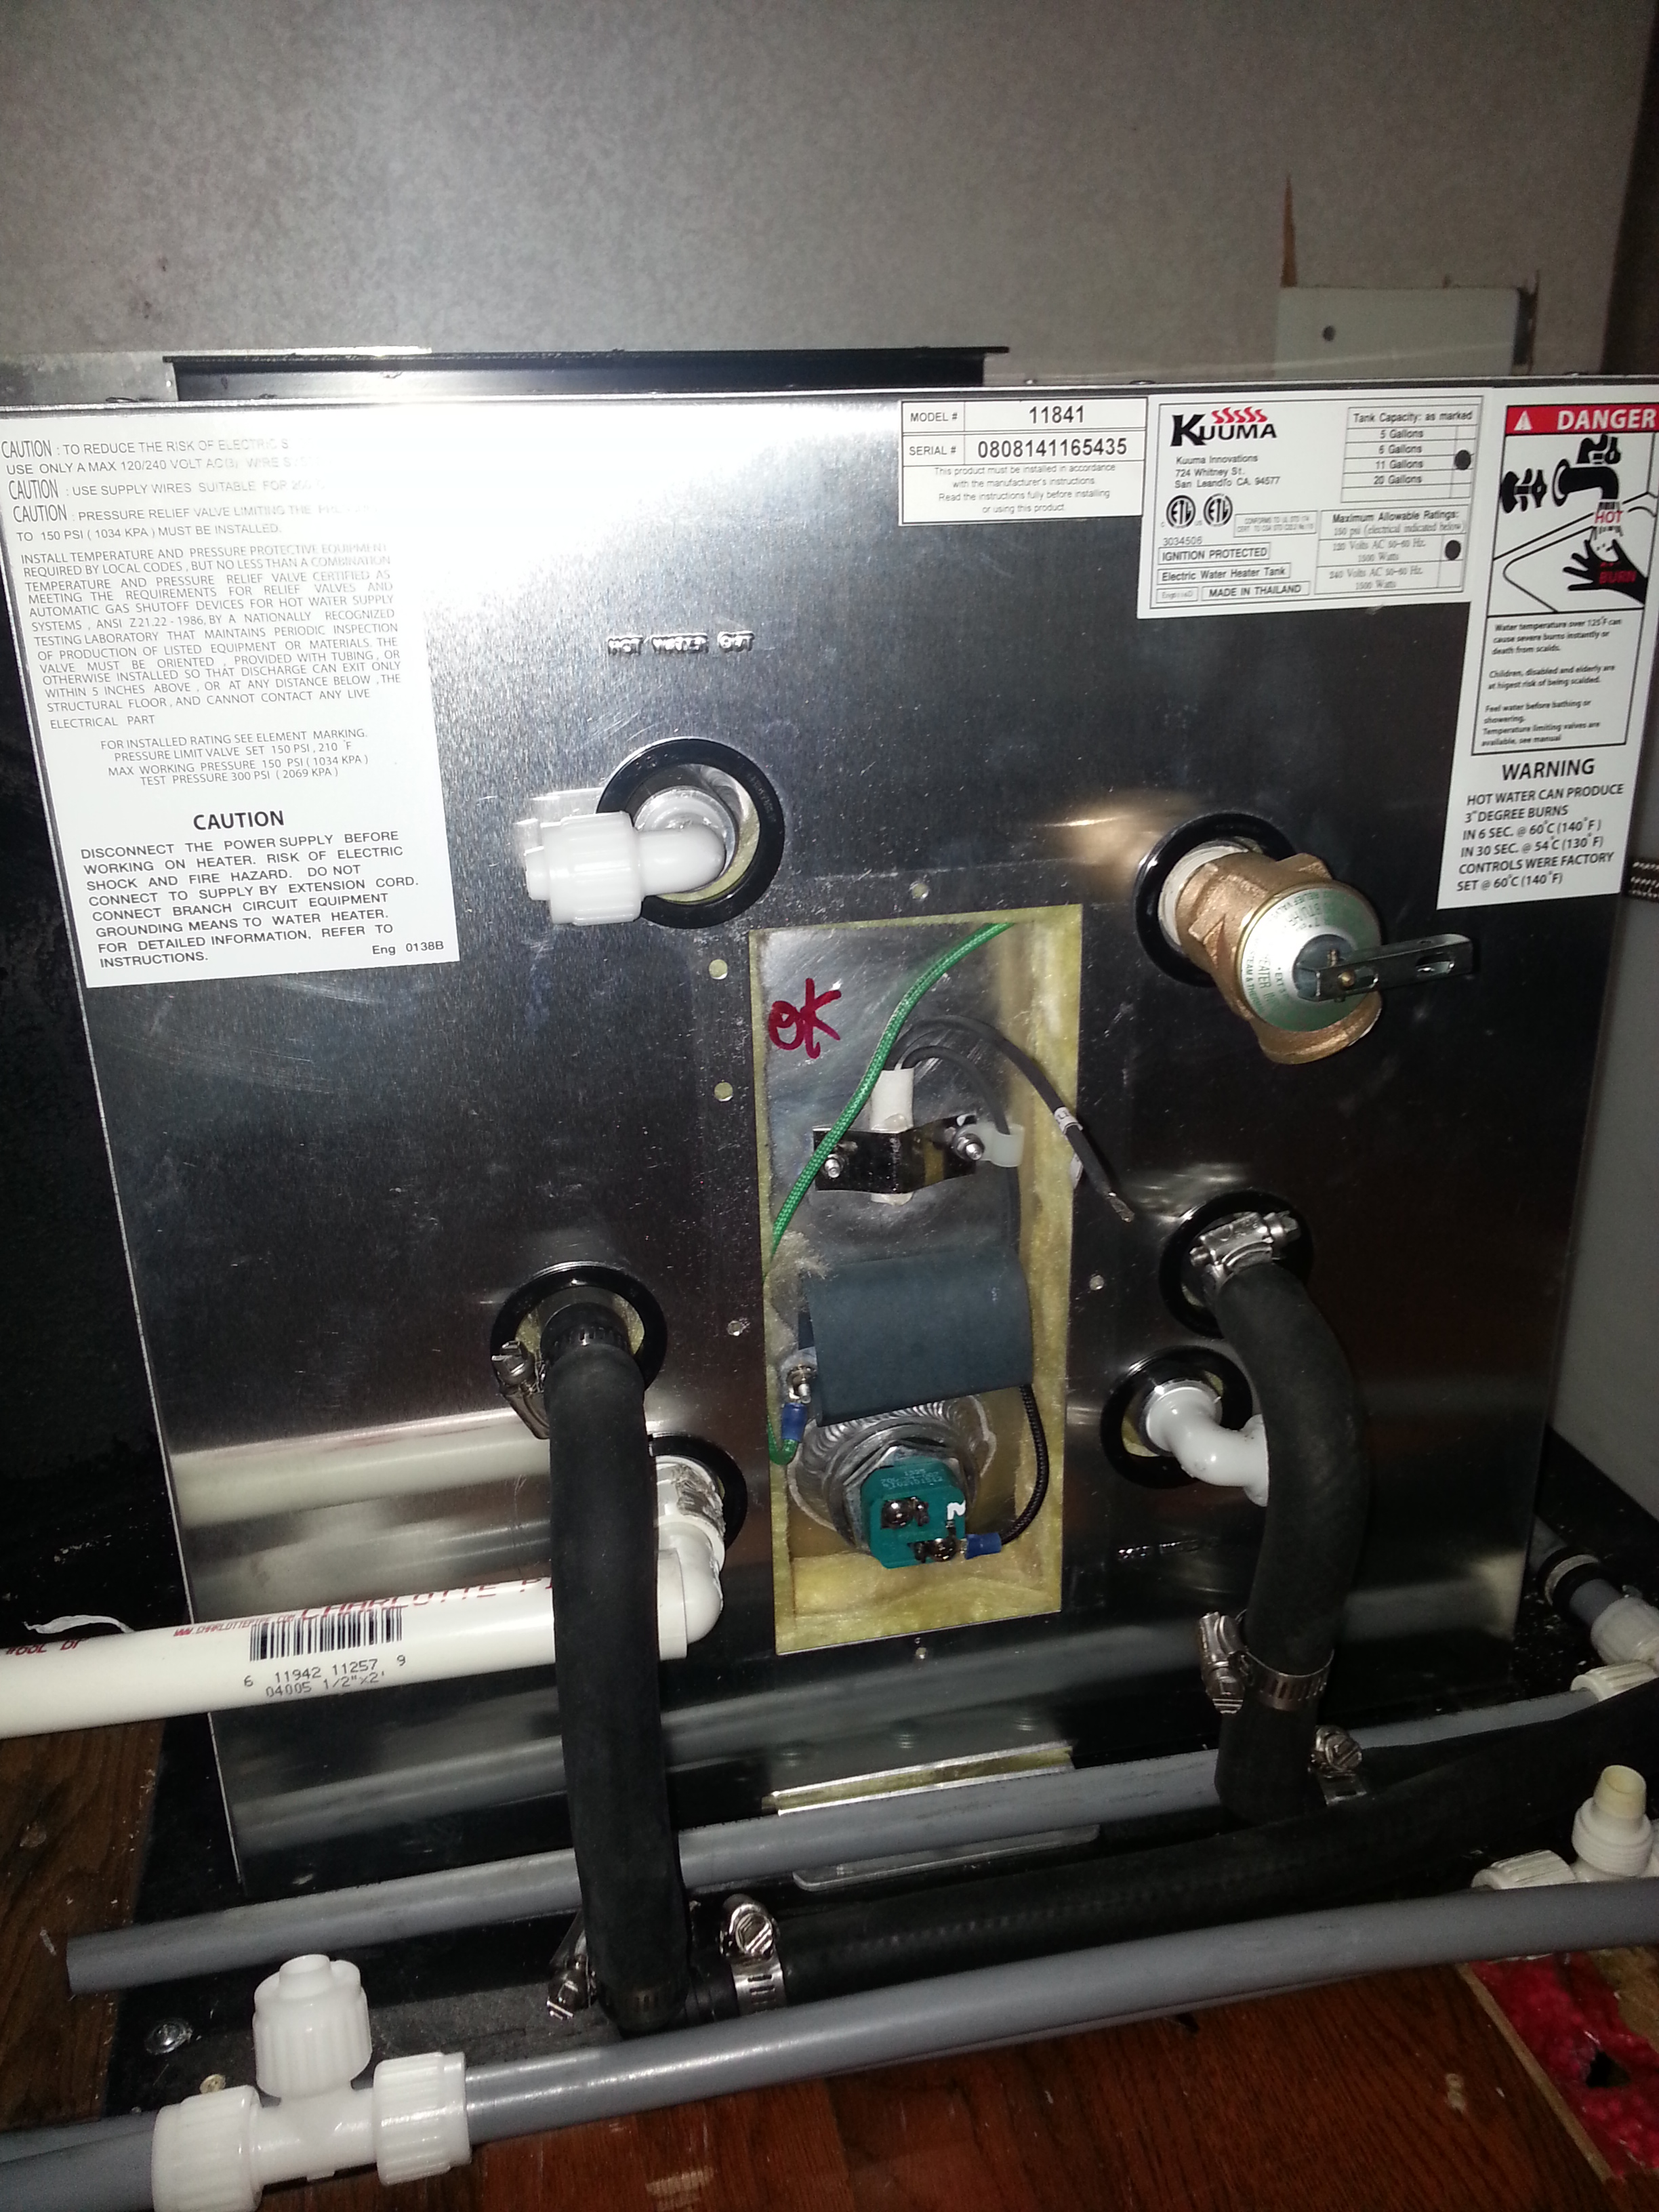
Here you can see the molded hoses, they just make for a neat install. One really nice thing about this install is that you can get to all the connections to the Heater by removing the kick panel under the seat. This heater has an automatic reset so that should not be an issue but just being able to get to all the connections is nice. The white pipe going off to the left is the drain for the water heater. I have a cutoff valve to install in that line then run it to the outside via a hole that already exists in the floor.
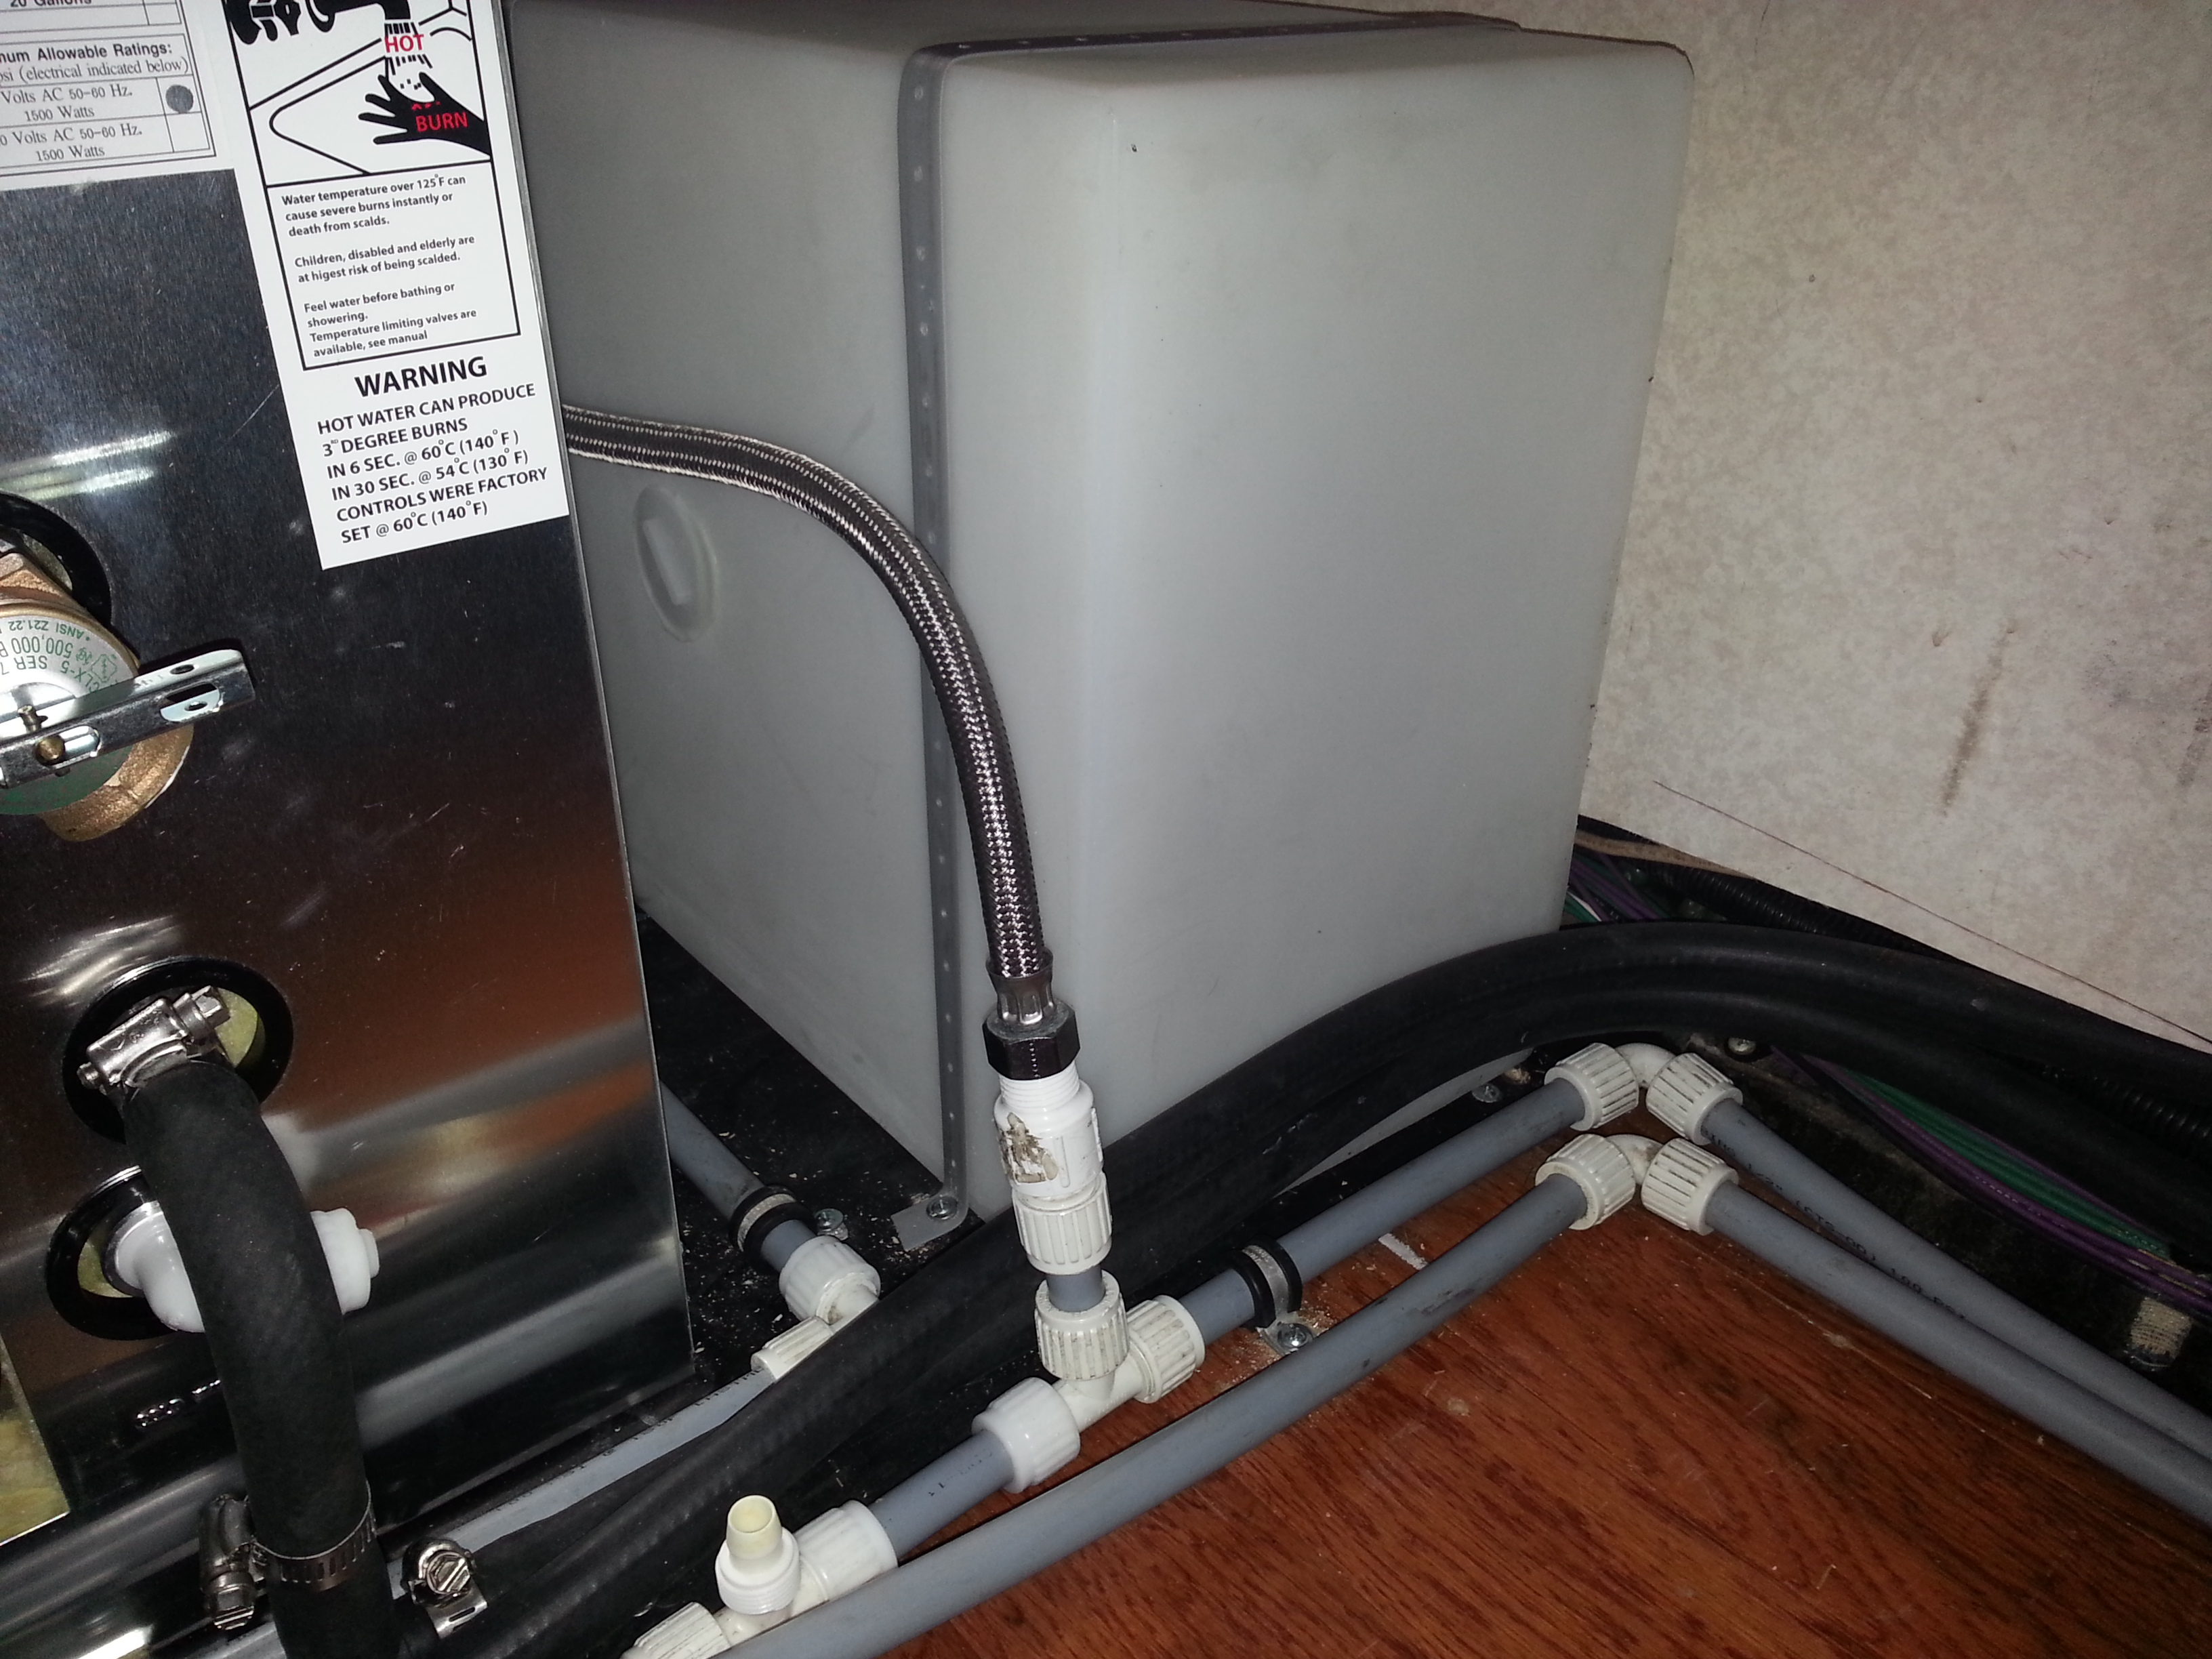
This is the city water connection. I like to use braided stainless steel hoses where ever I can. I also have then on all the faucets and toilet. They have rubber washers in the connections that keep them tight and leak free!
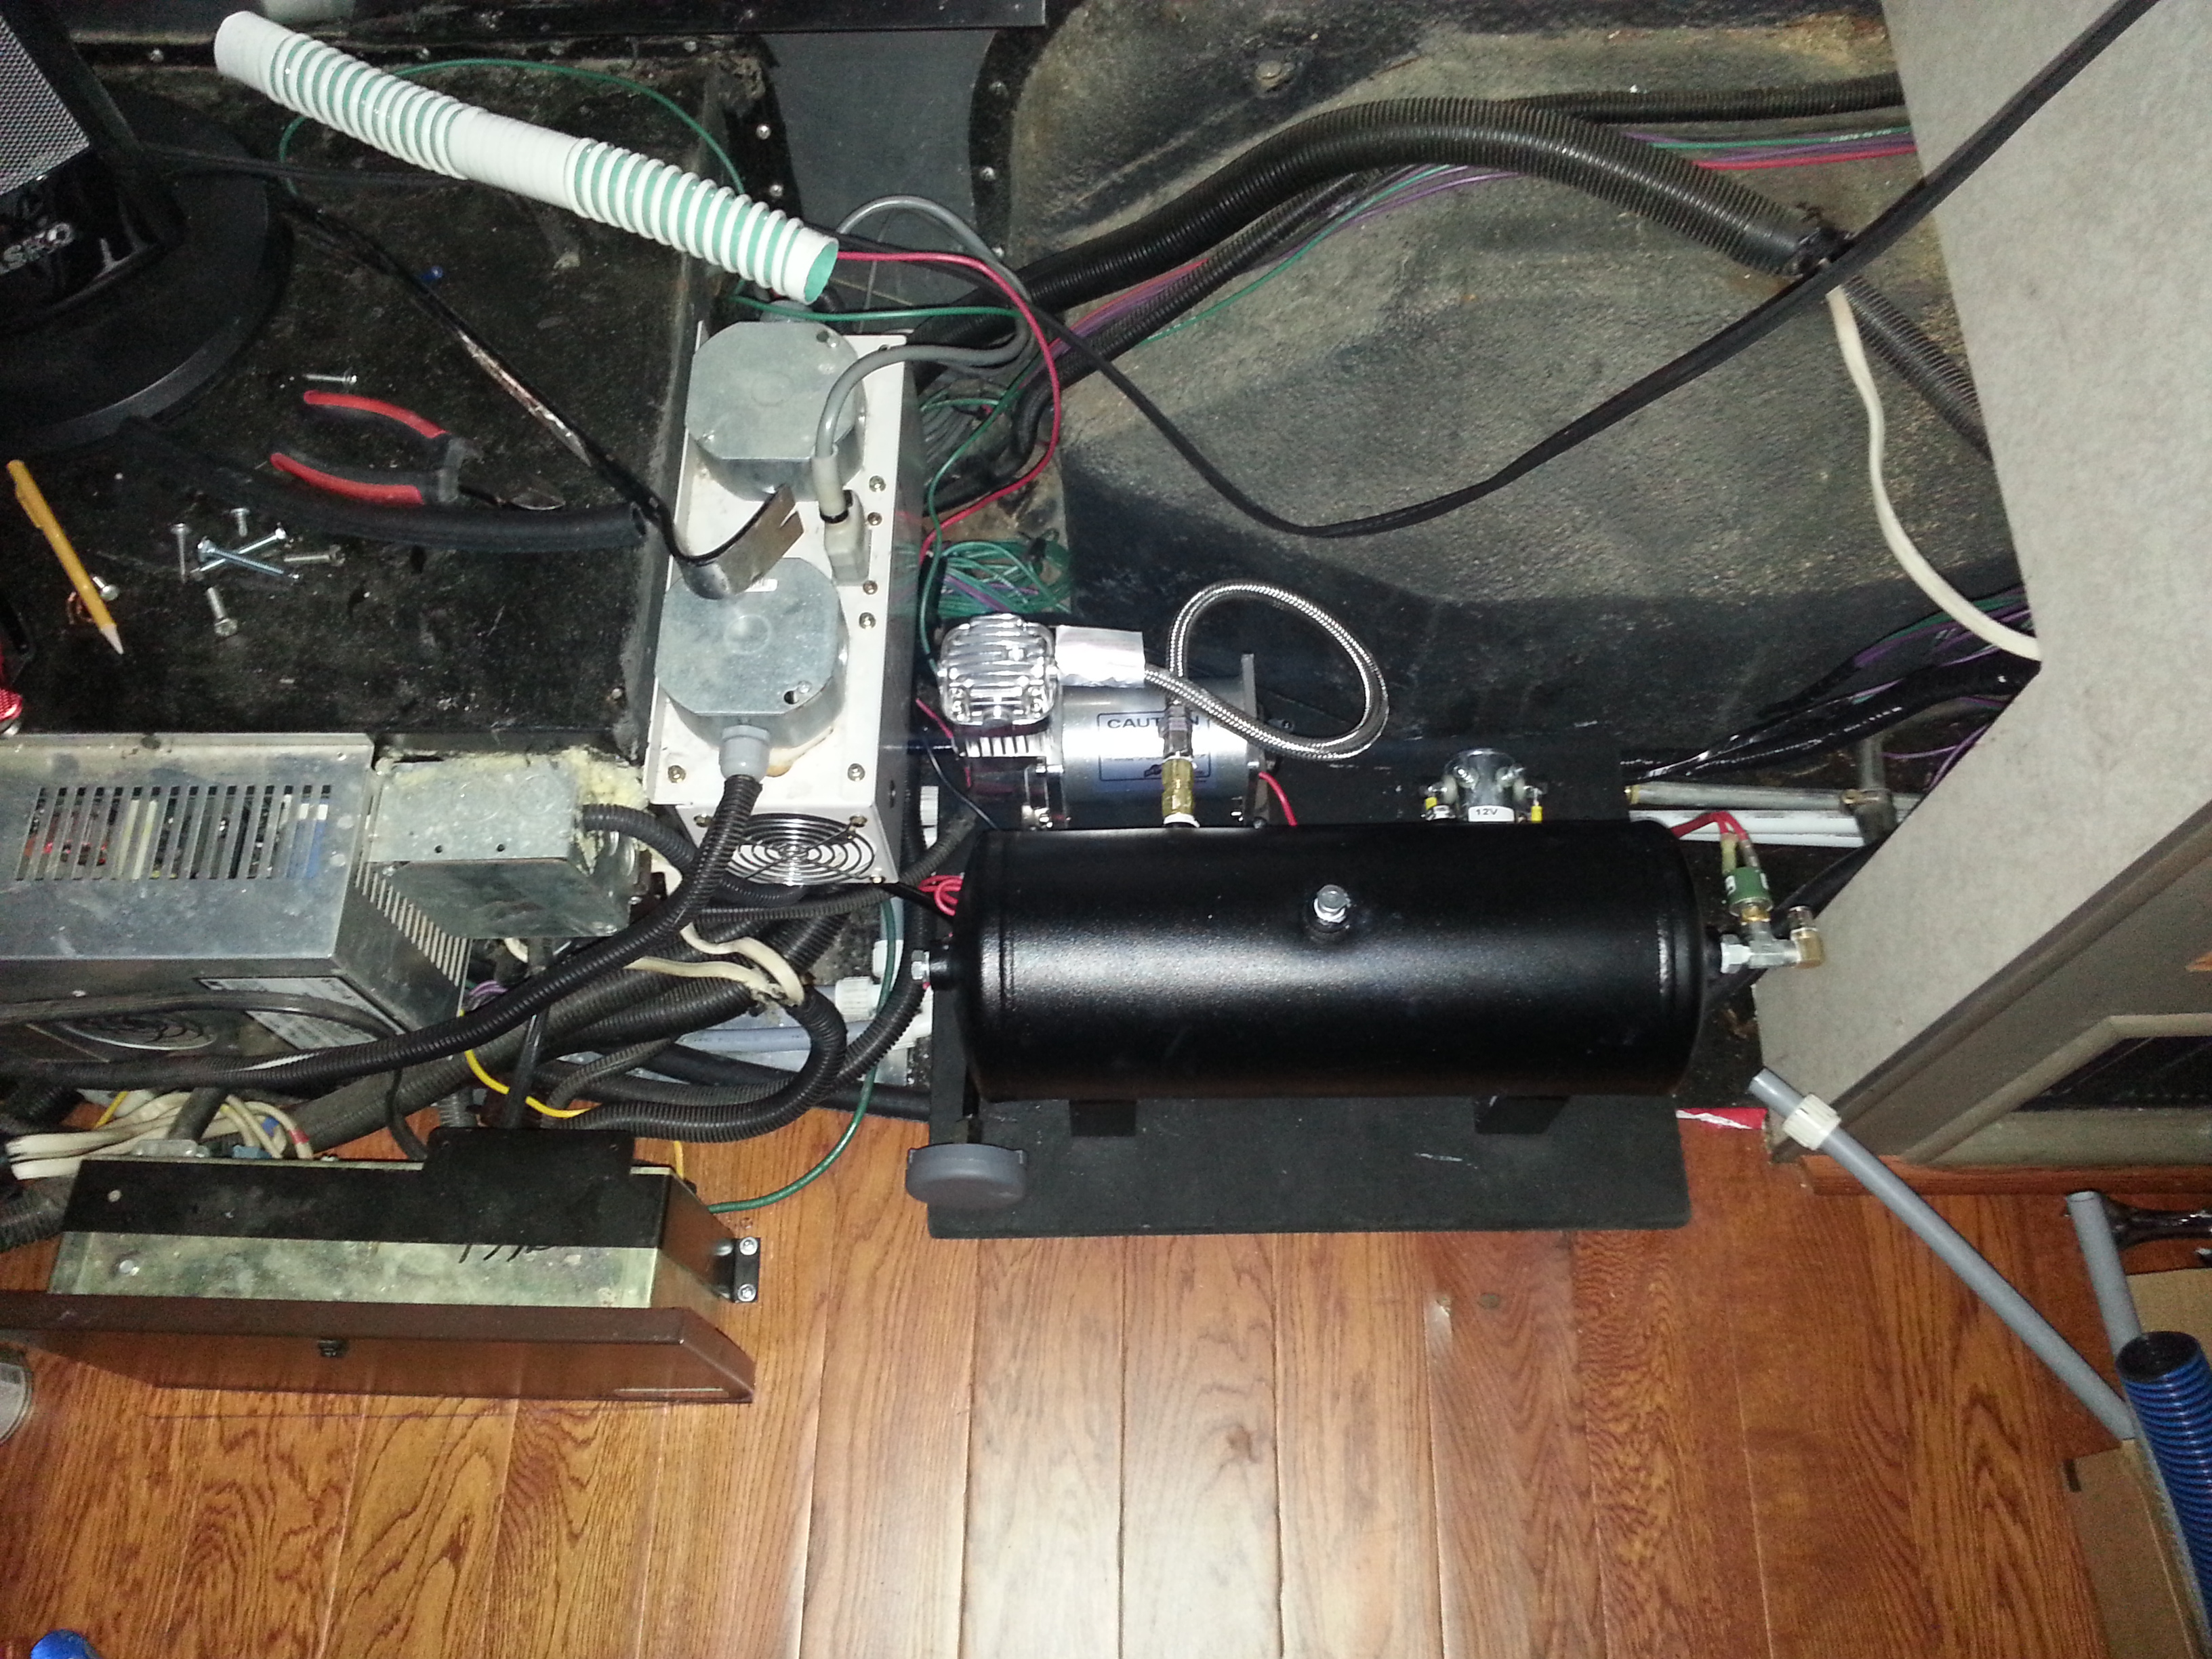
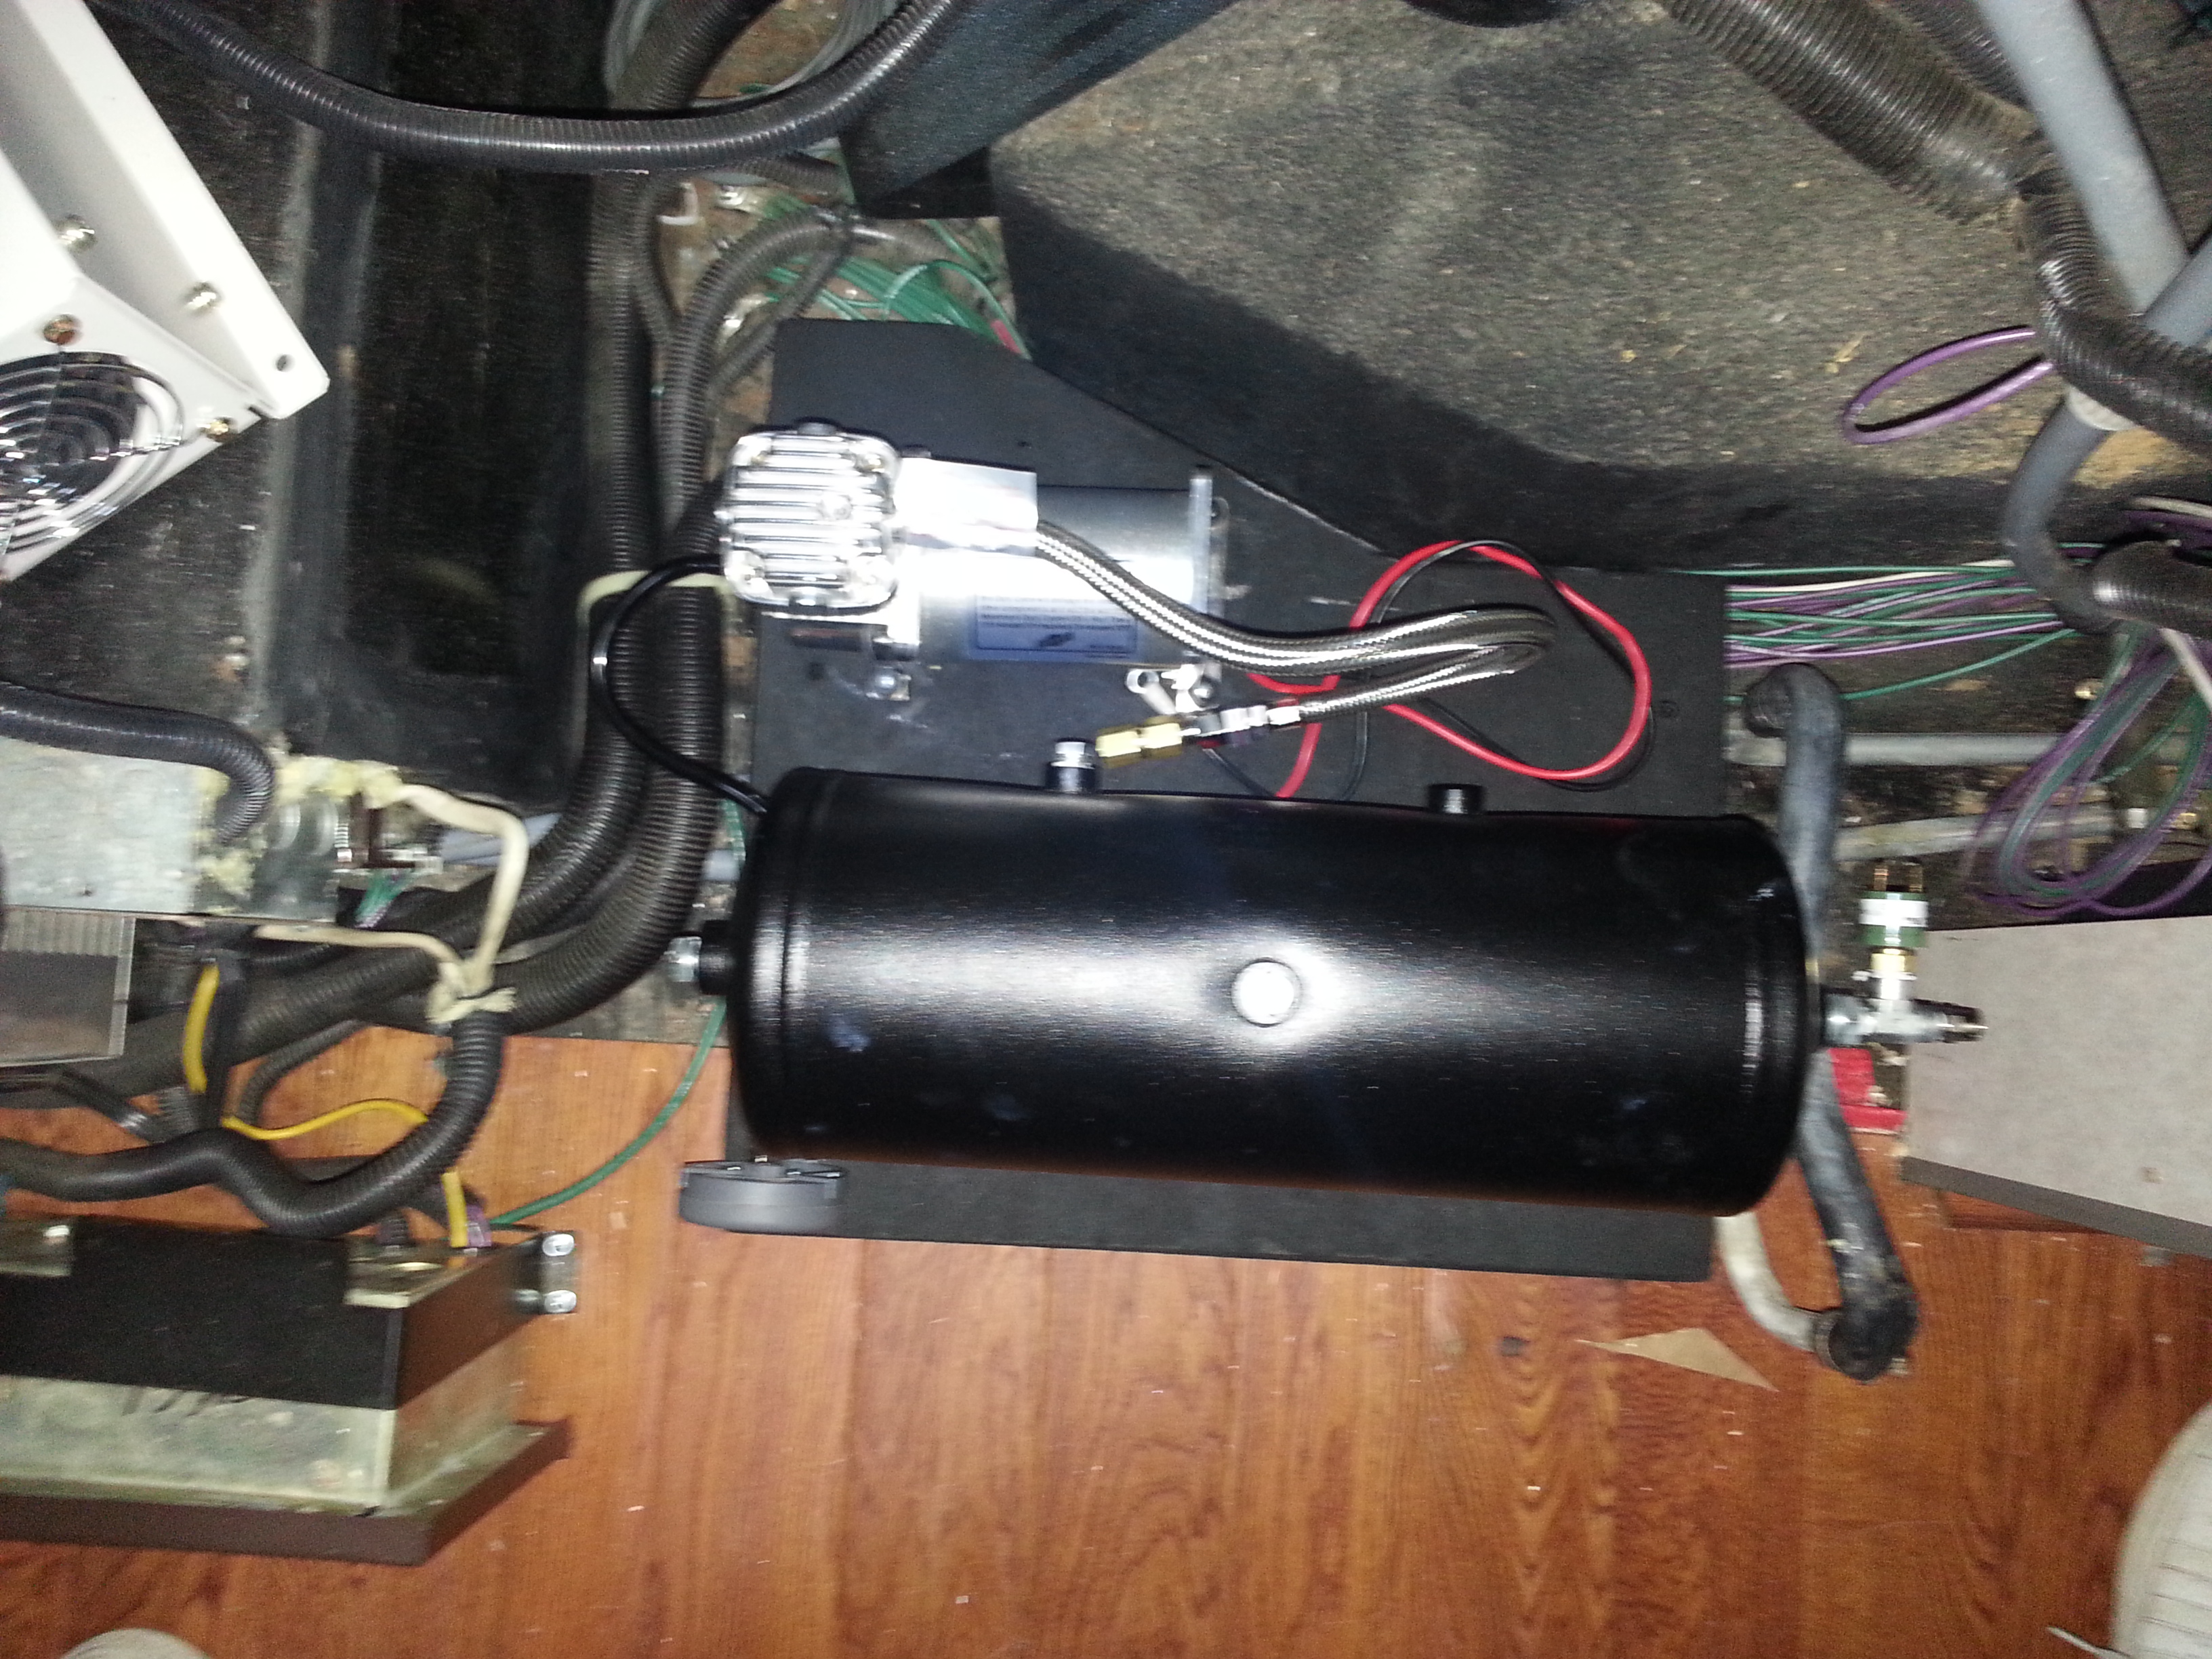
I also have the compressor installed and all the plumbing to the tank completed. You can see the solenoid located just behind the tank that will supply power to the compressor when a switch on the dash is turned on. All that is left here is to connect the power and run the air lines to the dash and then to the air bags. The rest of my fittings should be here tomorrow and the new electric heater will be here Tuesday. So I should have the water heater finished soon!
Friday 3-6-2015
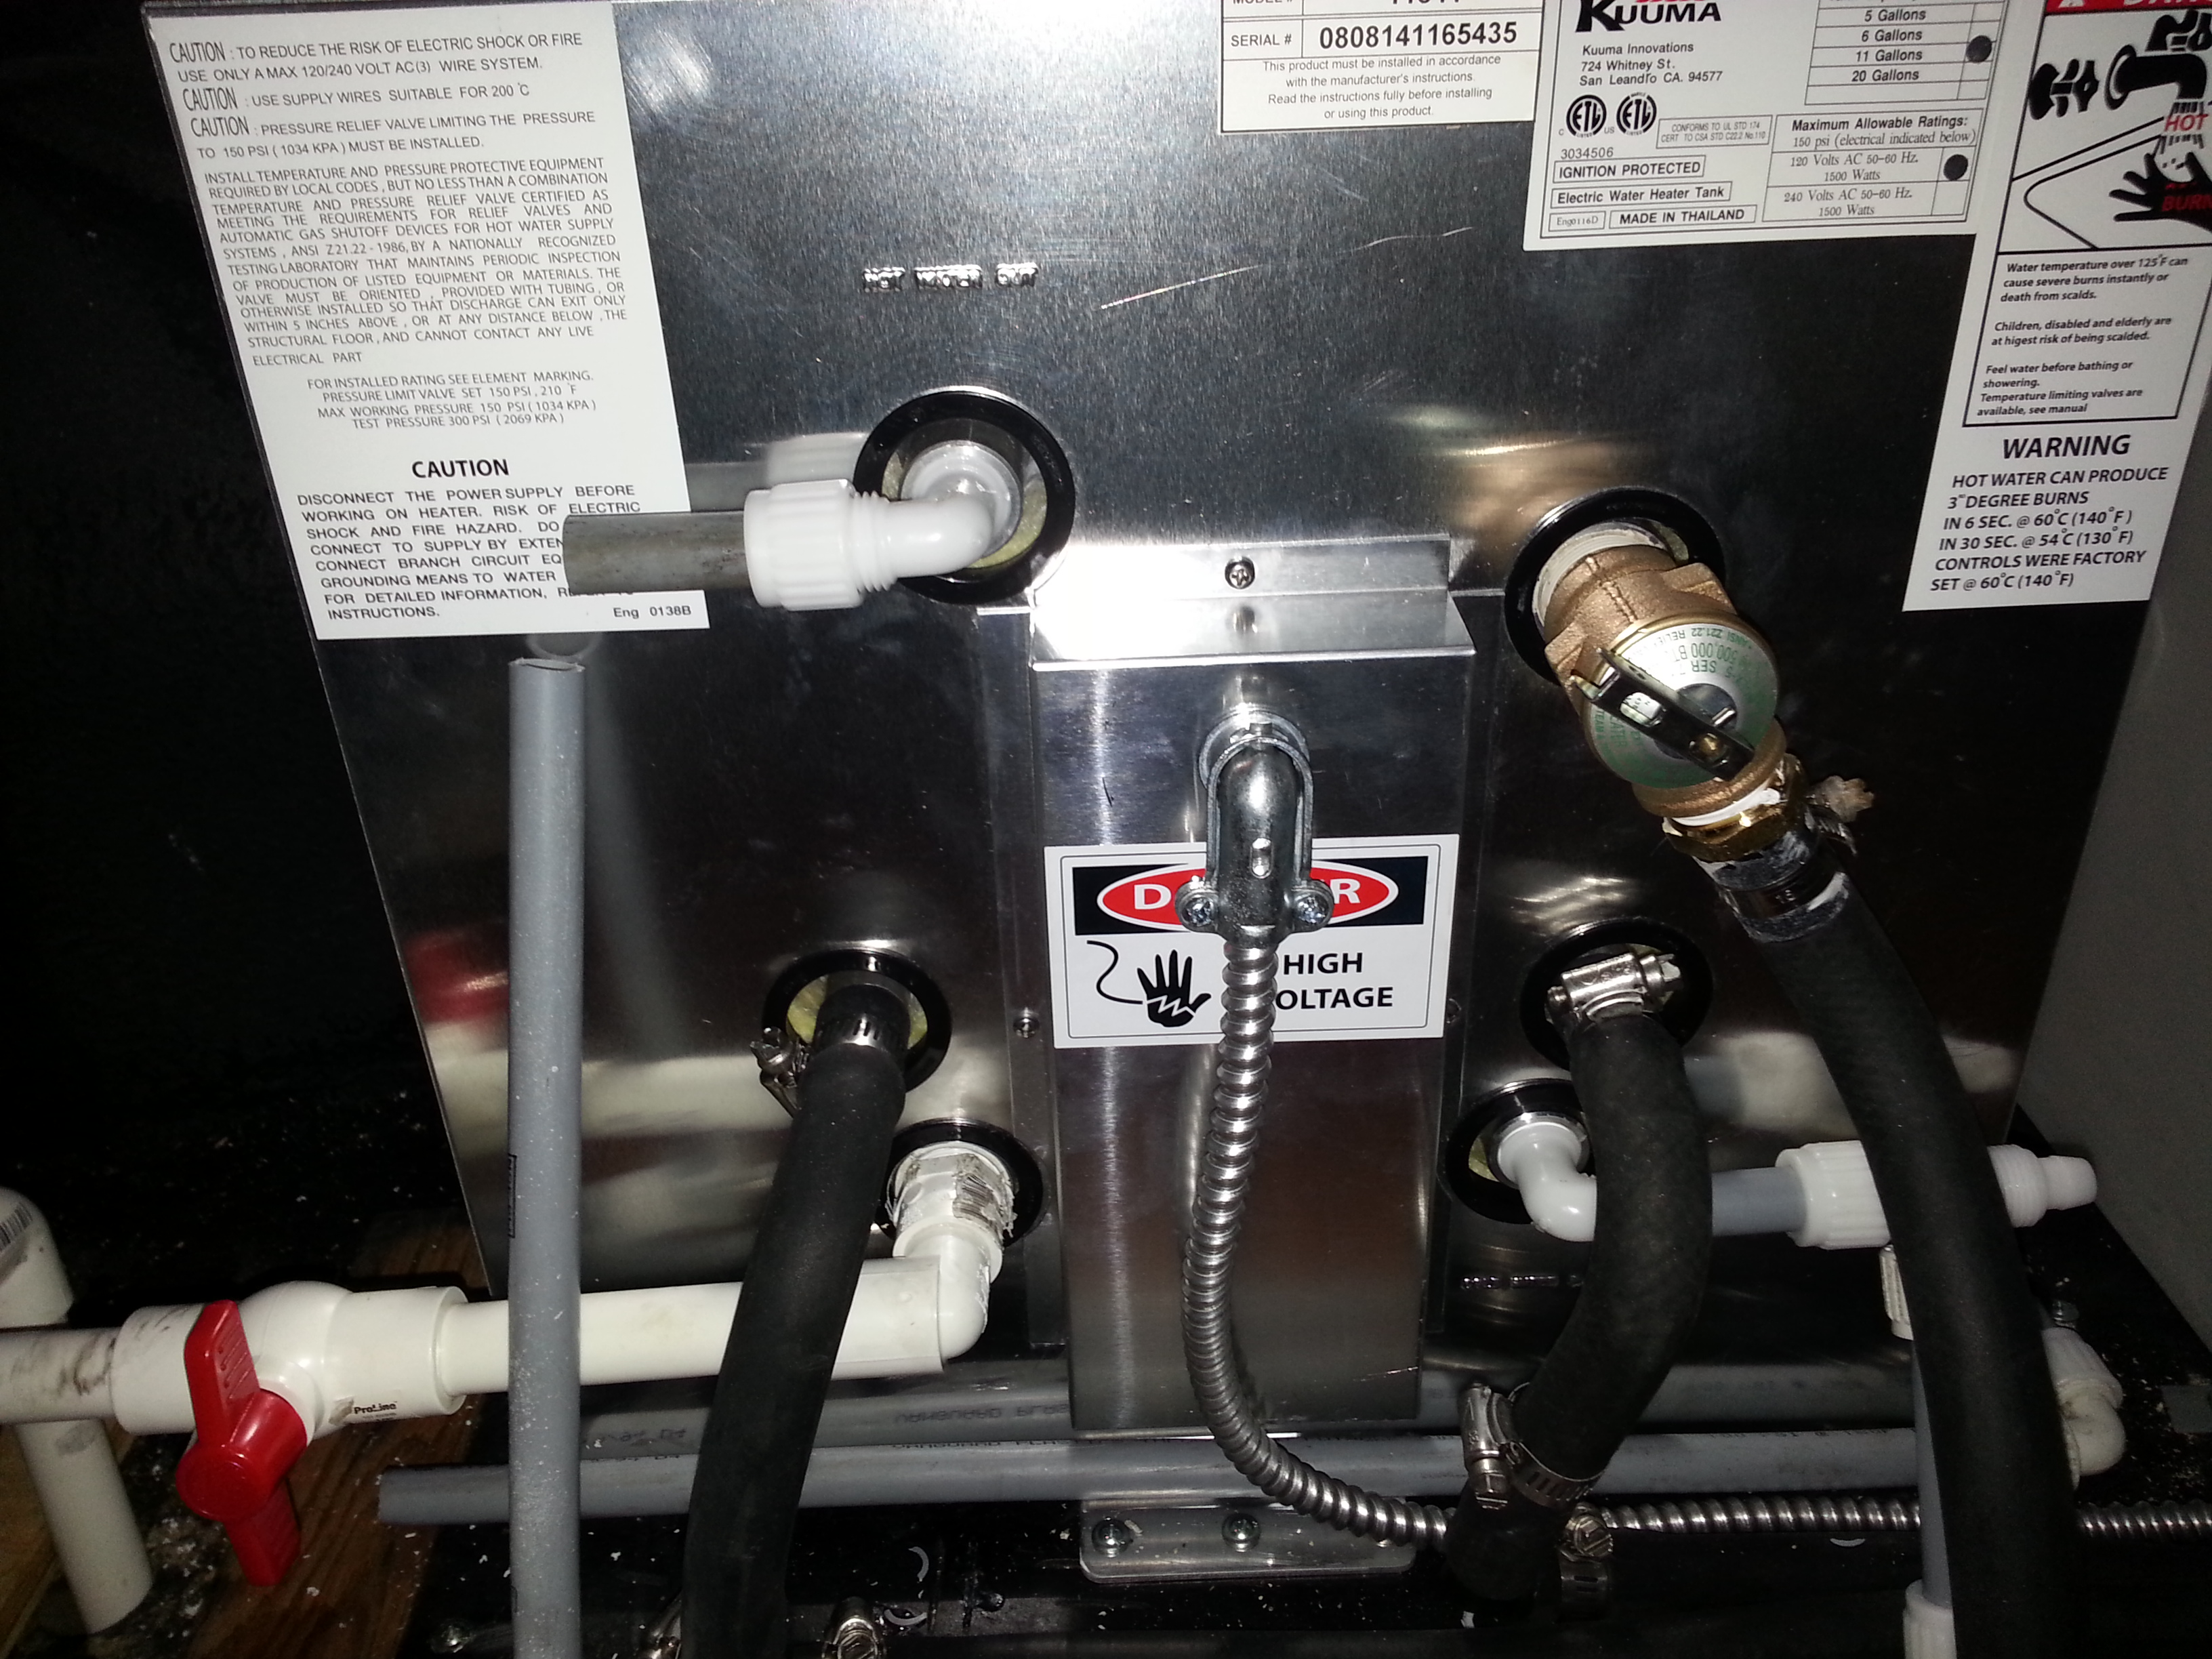
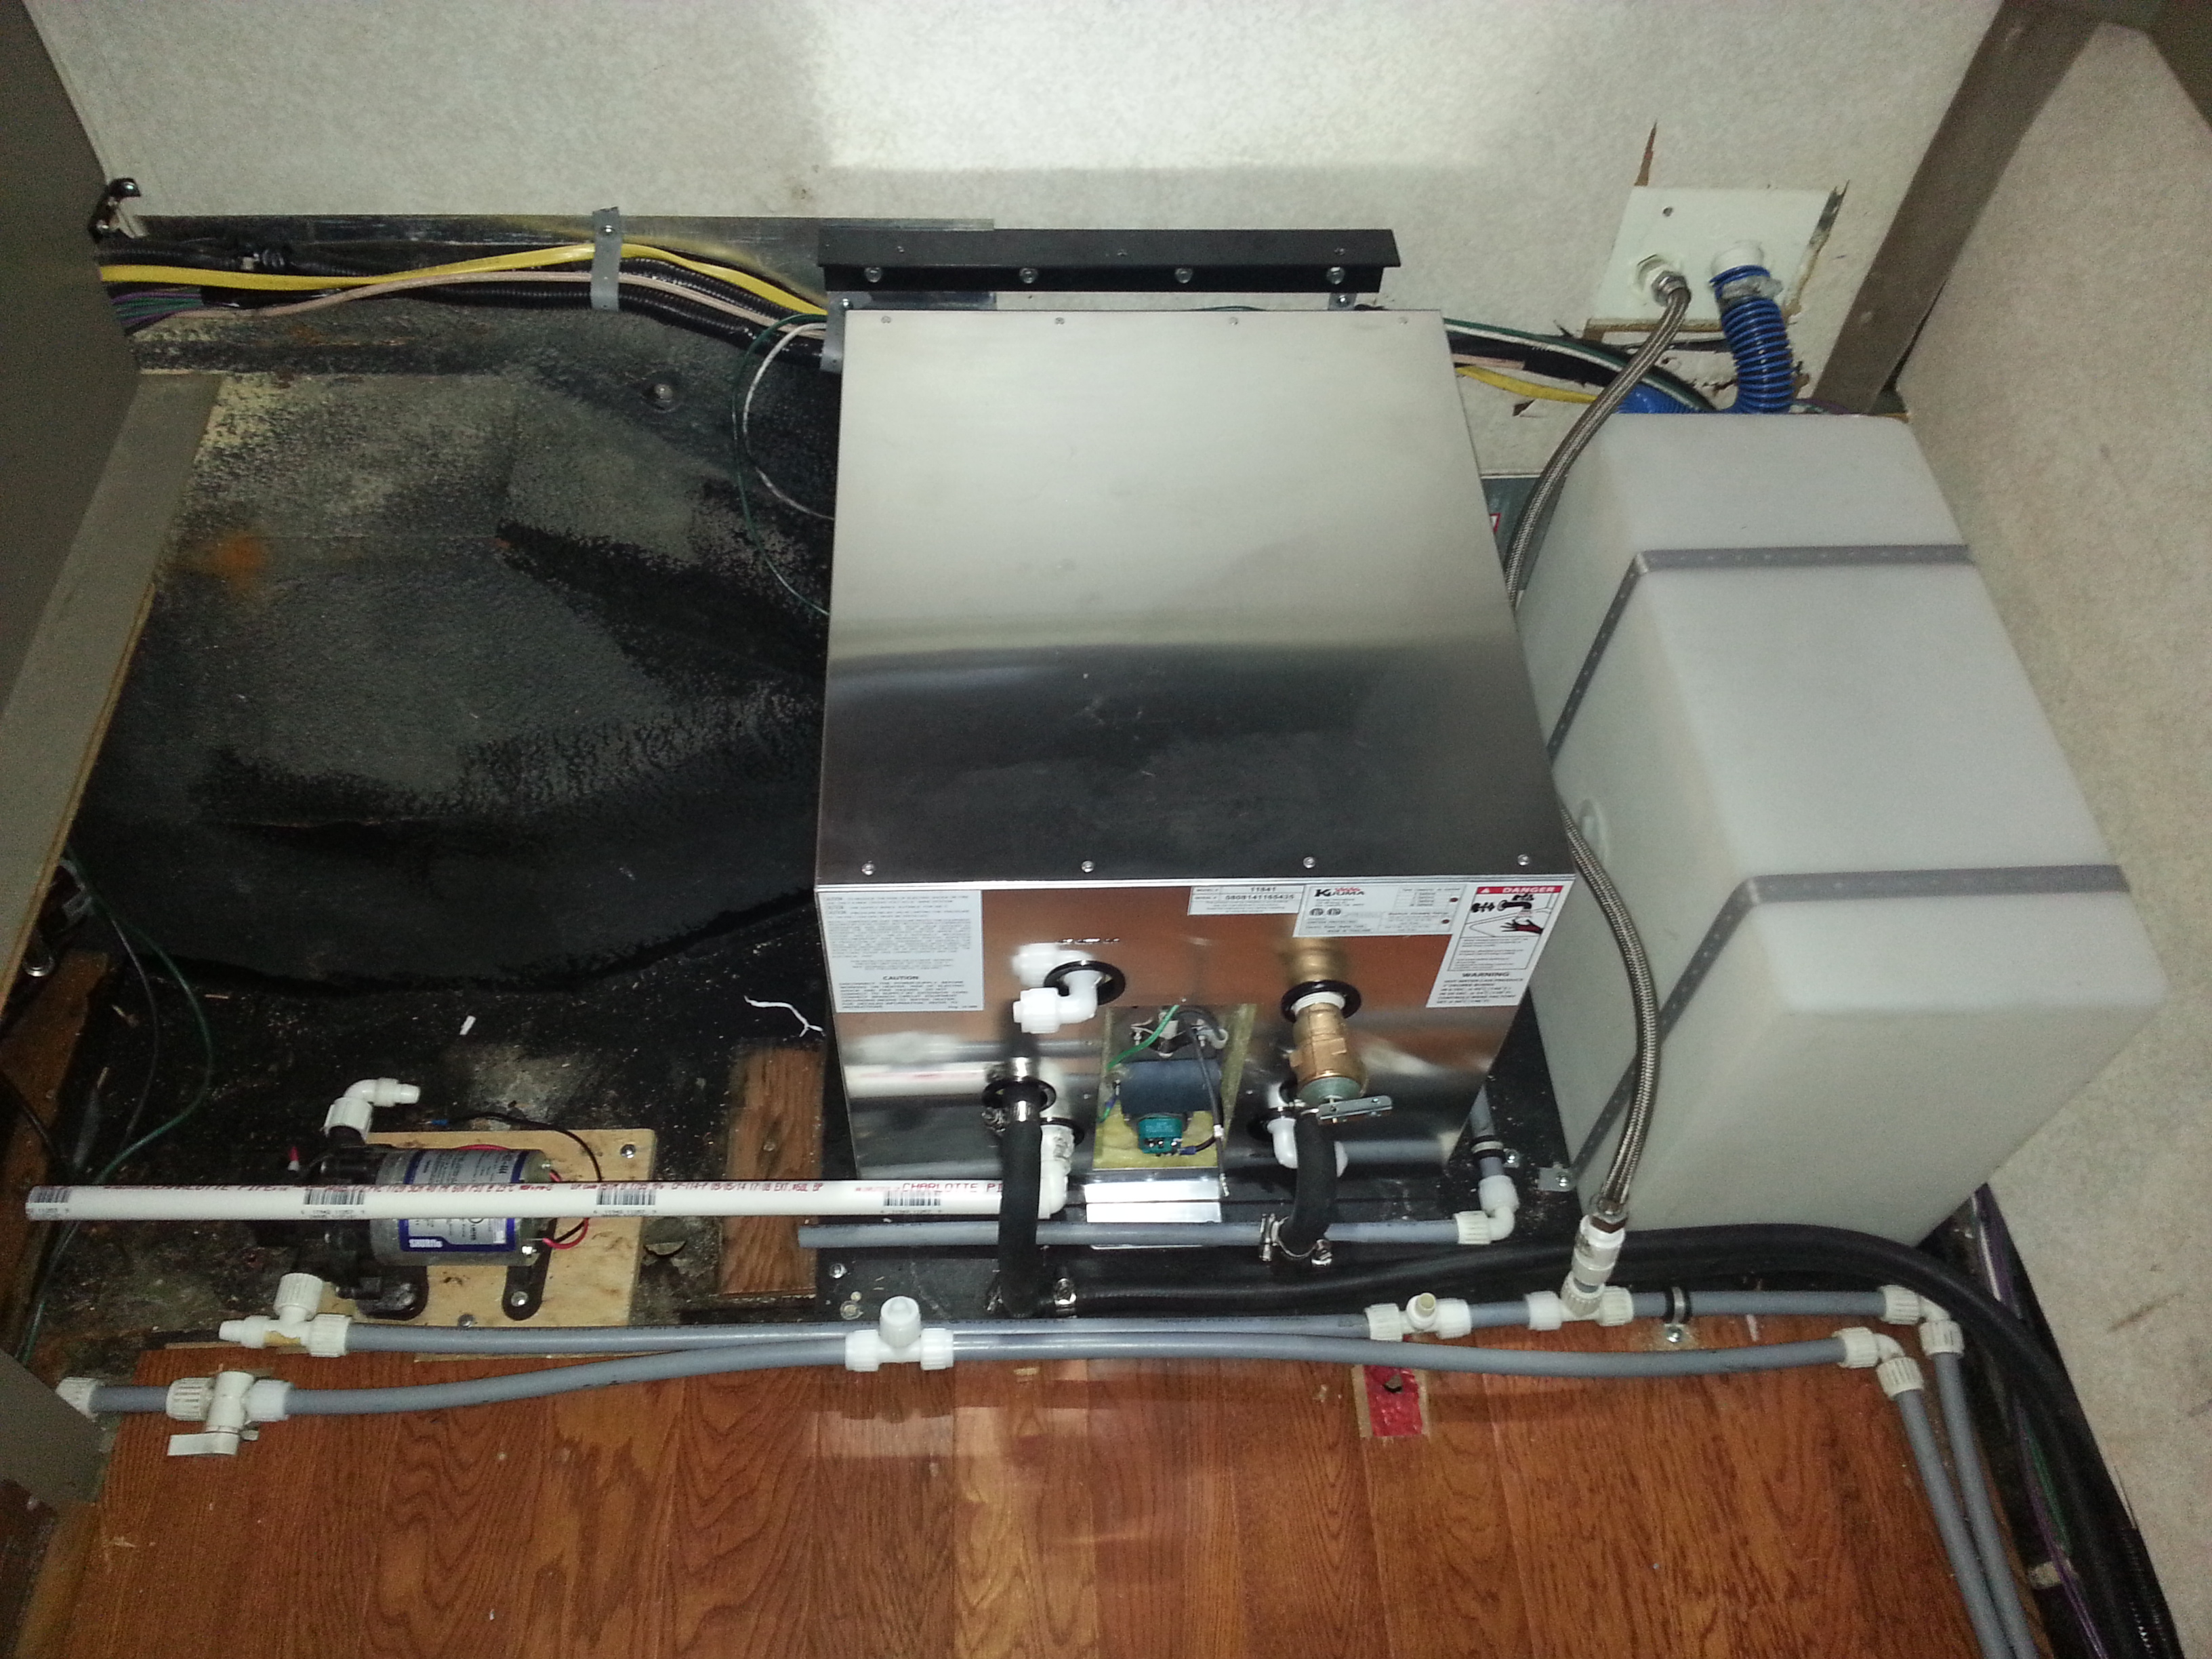
I did a little more work on the Rialta today. Got in the new water heater you can see it is about 3 inches taller and 3 inches wider than the old one.
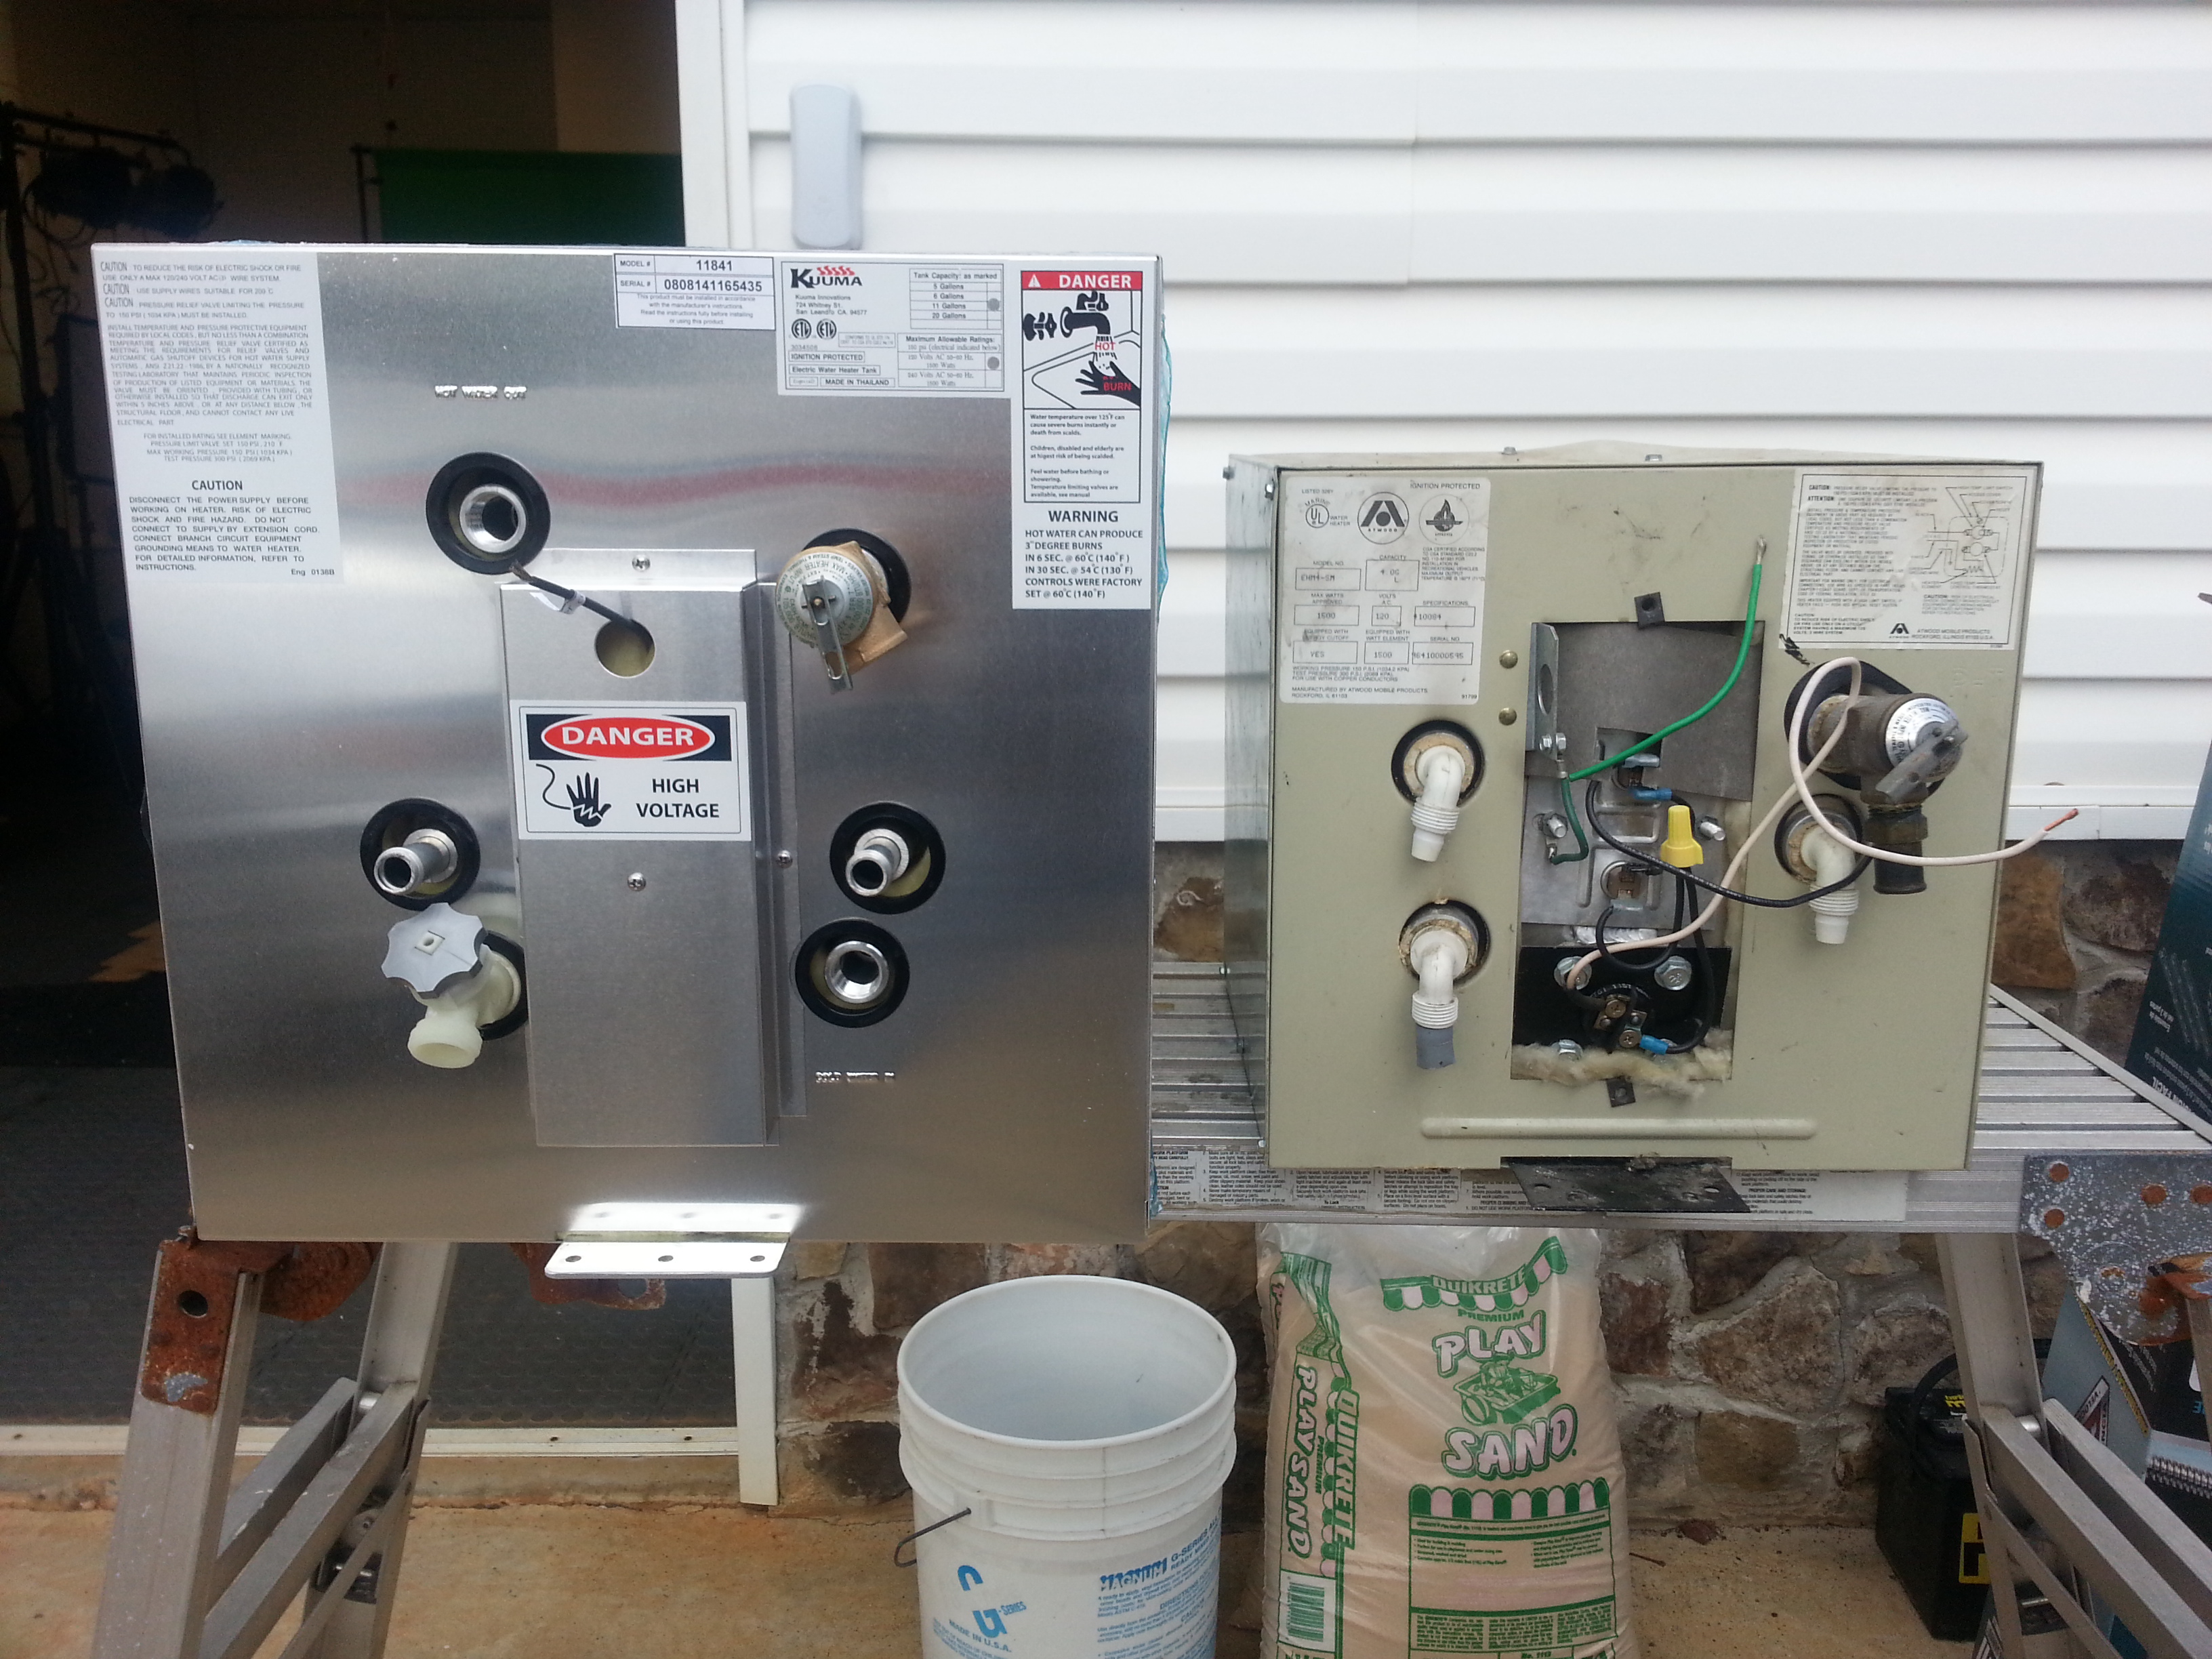
As you can see in this photo it fits nicely where the LP tank was.
I also got the Air Tank and Compressor mounted where the old water heater was located.
I got the new water tank and all the fittings in today so I am ready to install everything this weekend. There is a lot or rewiring to be done and I want to clean up the rats nest that Winnebago created when they installed the stuff in the first place. I think I can remove around 10 lbs. of copper just by routing the wires correctly. I also found some neat connections for the heat exchanger lines that run from the engine to the Aux heater and water heater. I will need to extend the coolant lines to the other side of the motorhome and I plan on running heater hoses inside the back wall to get to the other side. I found some Sharkbite connectors that will fit on the steel lines that ran to the old water heater. These will be adapted to 5/8 inch heater hose and run to the new heaters location.
Remove LP Tank and New Water Heater:
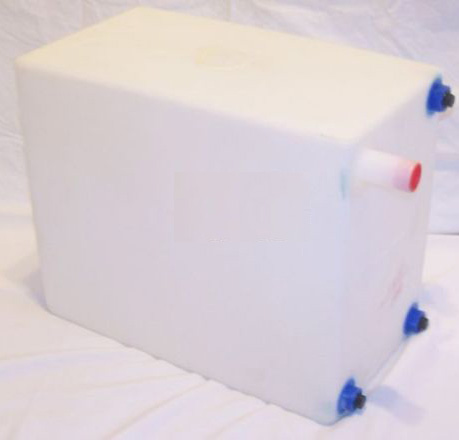
It took some doing but I removed the LP tank and Water tank to make room for a new 10 gallon water heater.
The challenge here was the metal box that covered the LP tank. It is screwed to the body with self tapping metal screws one every 2 inches around the 6 sides of the box. It is also glued with caulking (lots and lots of caulking). Once the box was removed the tank was held down with 4 bolts with nuts thru the floor.
The new 10 gal water tank and water heater will go here it will be a tight fit but it should work great. I am down sizing the water tank because we only use onboard water for the toilet when on the road. Having 10 gallons of hot water for showers is the main reason for this upgrade. Now the wife will not have a problem washing her hair!
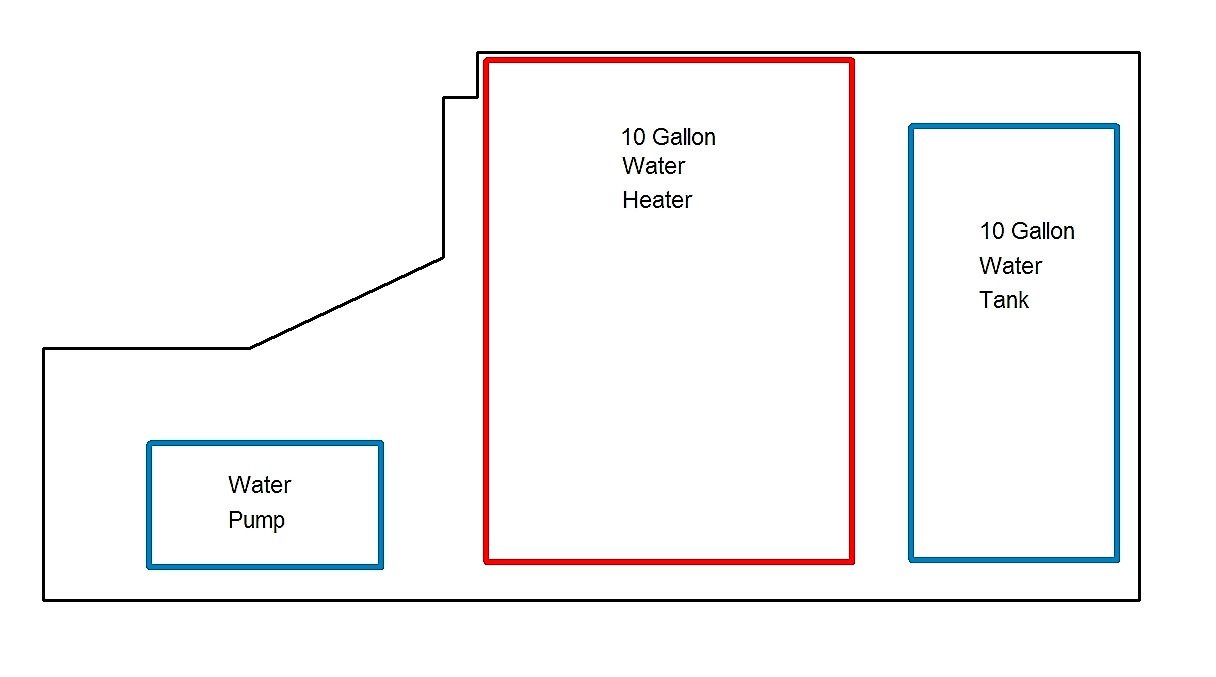
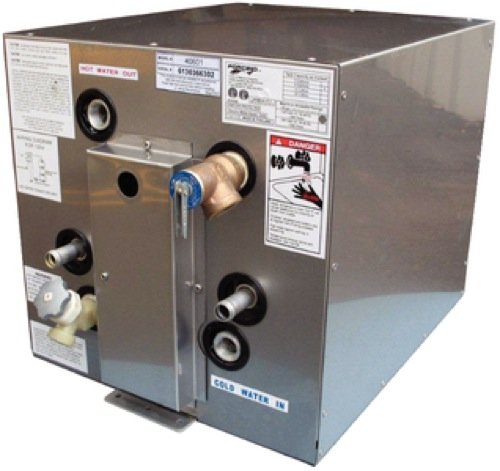
There will even be a small space for outside storage behind the new water tank! I am going to have to raise the rear seats up about 1 to 2 inches. This will not be hard because the rear seat is only attached at 3 points. 2 legs and onto a metal angle at the wall. I plan on installing the tank for the air bag in the space vacated by the old water heater.
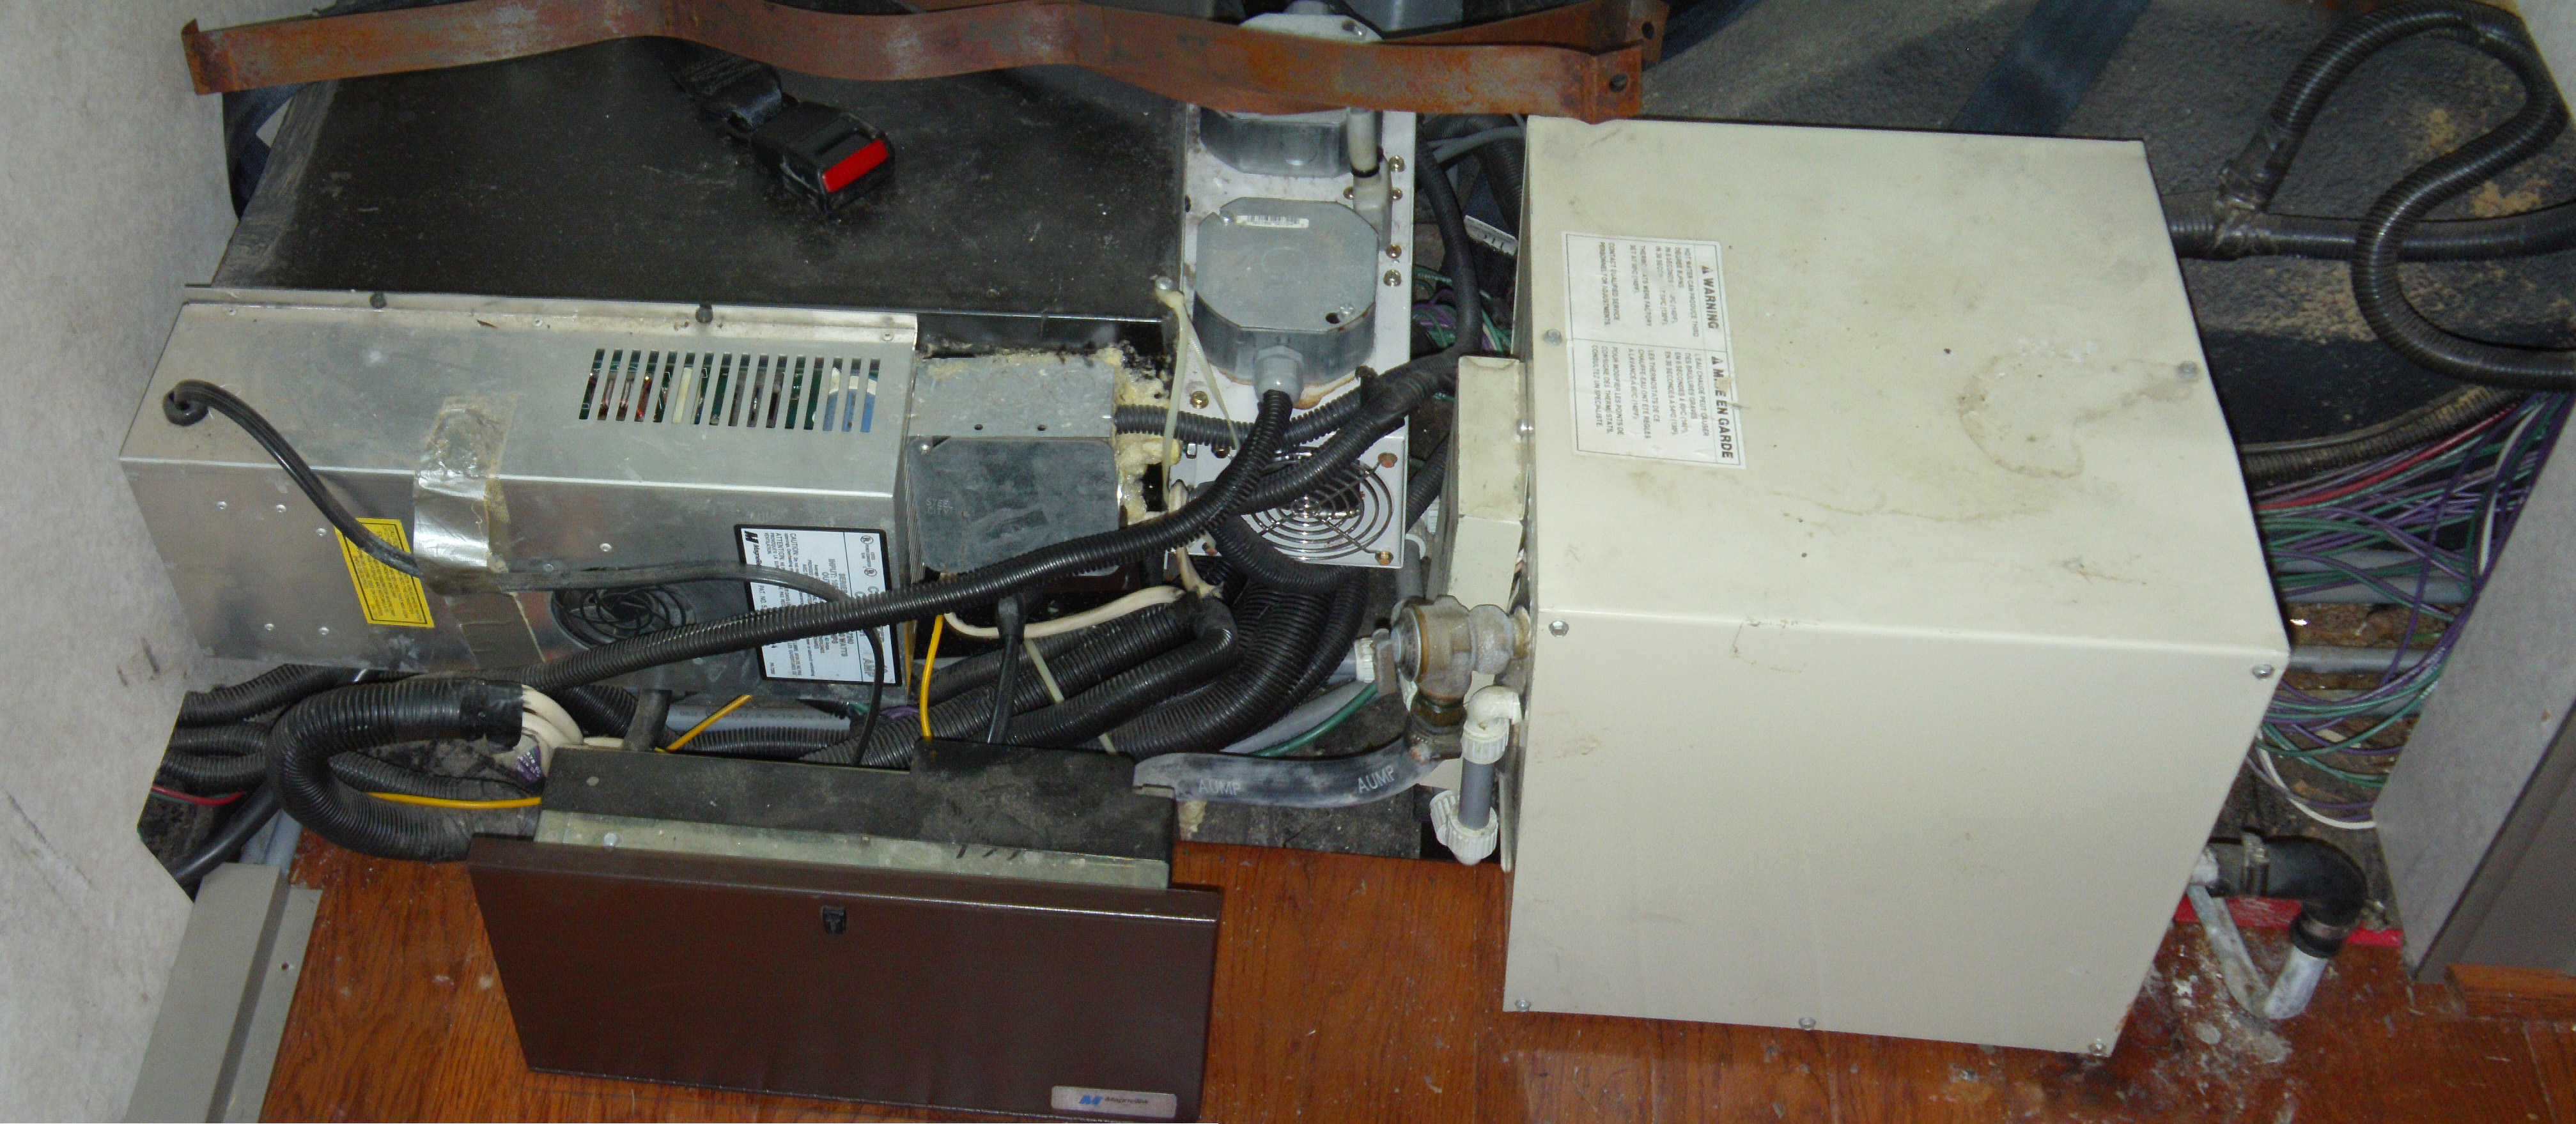
This is also where the new 50 amp service panel will go it will have a built in 12v converter and battery charger so the old Magtek will also be going. I also hope to clean up some of the rats nest of wiring that is located in both areas.
How much does this cost? I got the water tank off ebay for $36.00 and the water heater of all places, Wal-Mart online! it was $320.00 including shipping and tax. It will probably take another $50.00 for plumbing parts and radiator heater hose to plumb up the heat exchanger. It will be a week or more before all the parts are here so in the mean time I am going to remove the old water heater, clean up the plumbing and start installing the air tank and compressor.
Monday 2-23-2015
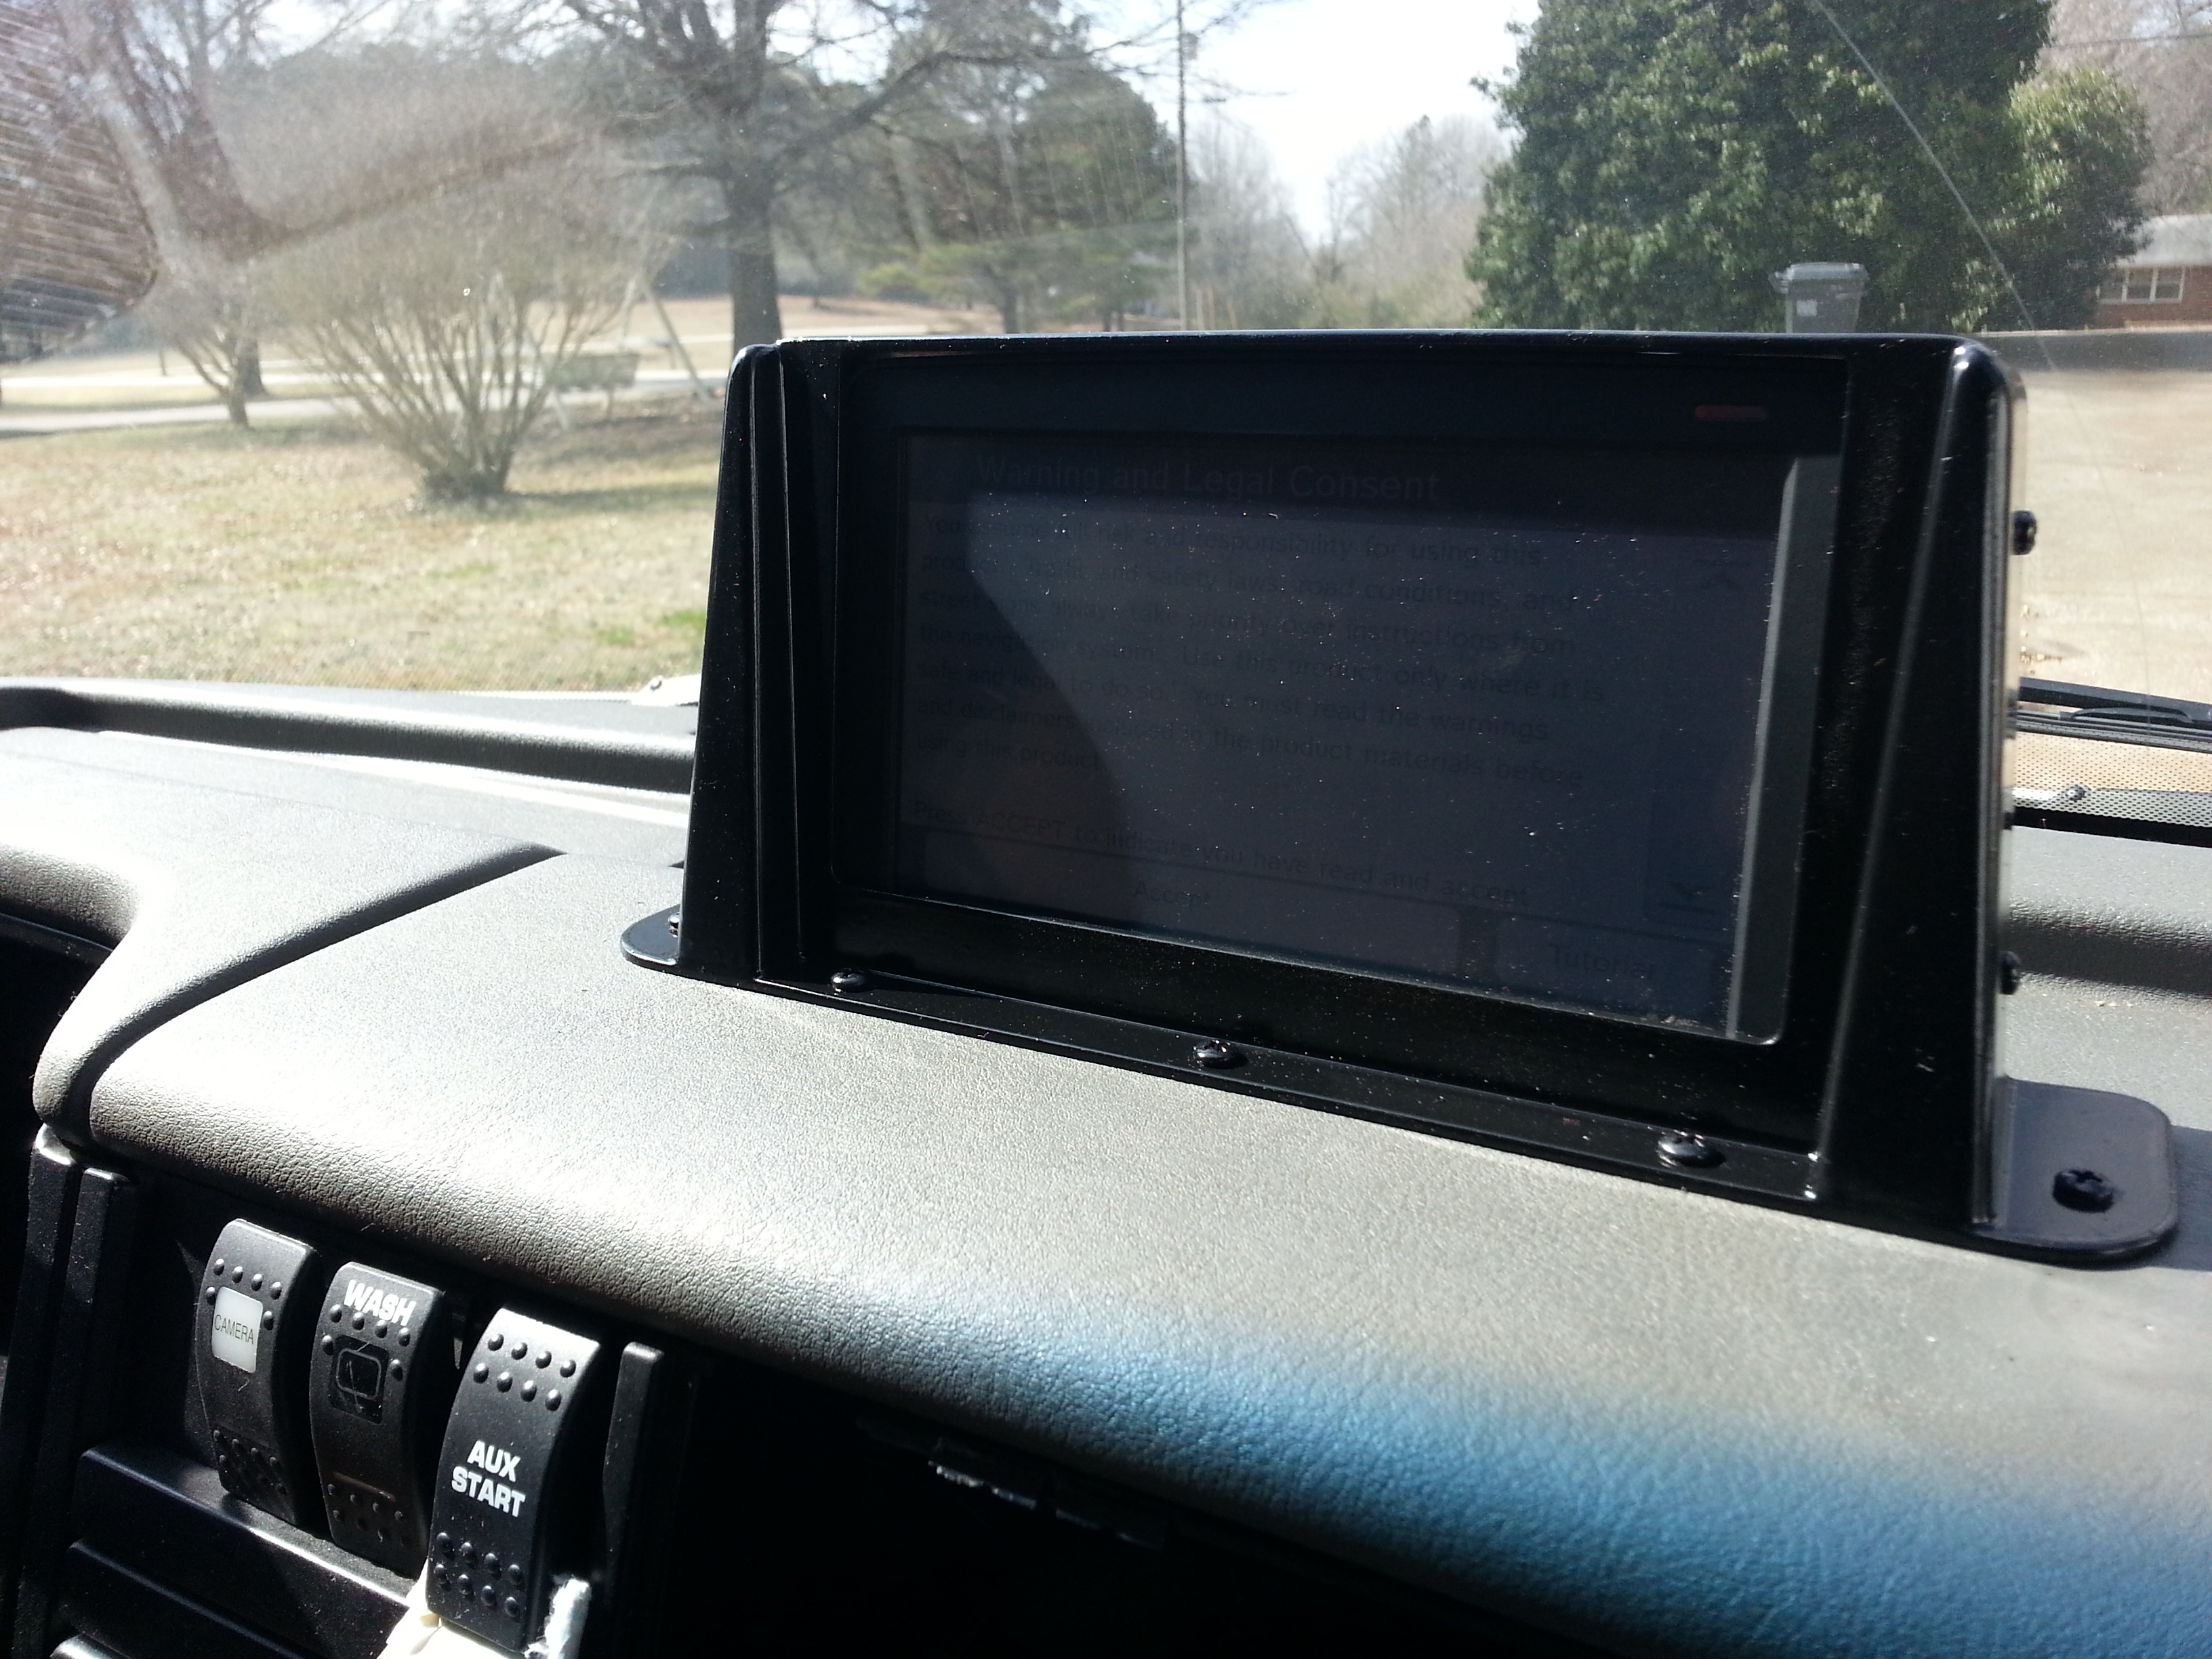
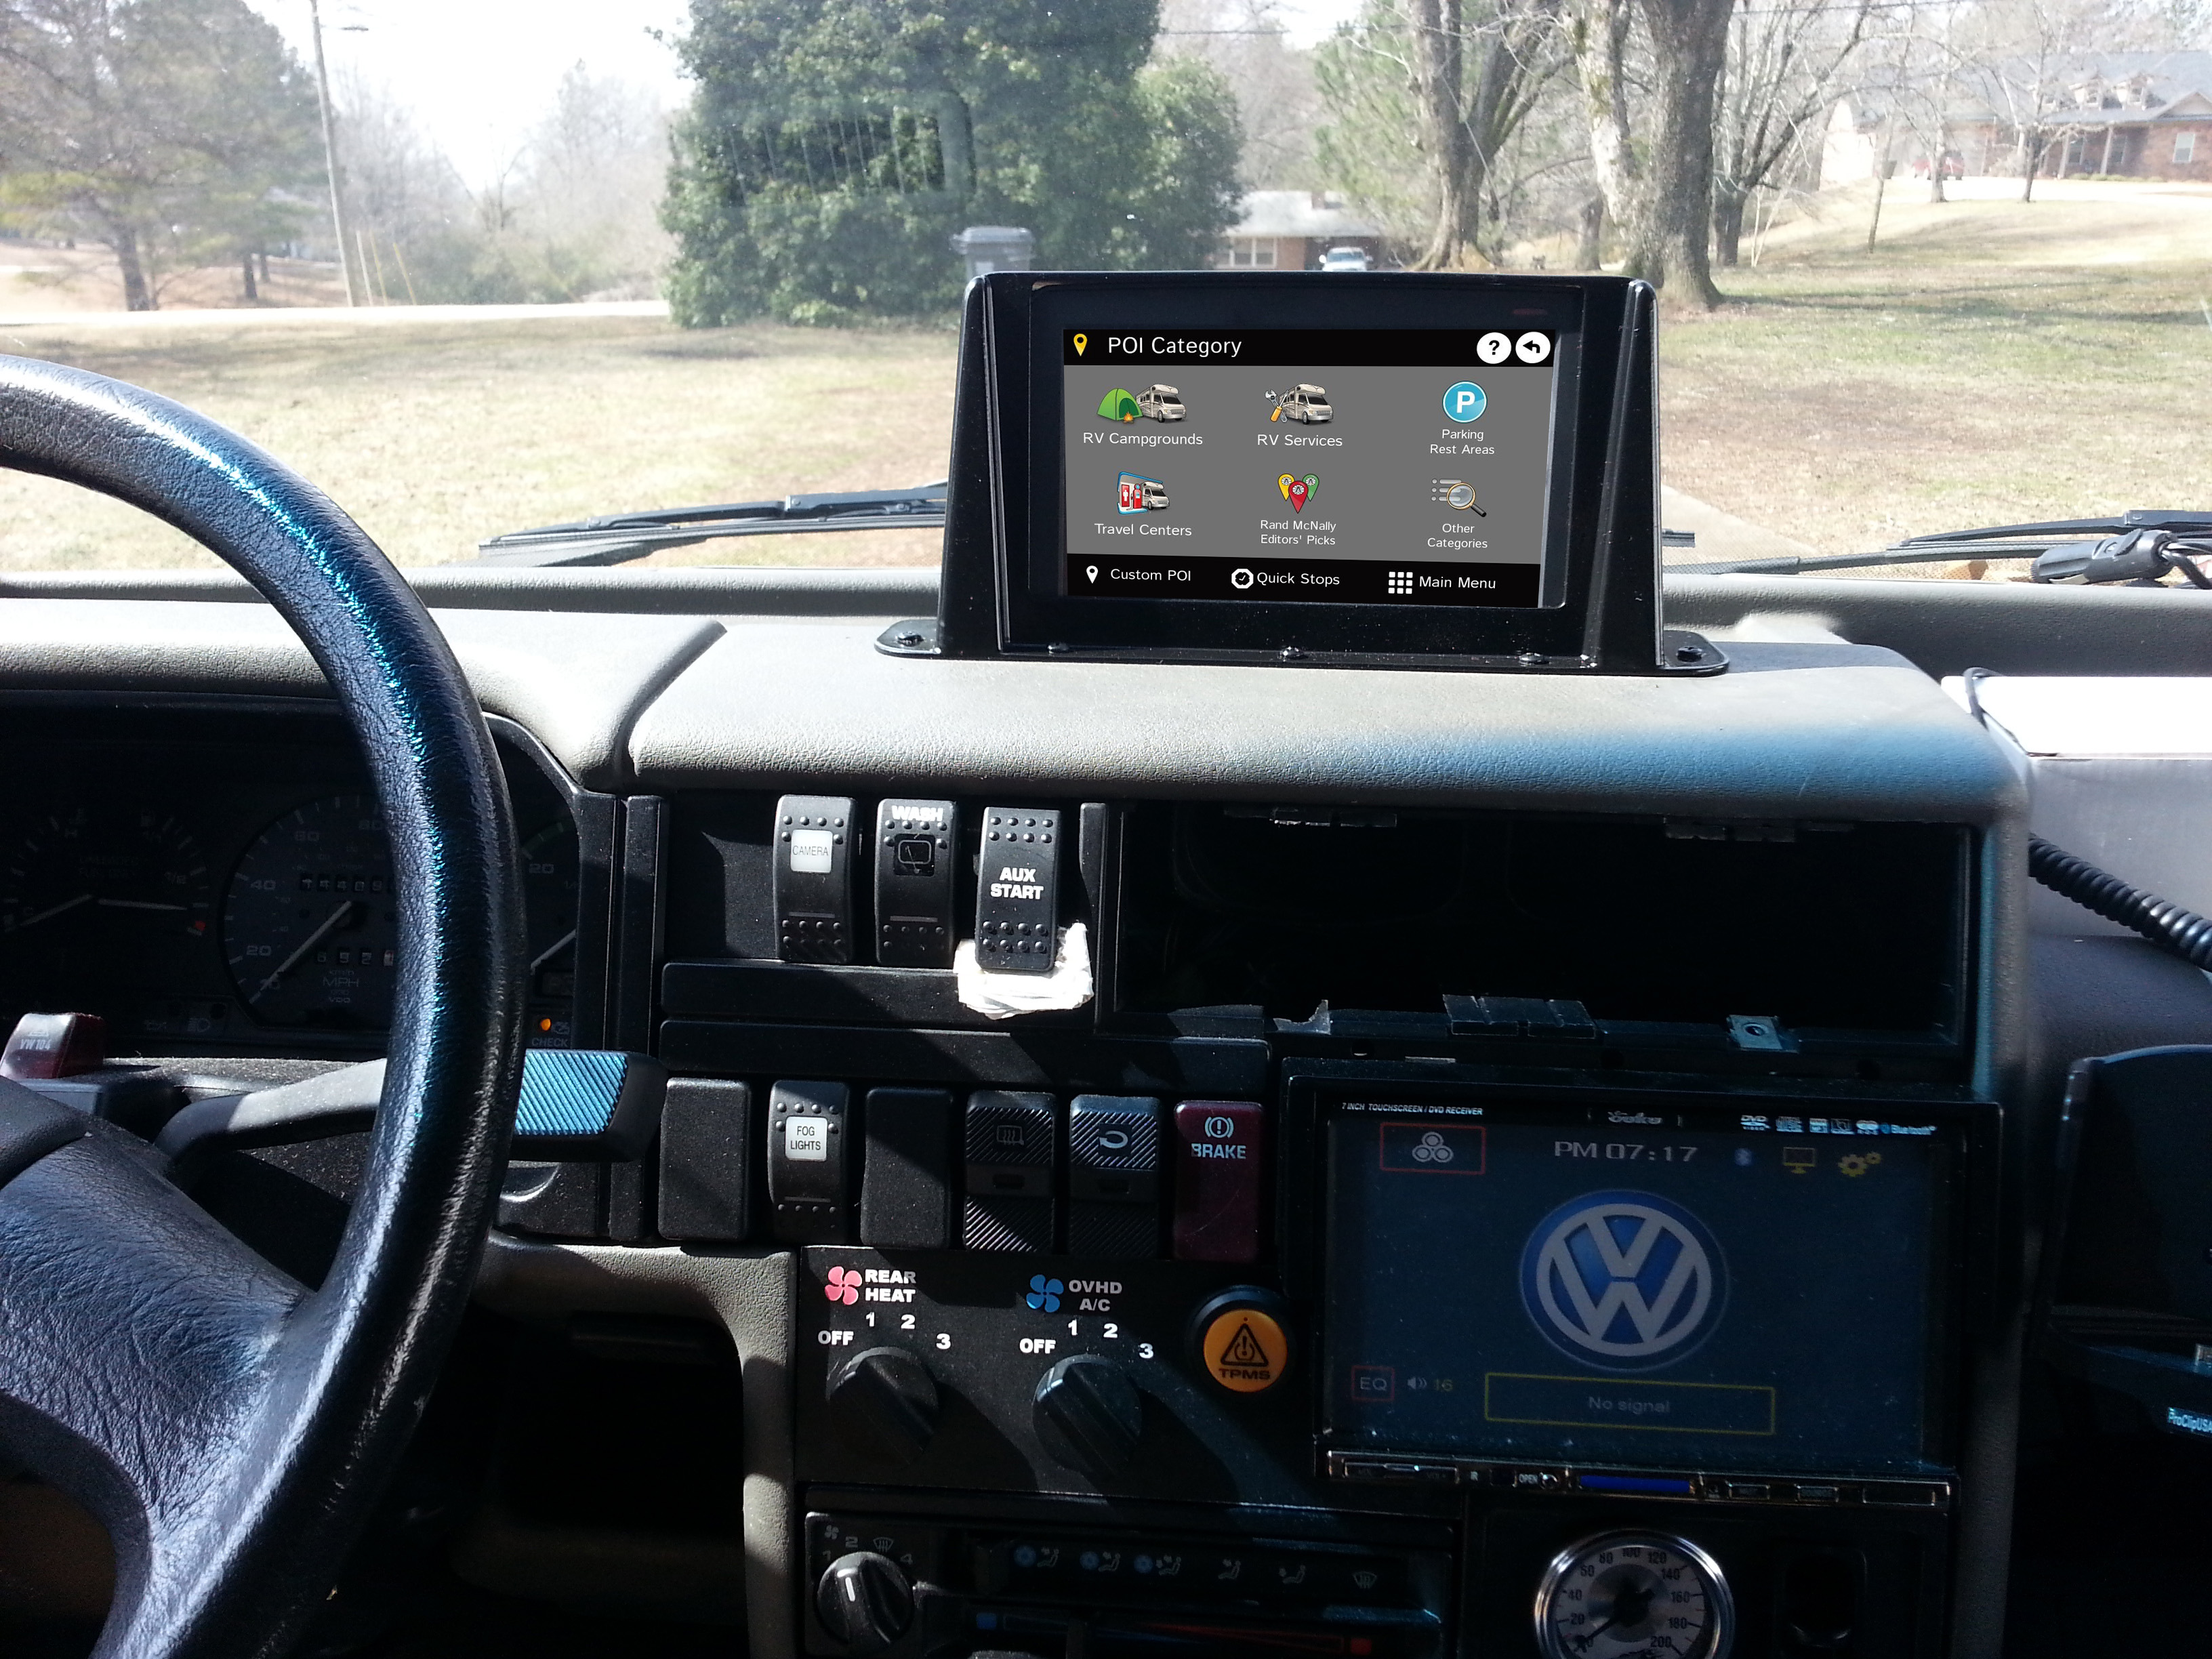
New GPS enclosure:
I teased this in the TPMS and Camera Upgrade write up. I wanted a nice enclosure for the 7 inch Rand McNally RV7730 GPS that I recently got to replace my 5 year old unit. The RV7730 has some special features that are geared to an RV. Including...
RV Content
And it supports a Backup Camera!
To make the enclosure I purchased an under dash double DIN radio mounting kit from Amazon. It is basically a molded plastic box that can house a 7 inch radio.
I cut be box in half then made a 3/4 inch plywood back. I used the plywood to sandwich the GPS unit in place. I had to drill a 1 inch hole in the top so you can access the on off switch and a 2 inch hole in the back for the speaker. Then I trimmed the case flush with the plywood back. Sanded it good and shot it with some gloss black and a couple coats of clear. It screws to the dash using a flange and all of the wiring is hidden inside the case. I connected it to 12v power and also to the new backup cameras via the control box. It adds a nice built in look to the GPS much neater than the old mounting bracket and suction cup arrangement.

The finished installation.
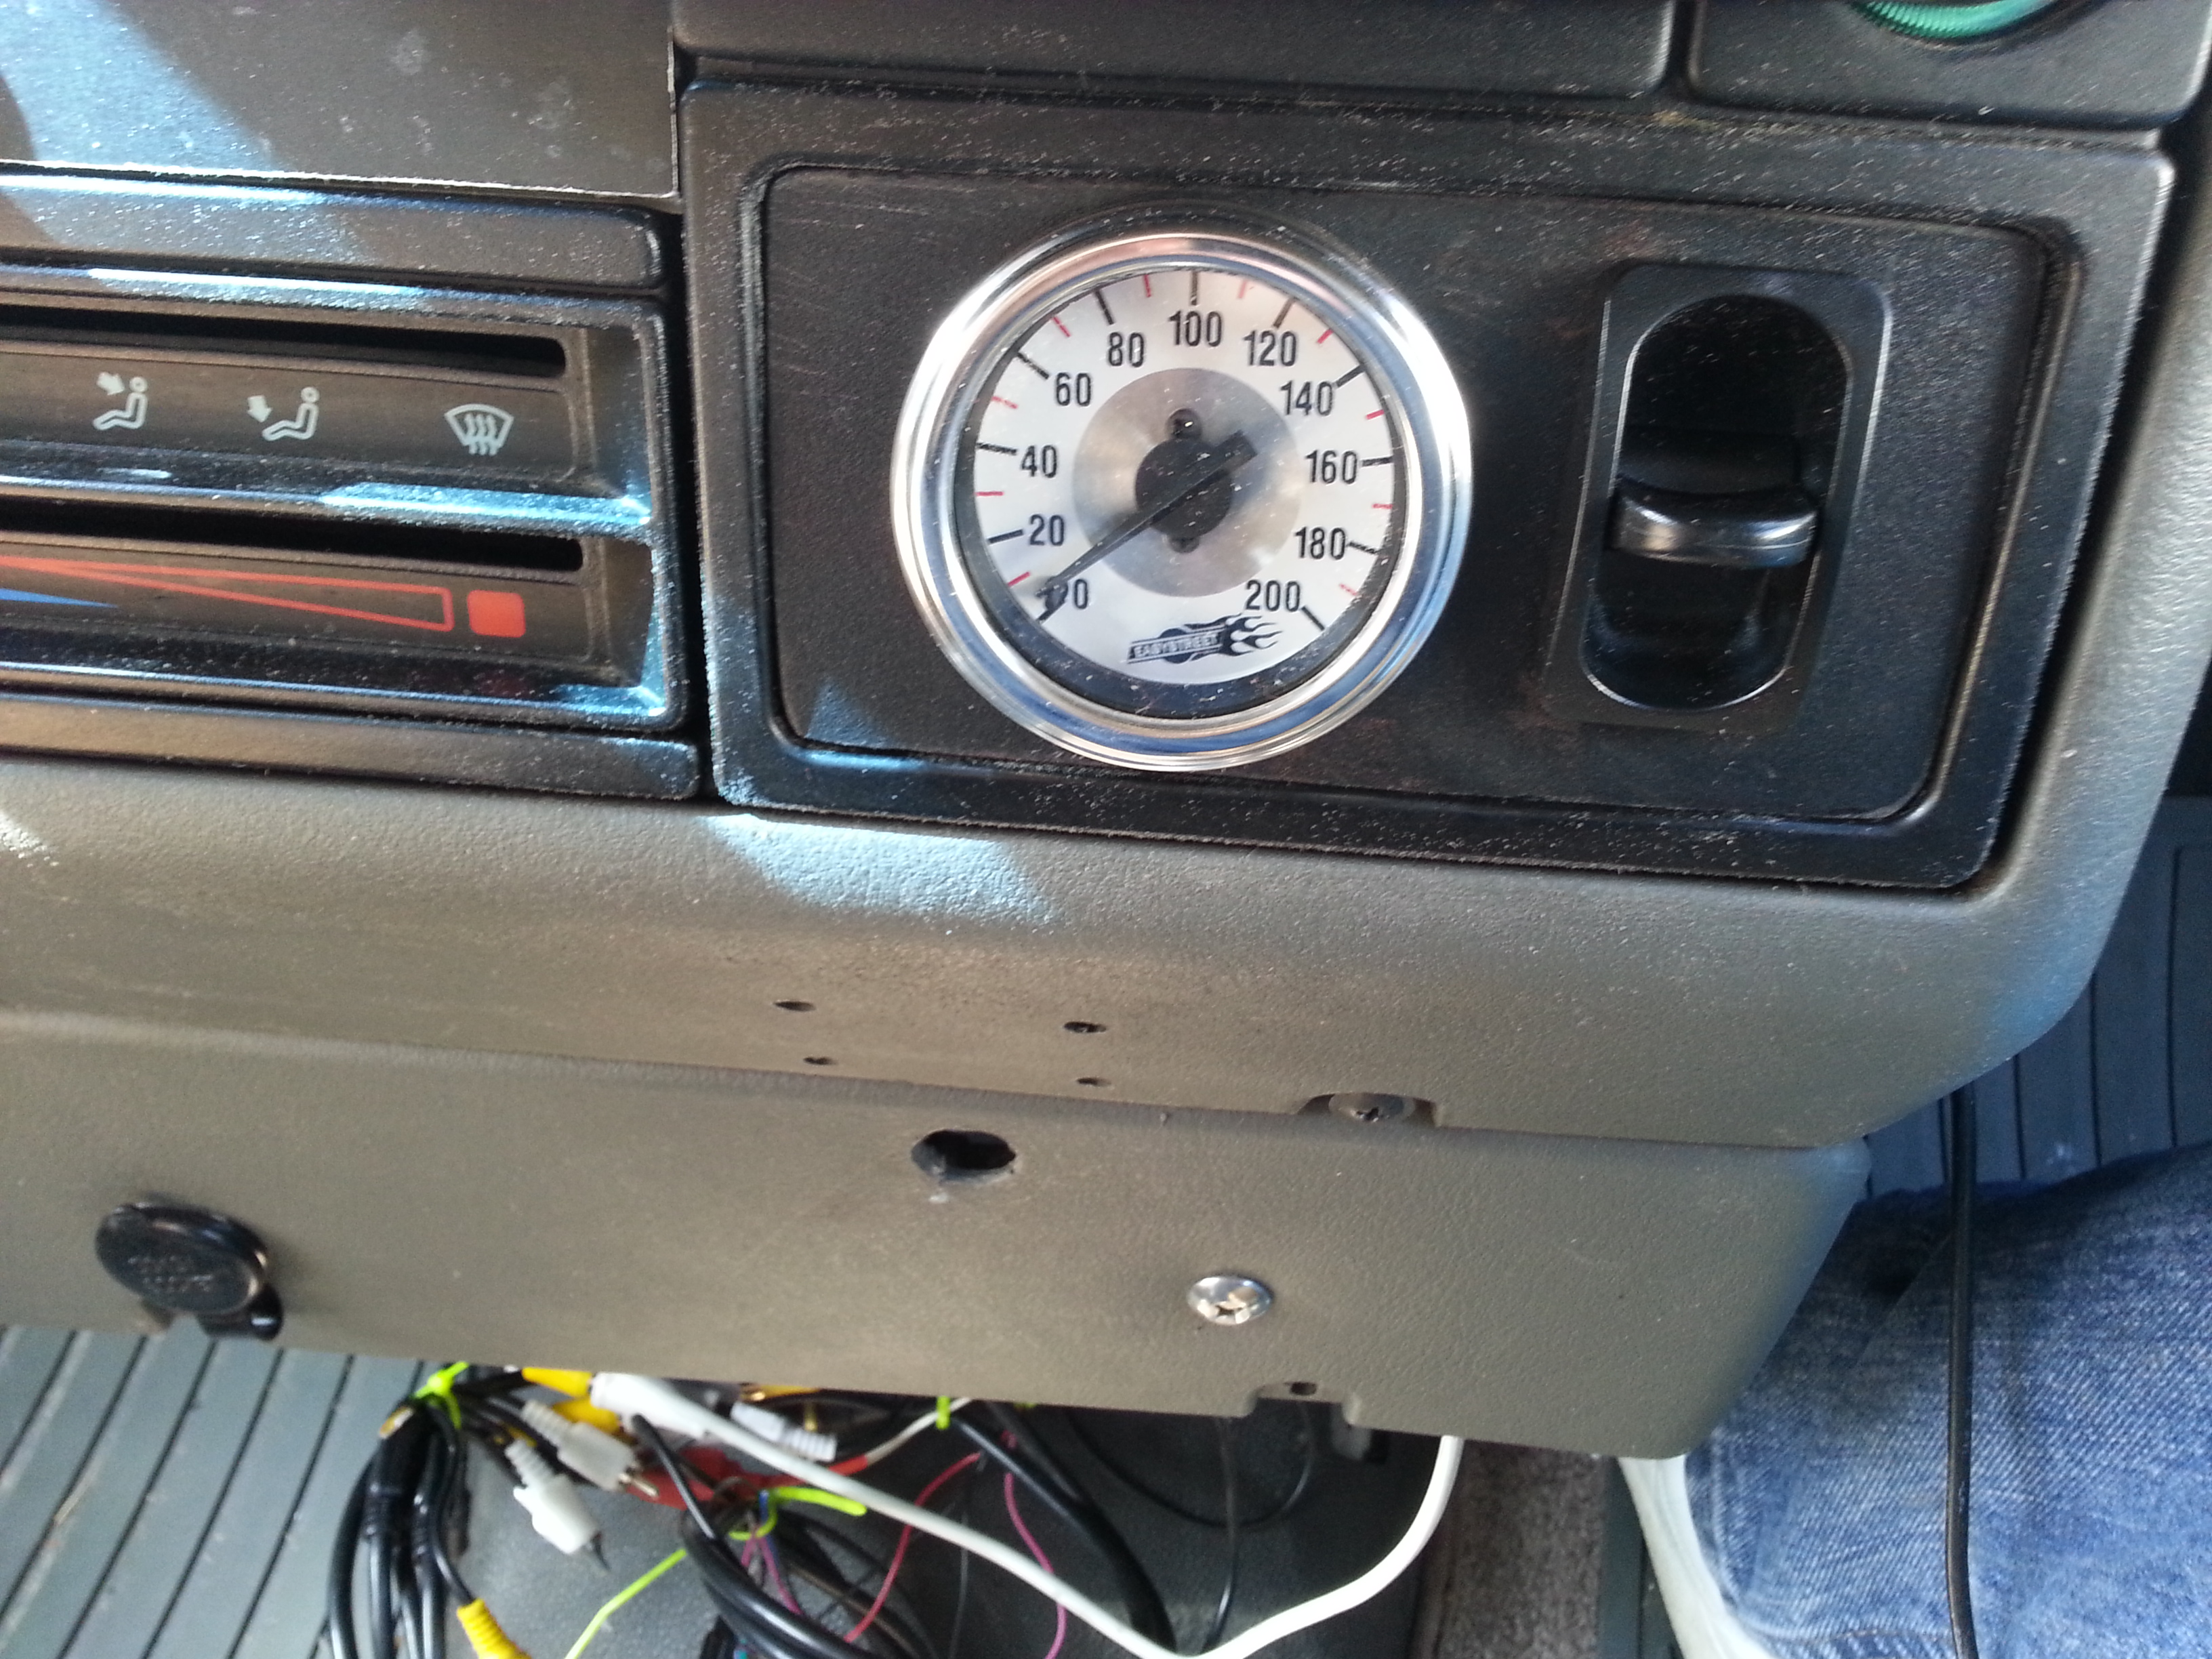
Next up Air Ride Pump and Air Tank. I got started by installing the gage and switch. Used some of the leftover plastic Radio box to make a filler plate for the ash tray (It was only being used to hold the radio remote). That's all I have done on this project need some nice weather to get the tank mounted and all the lines run.
Also got the new switch for the backup cameras and the additional cameras in today. I pulled the switches and started chasing the wiring as you can see here it is ALOT OF WIRES!
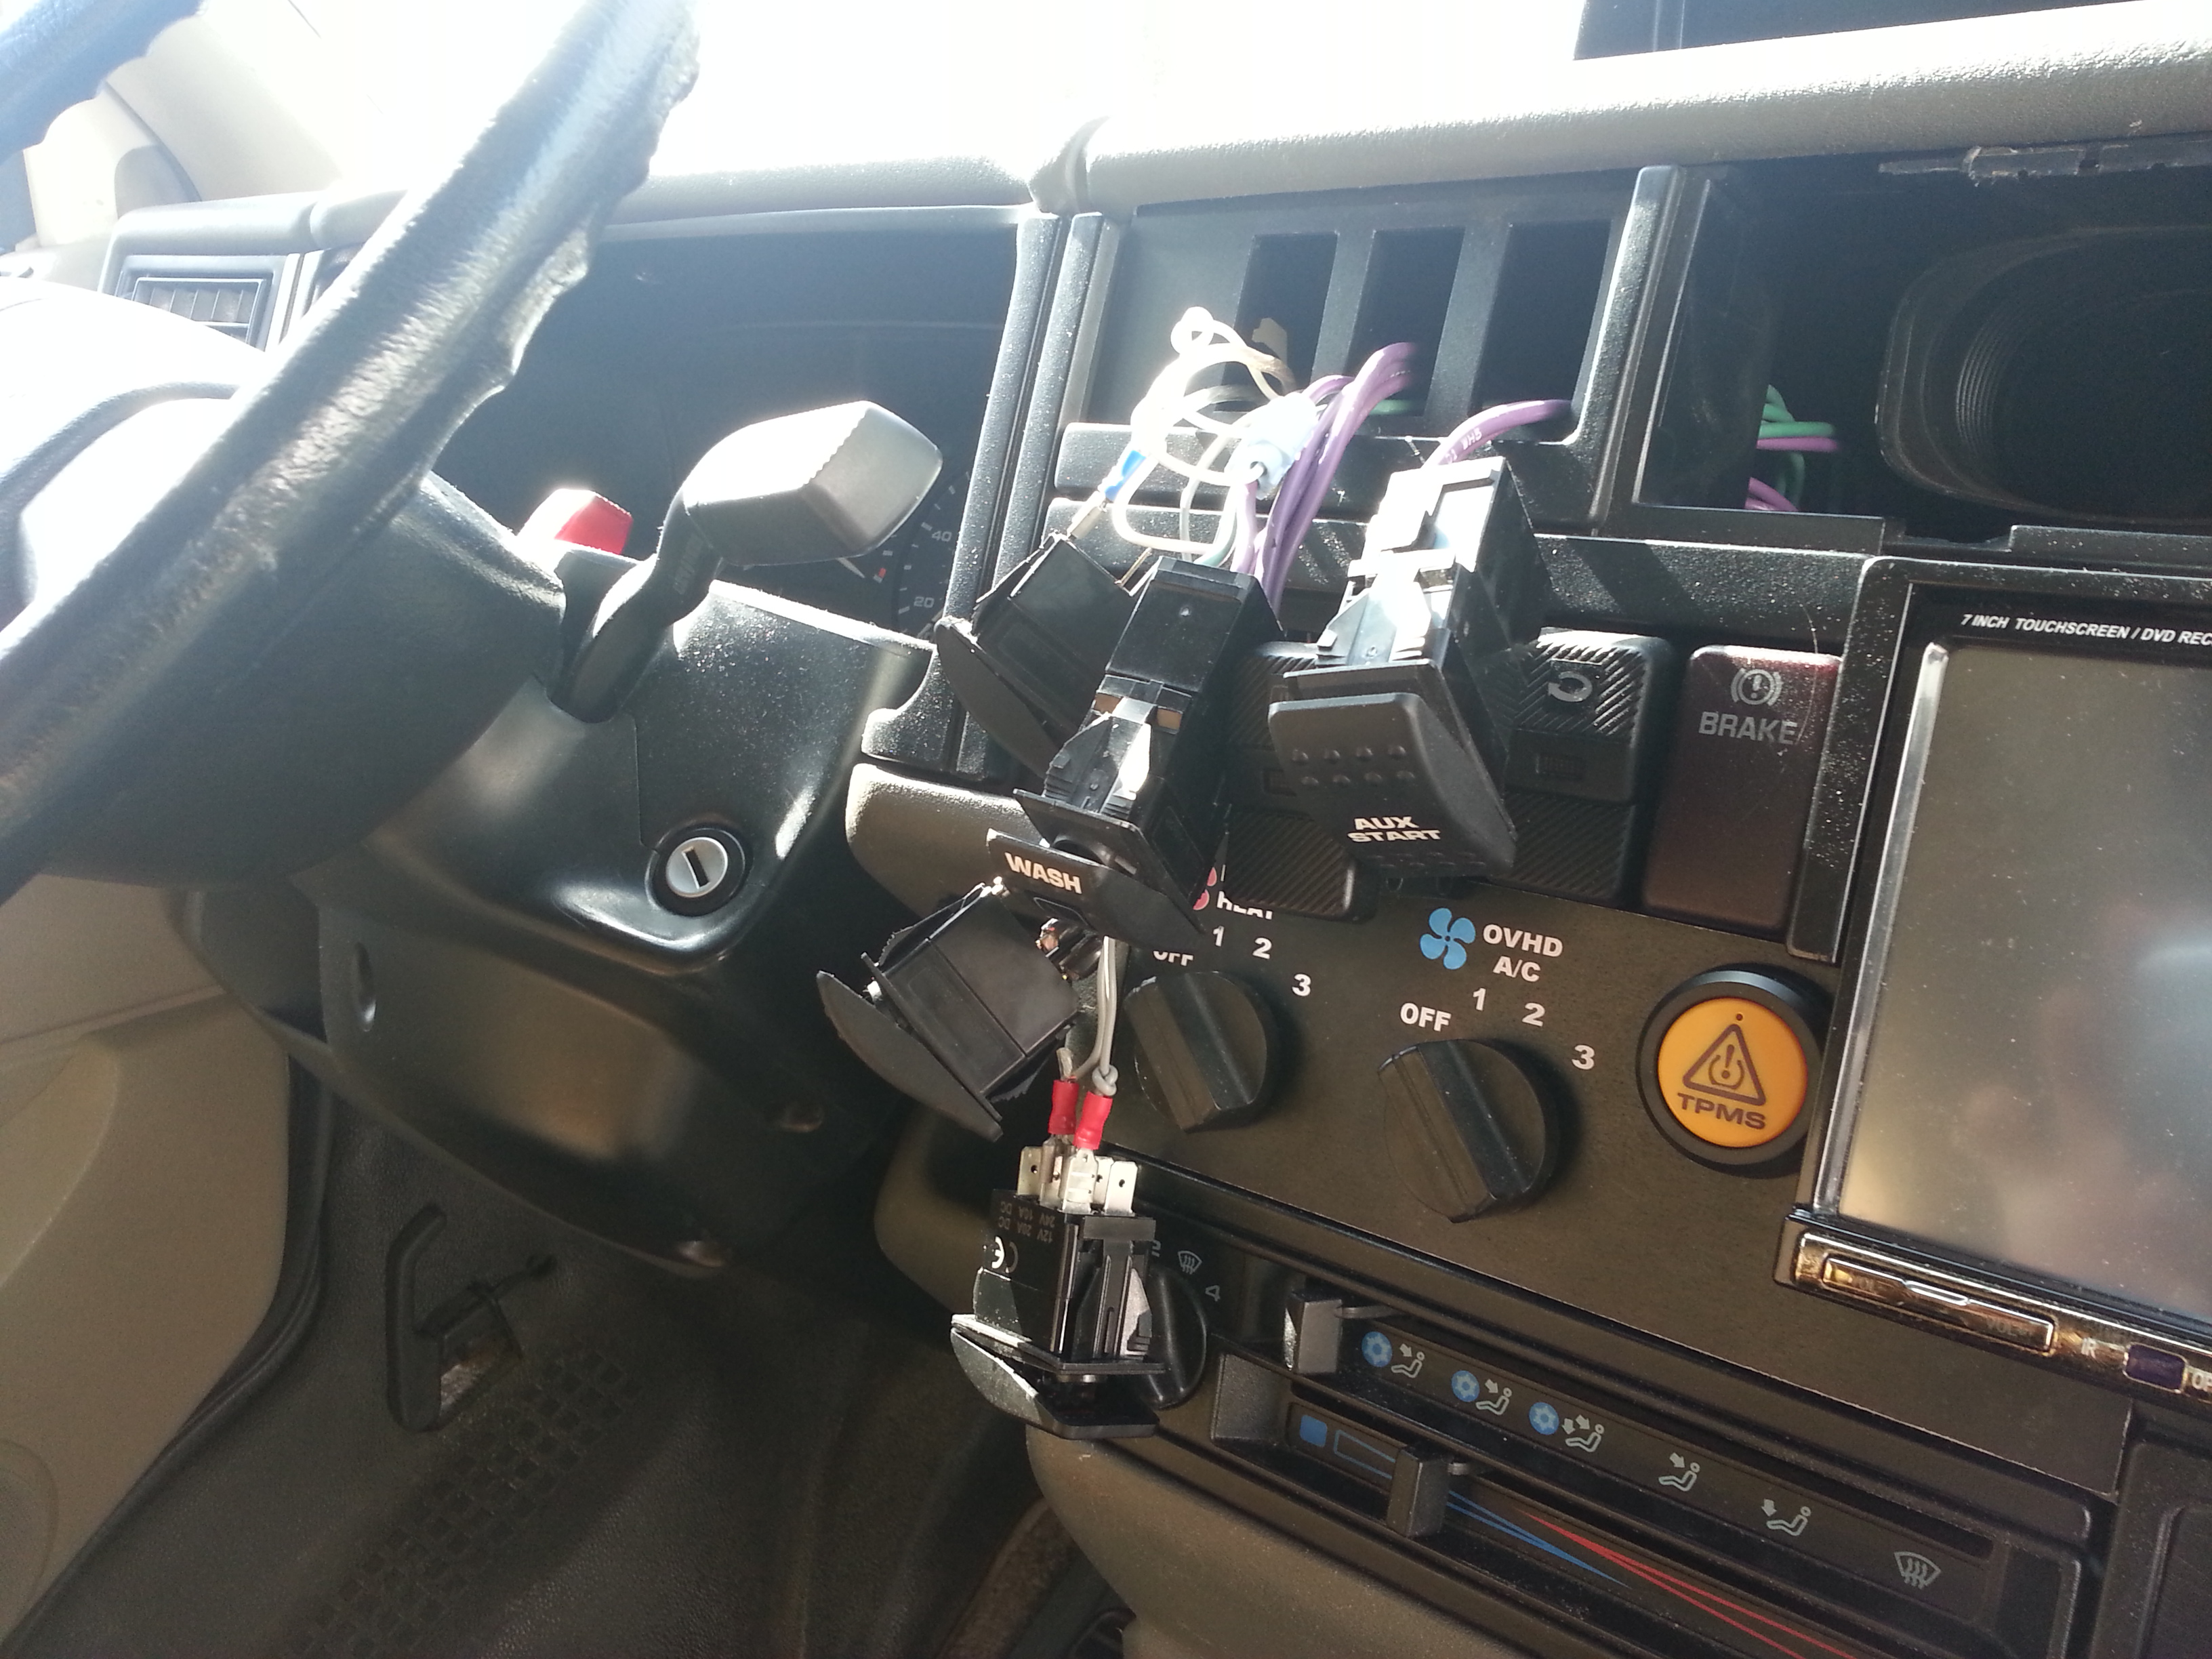
I was going to use the rear defroster wire to power the new cameras on trailer or cargo box but I might just pull some new wire (you can never have enough it seams. I now have all the parts to finish the cameras so I will concentrate on getting that done in the next few days.
Stay tuned lots more to come.....
Robert